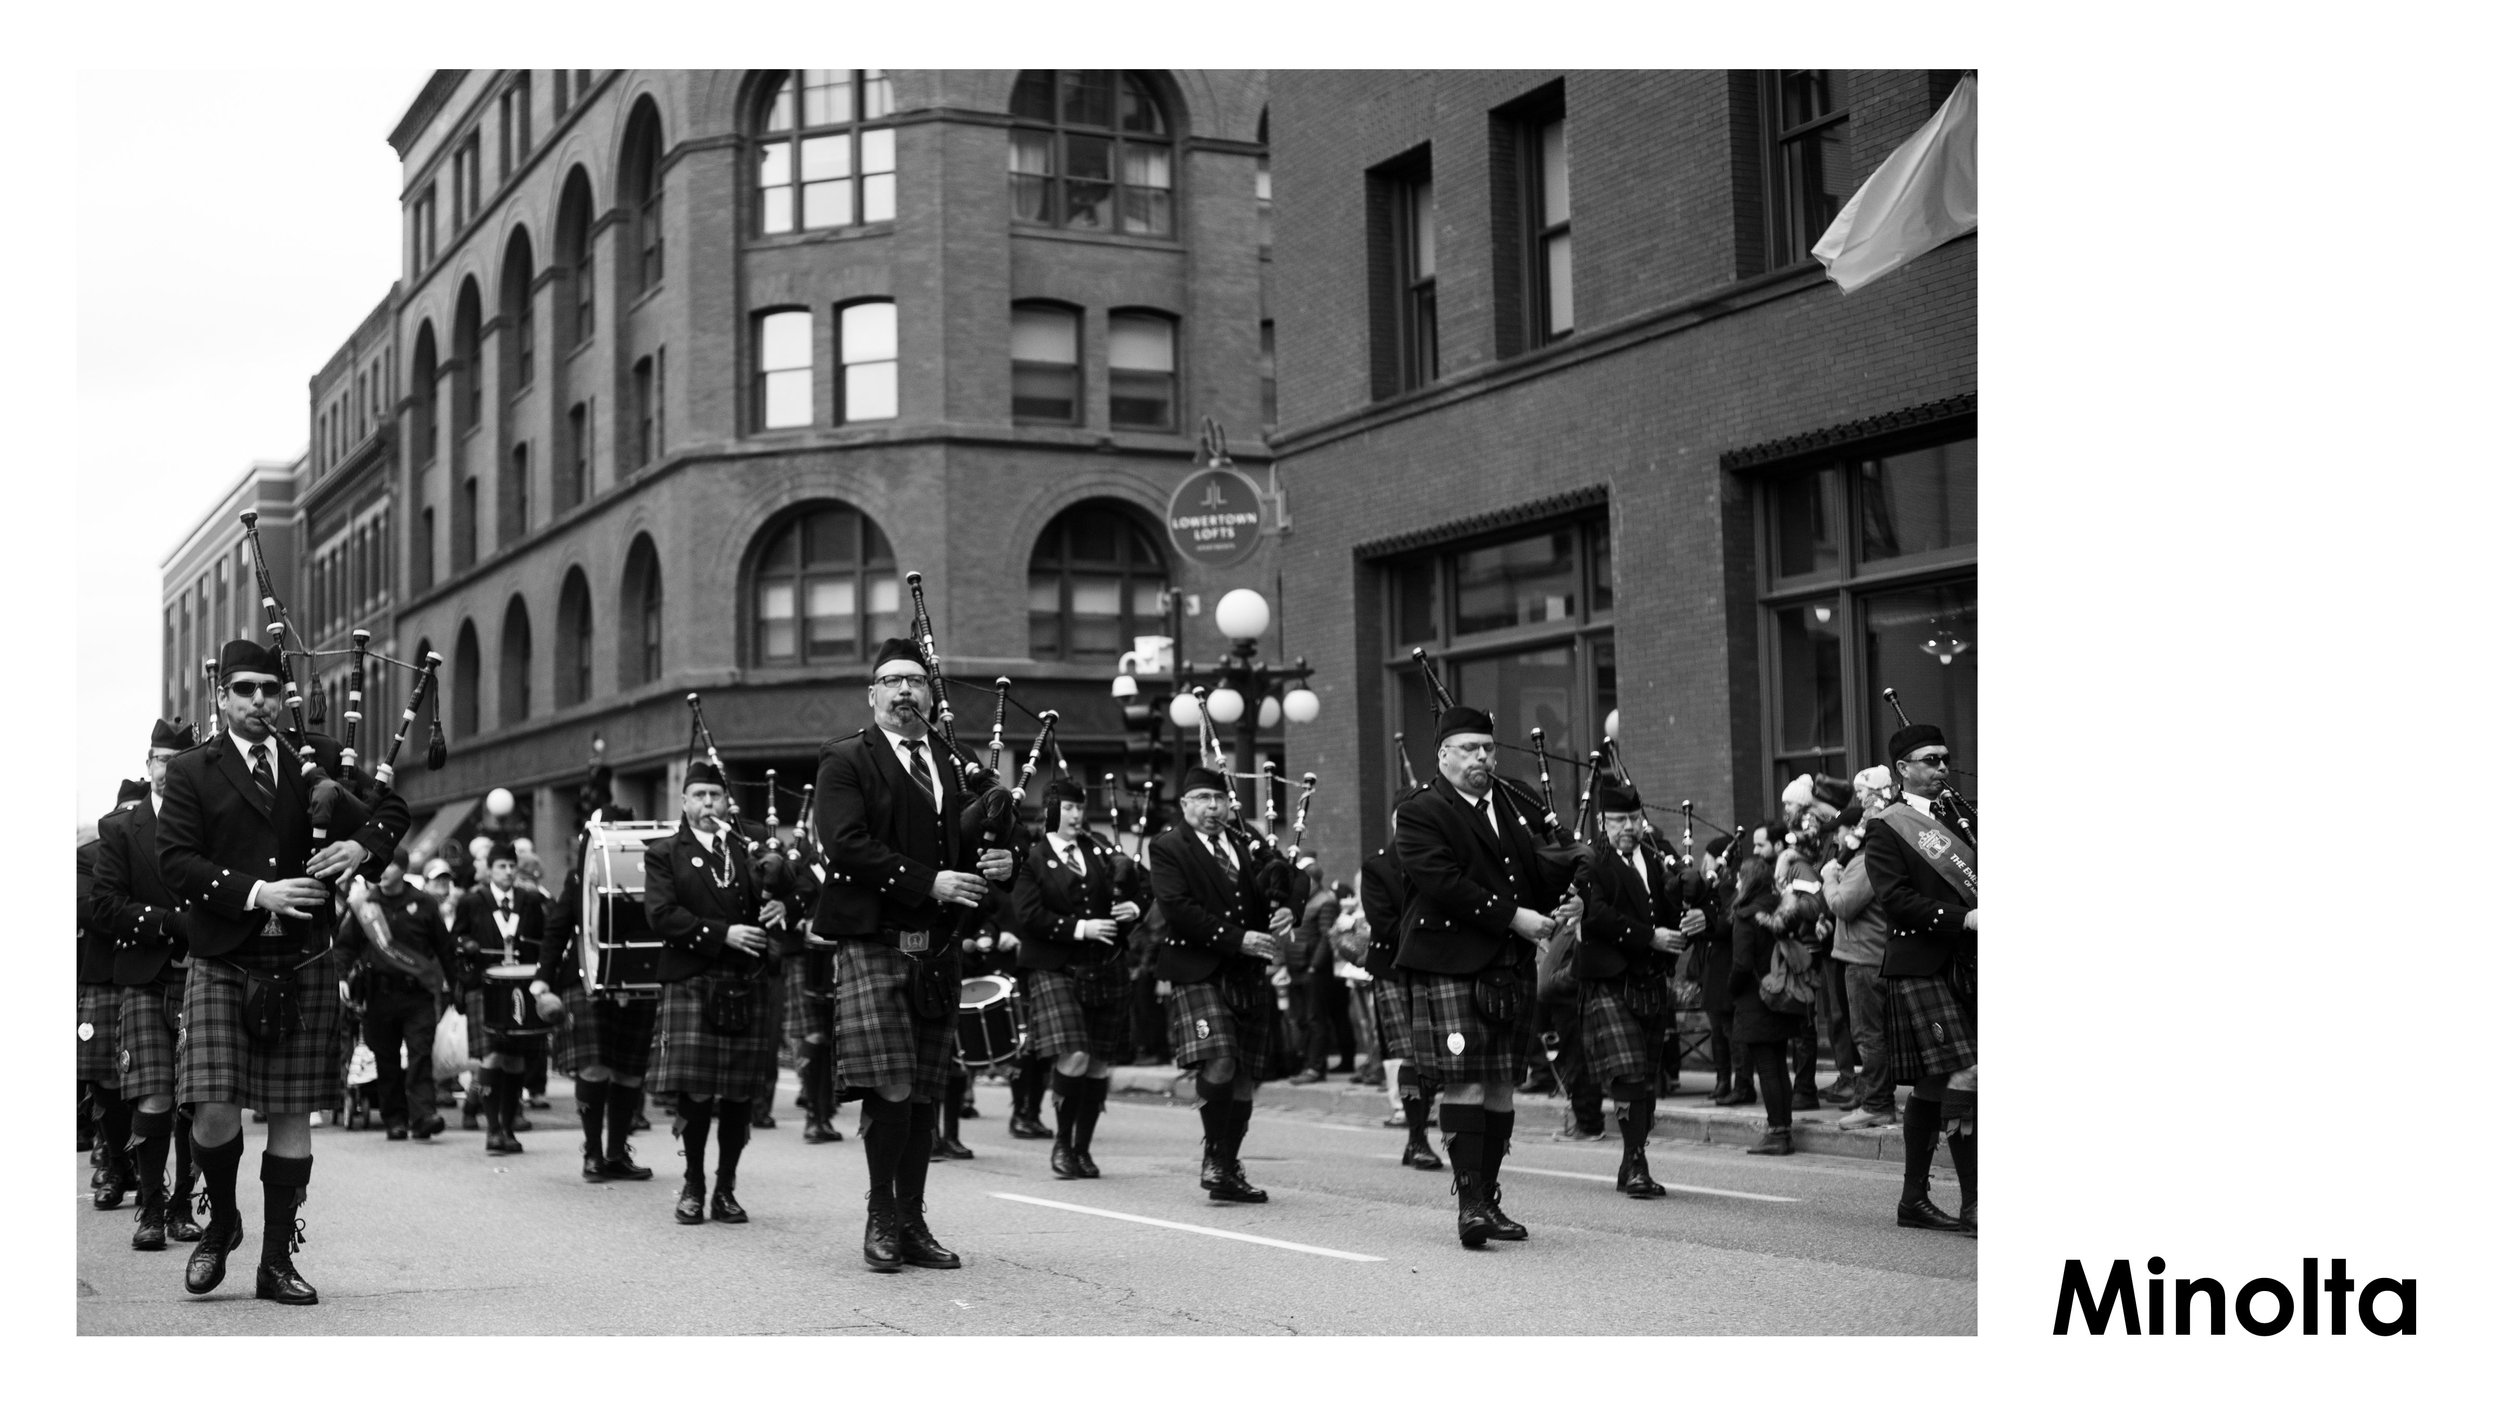
Sony FE 85MM f1.8 vs Cheap Vintage Manual Focus Lenses
If you have a mirrorless camera and want to get started photographing right away but don’t have the cash for new auto focus lenses, consider starting out with some cheap, vintage, manual focus lenses. In my video I used the Sony A7iii paired with Sony’s FE 85mm which has auto focus and I tested three old lenses that you might want to consider:
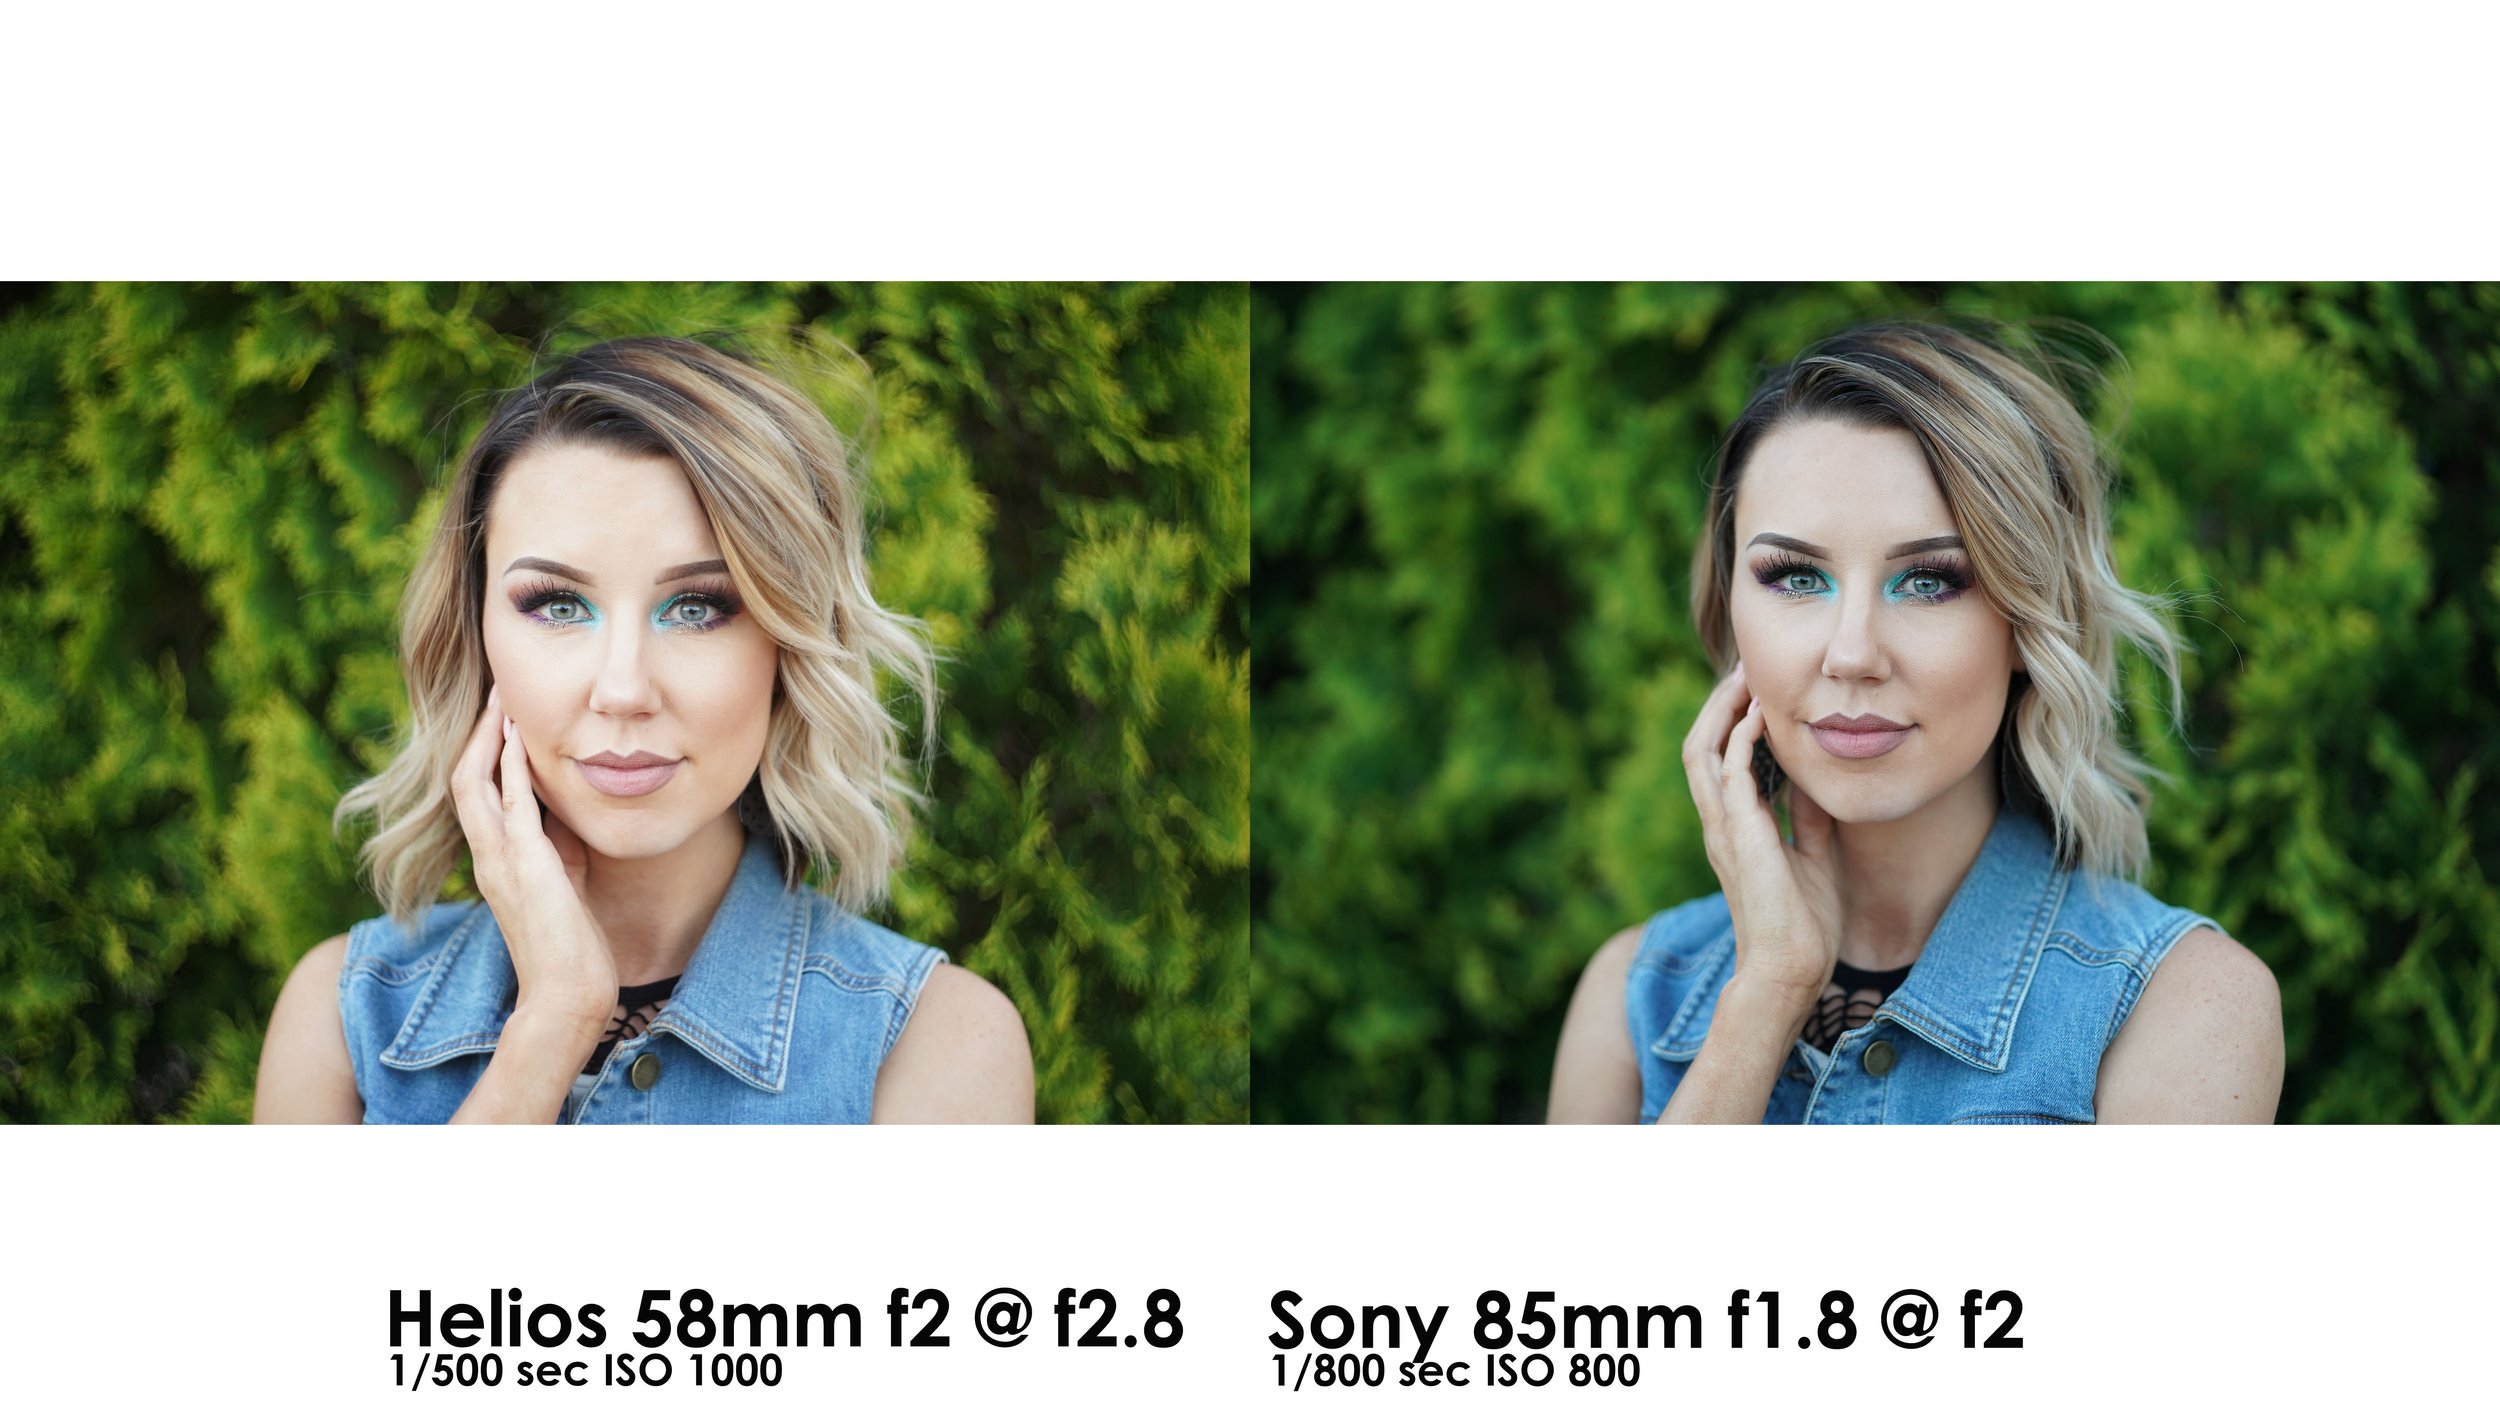
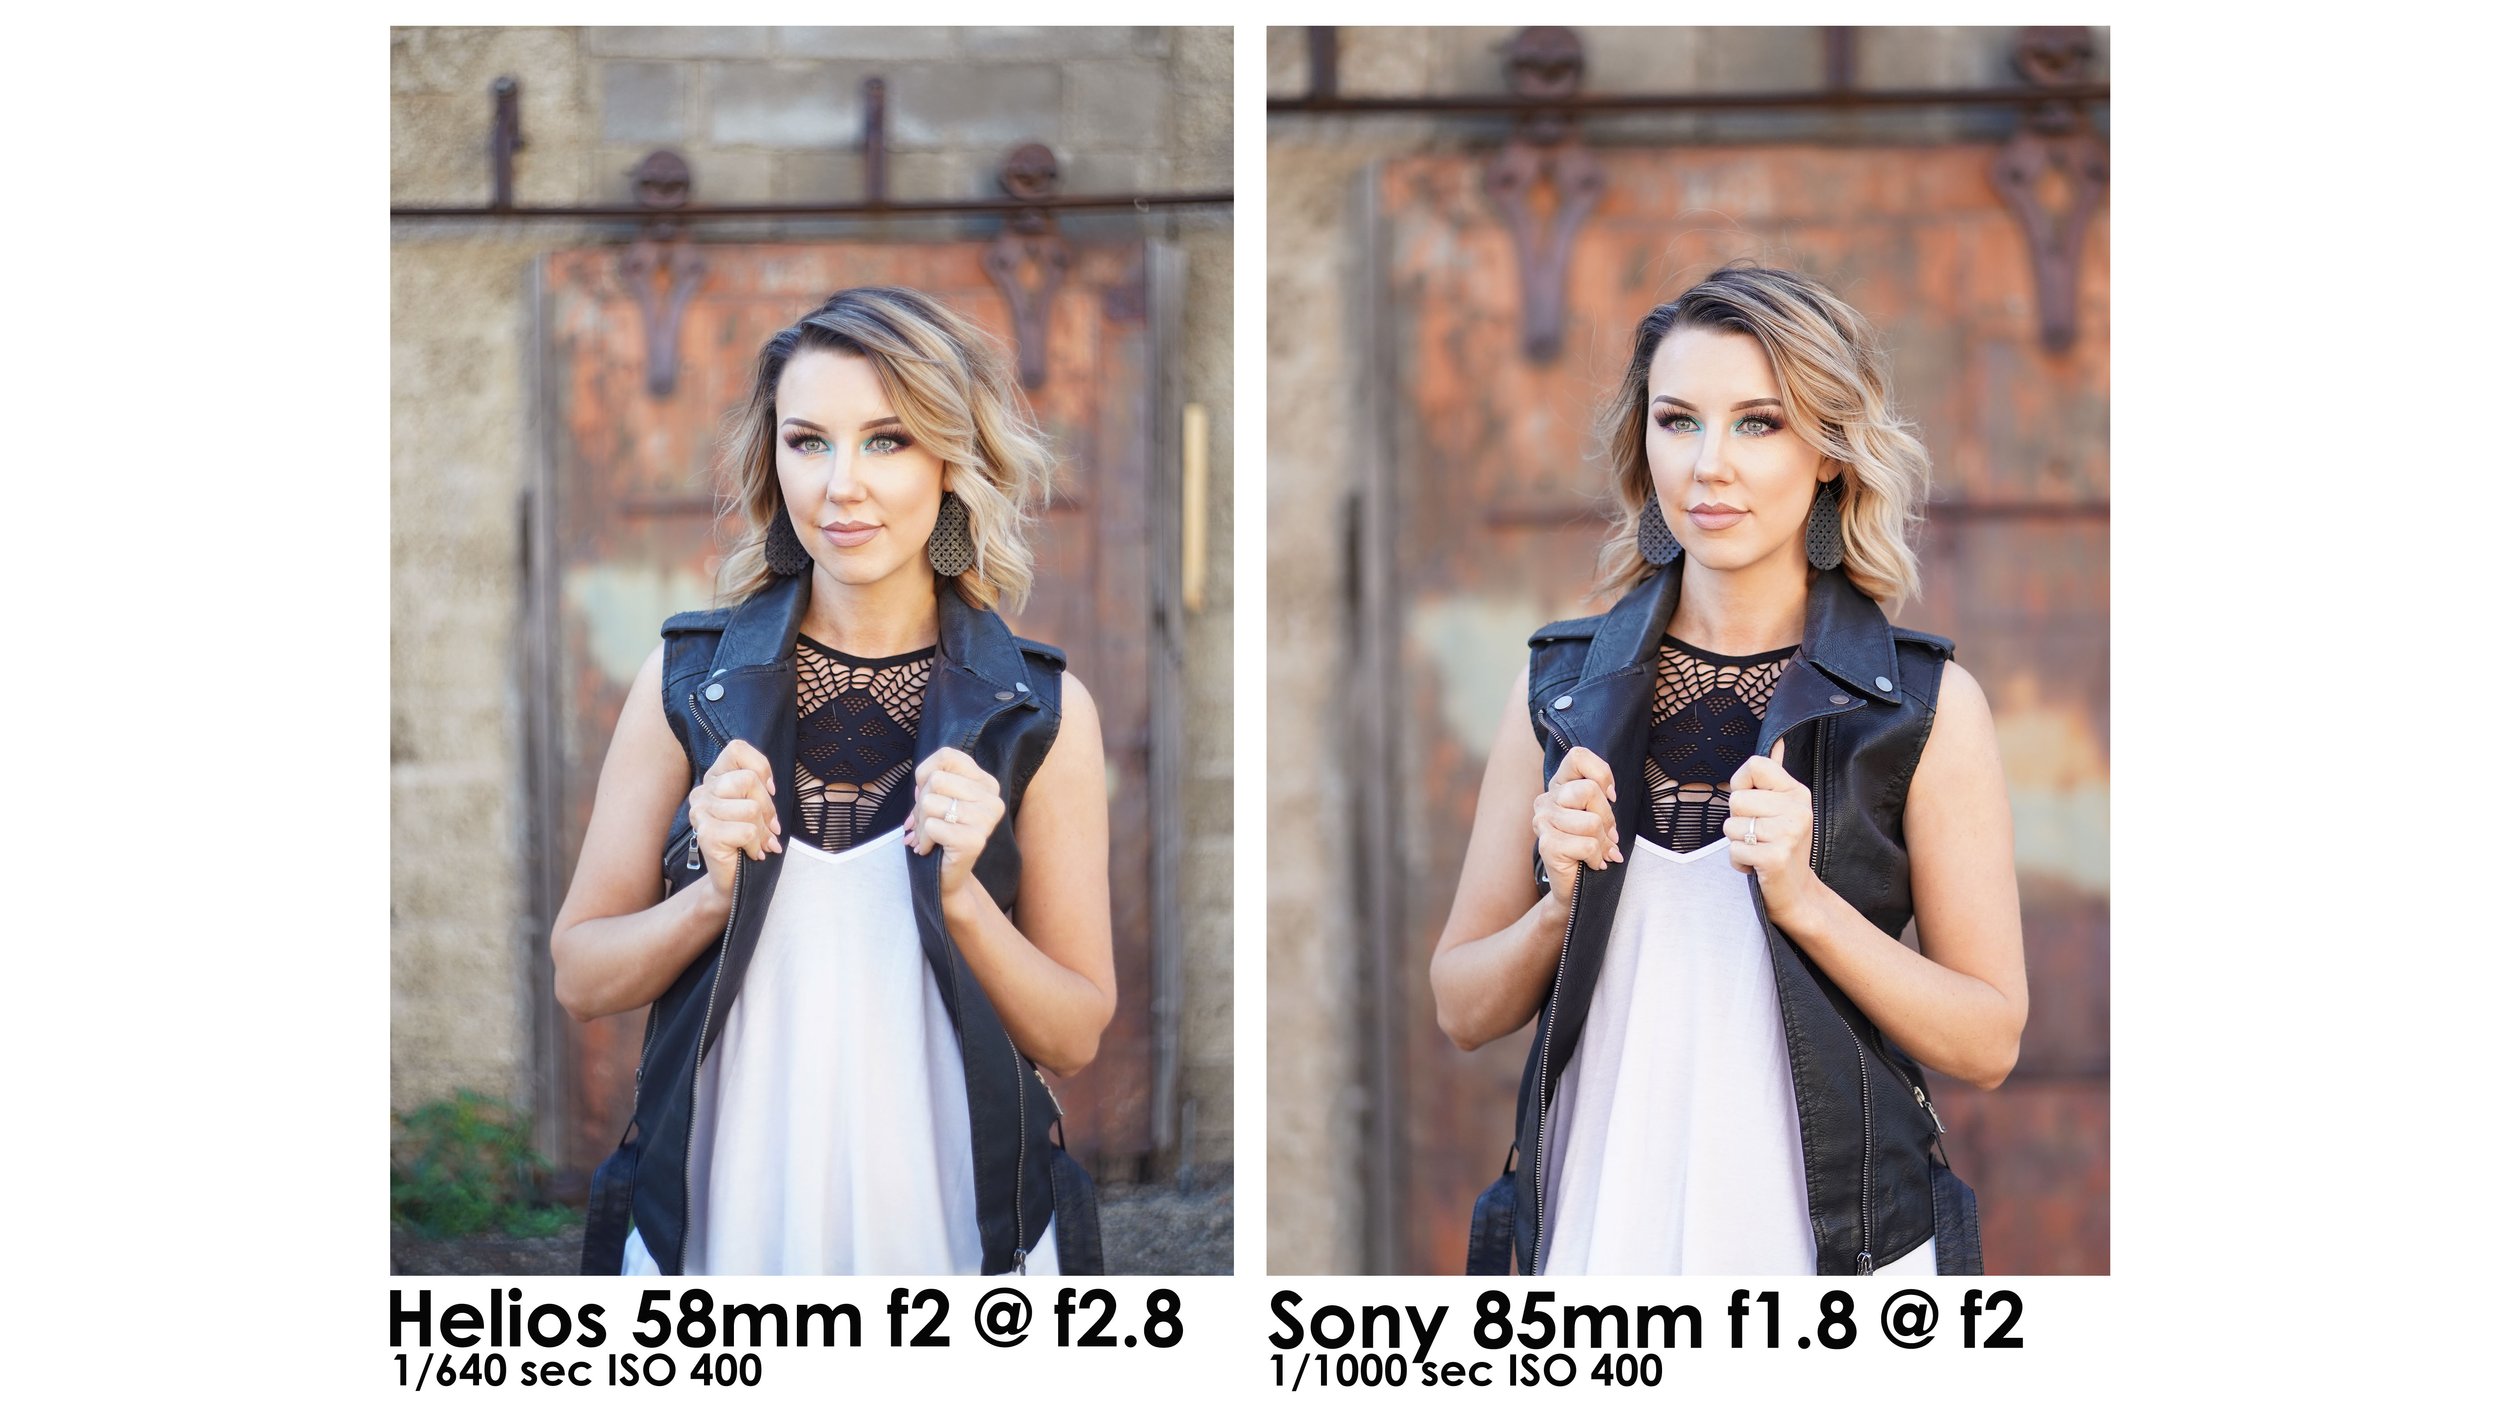
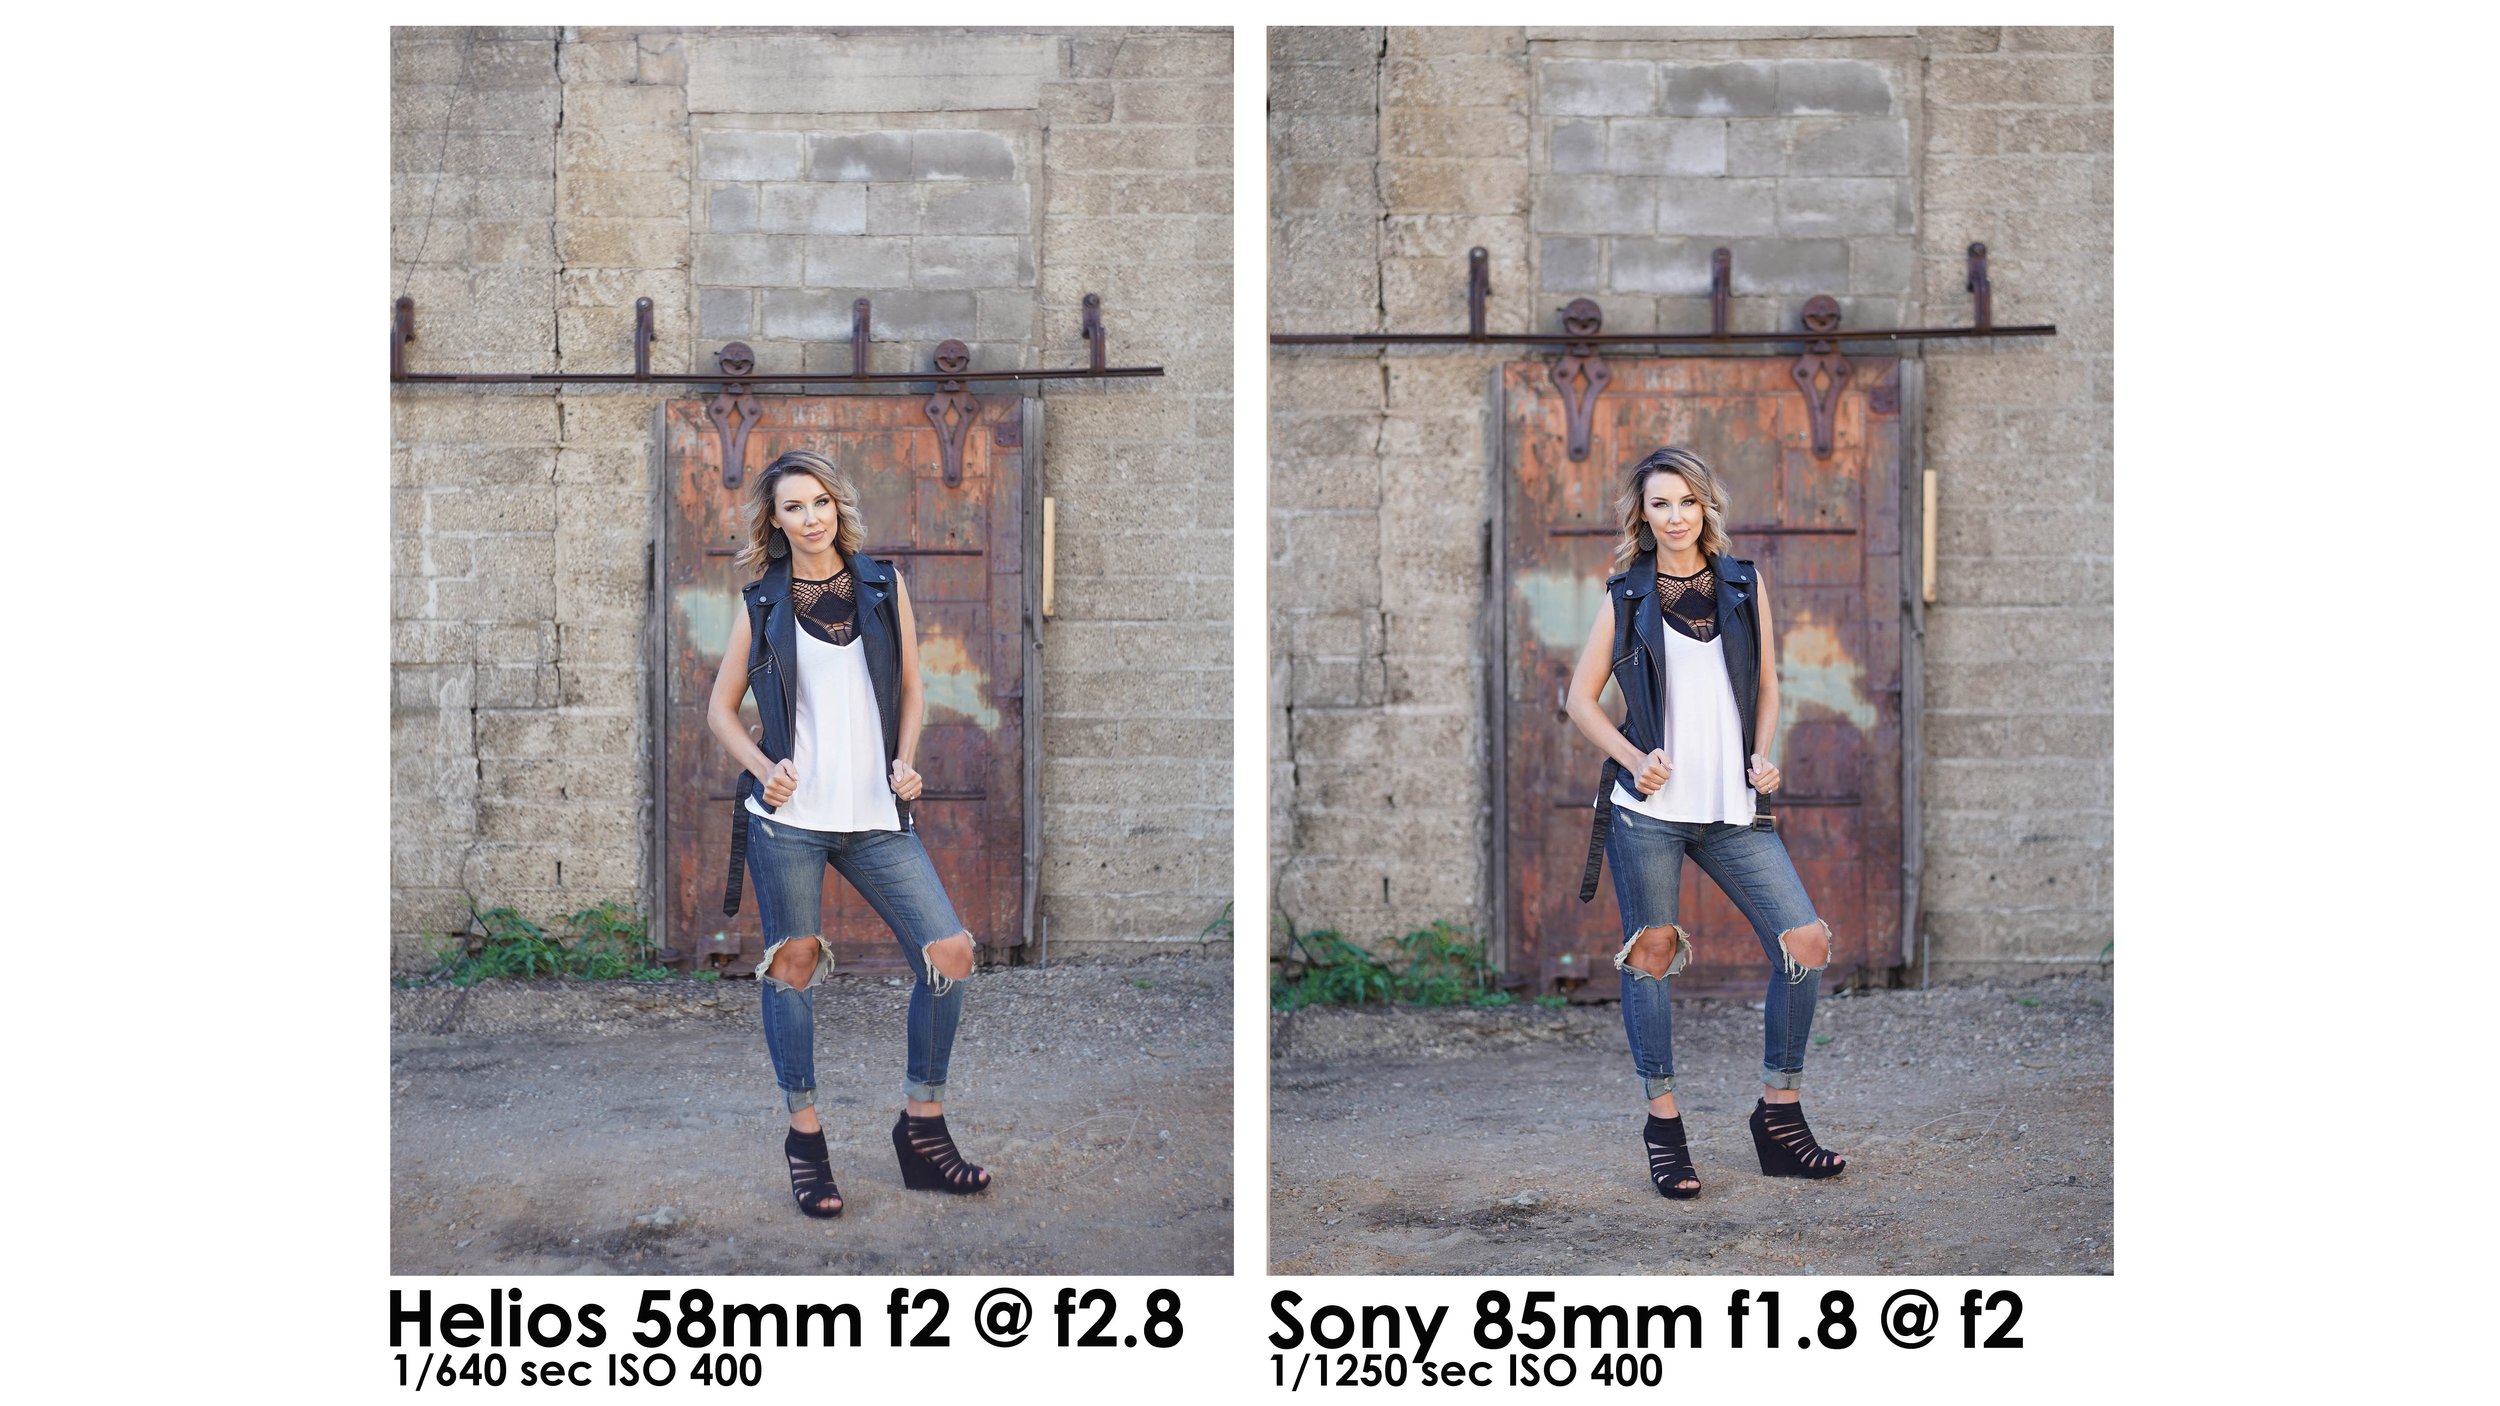
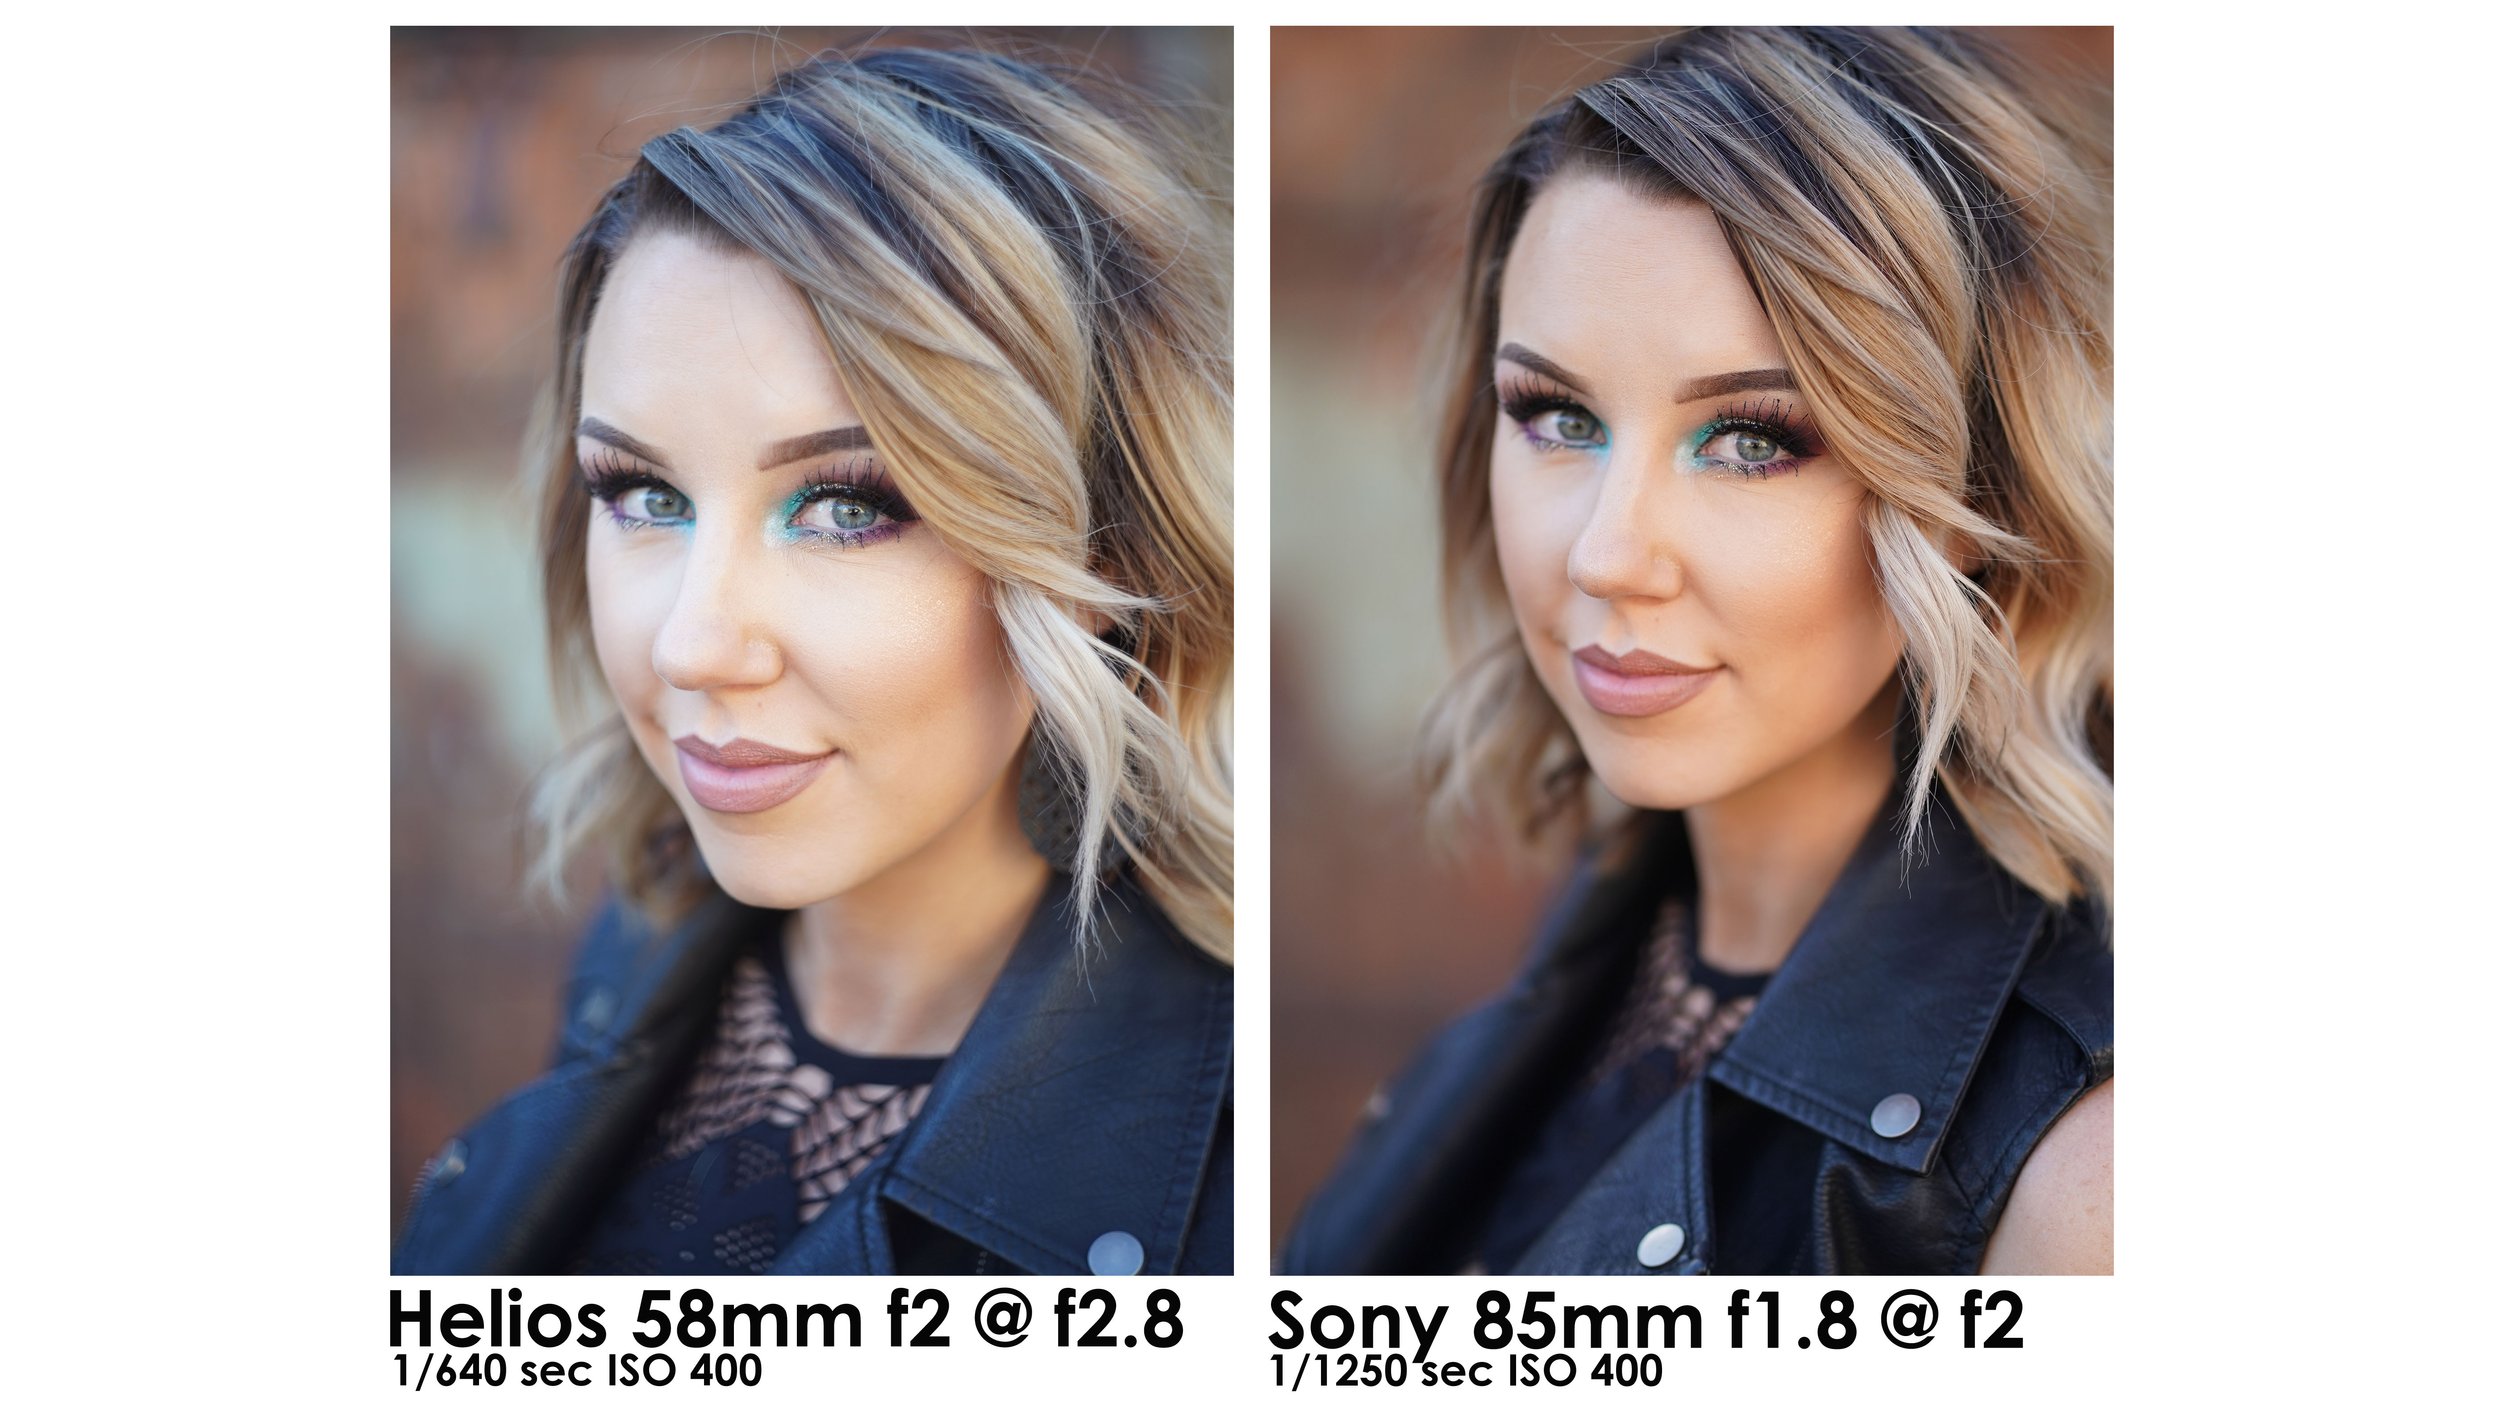
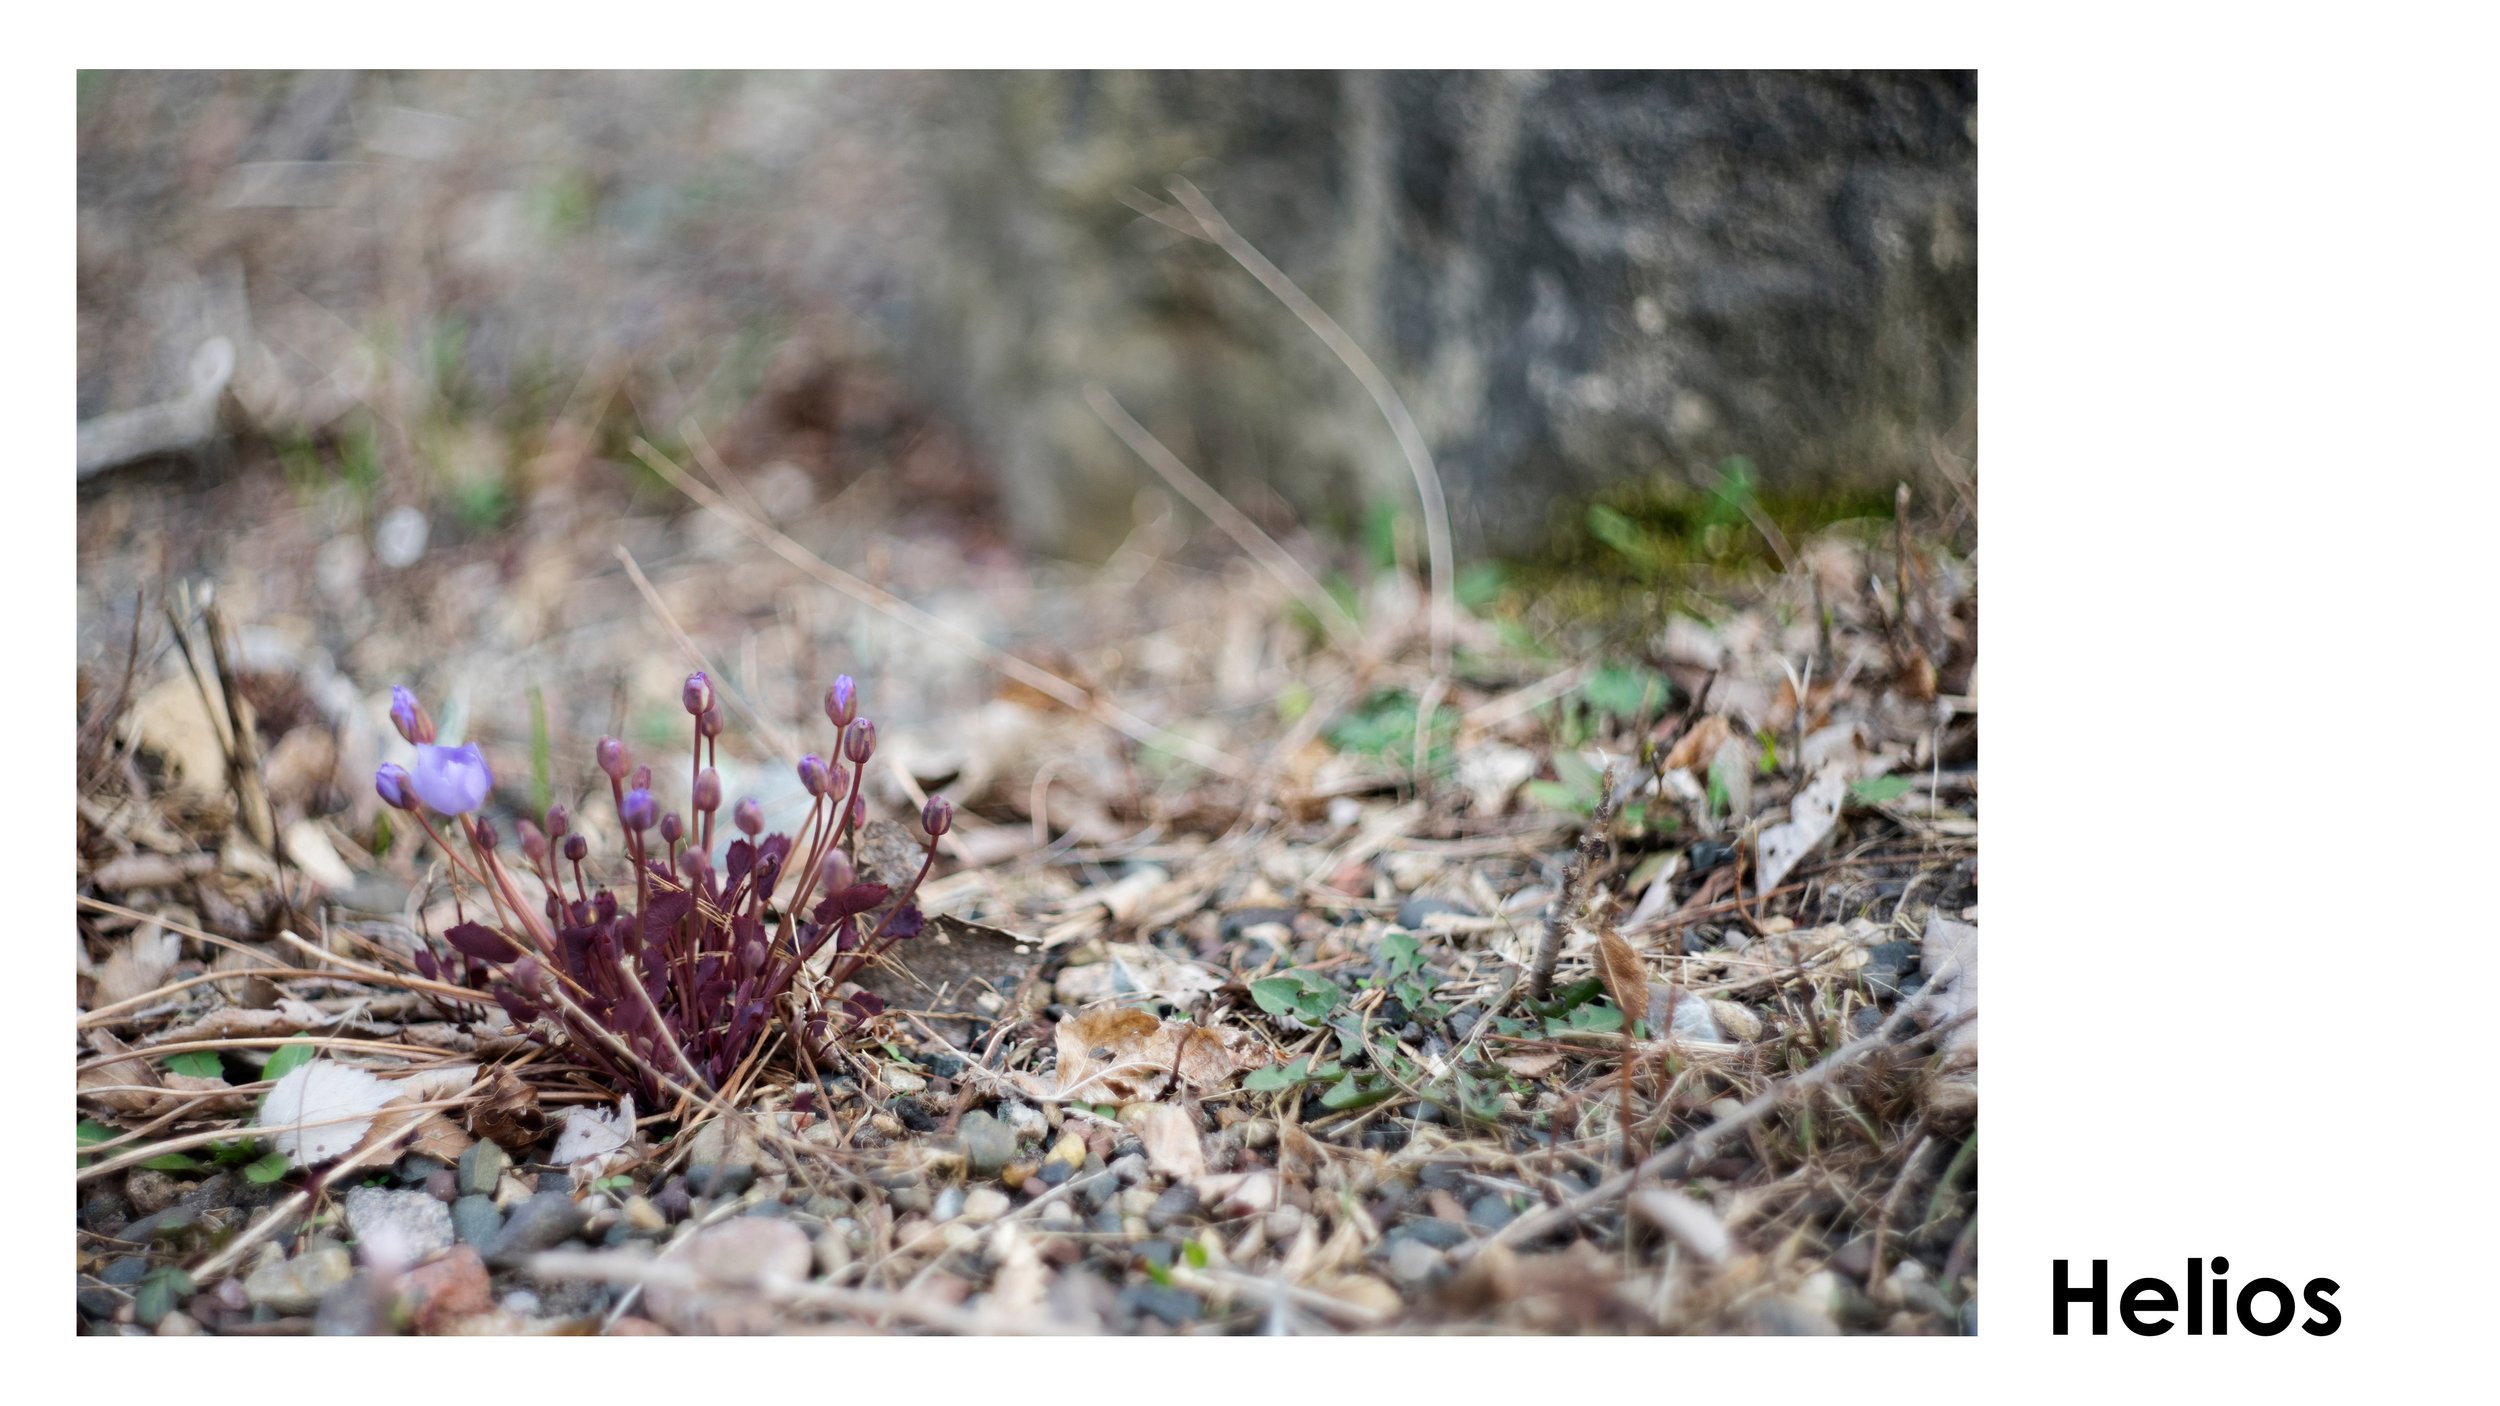
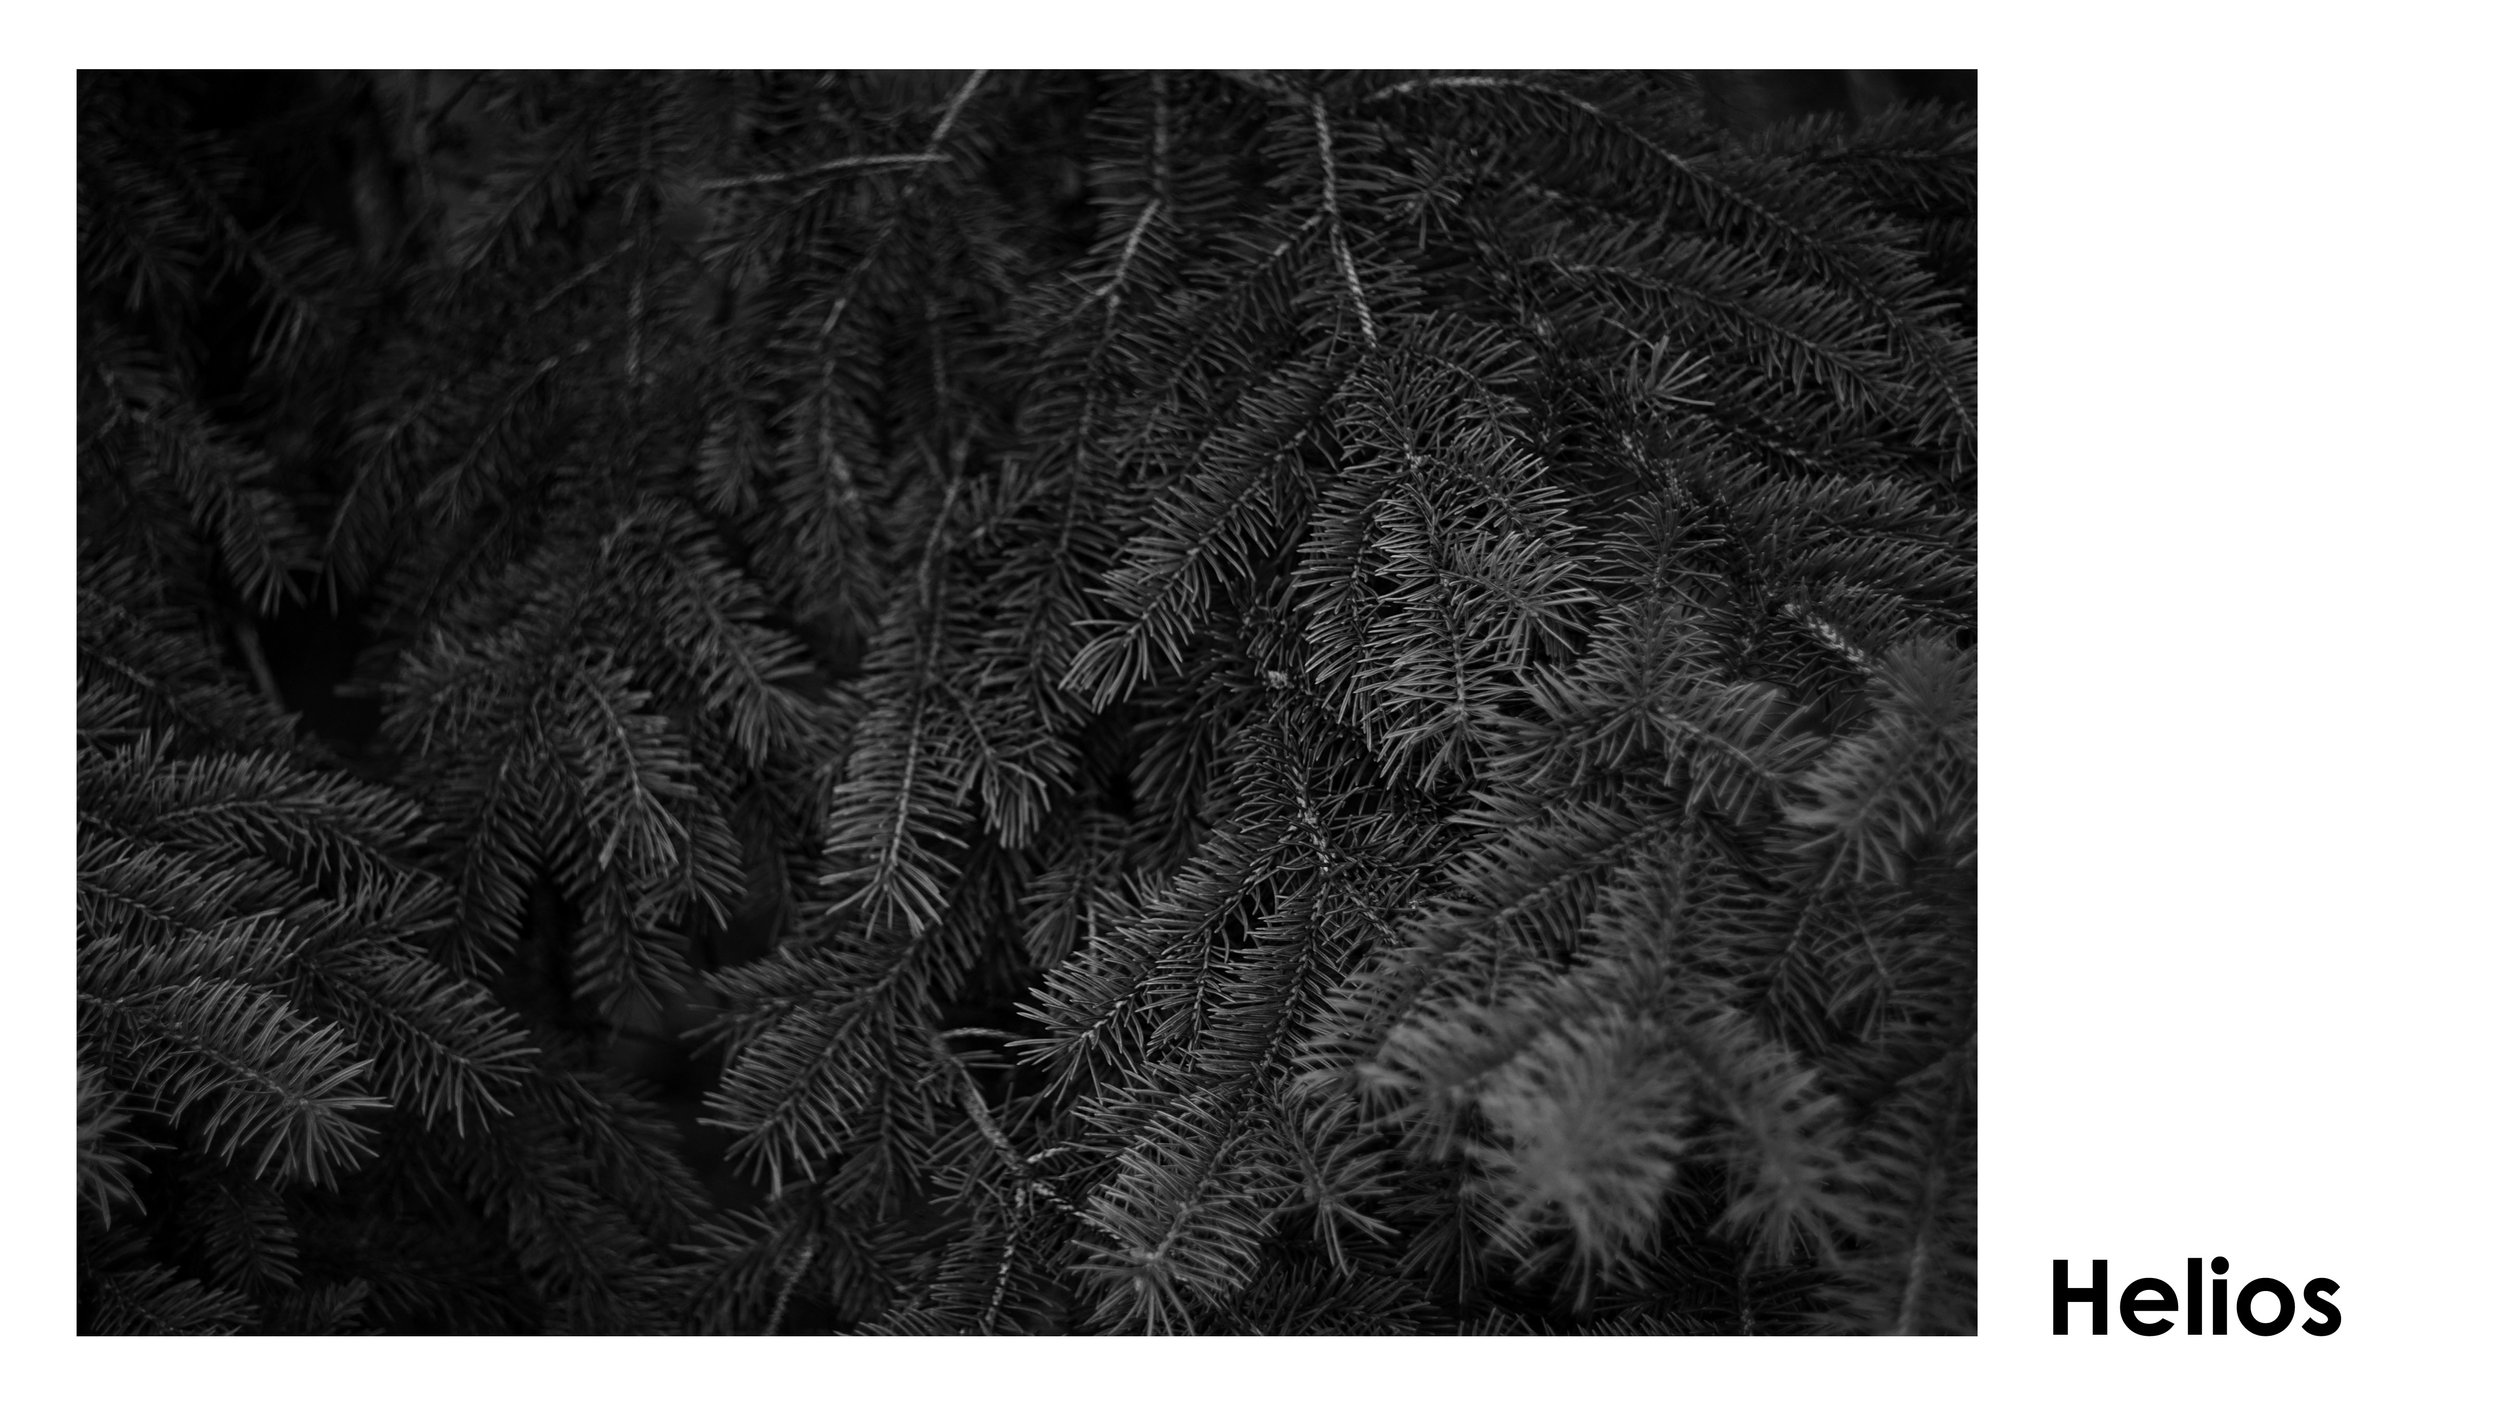
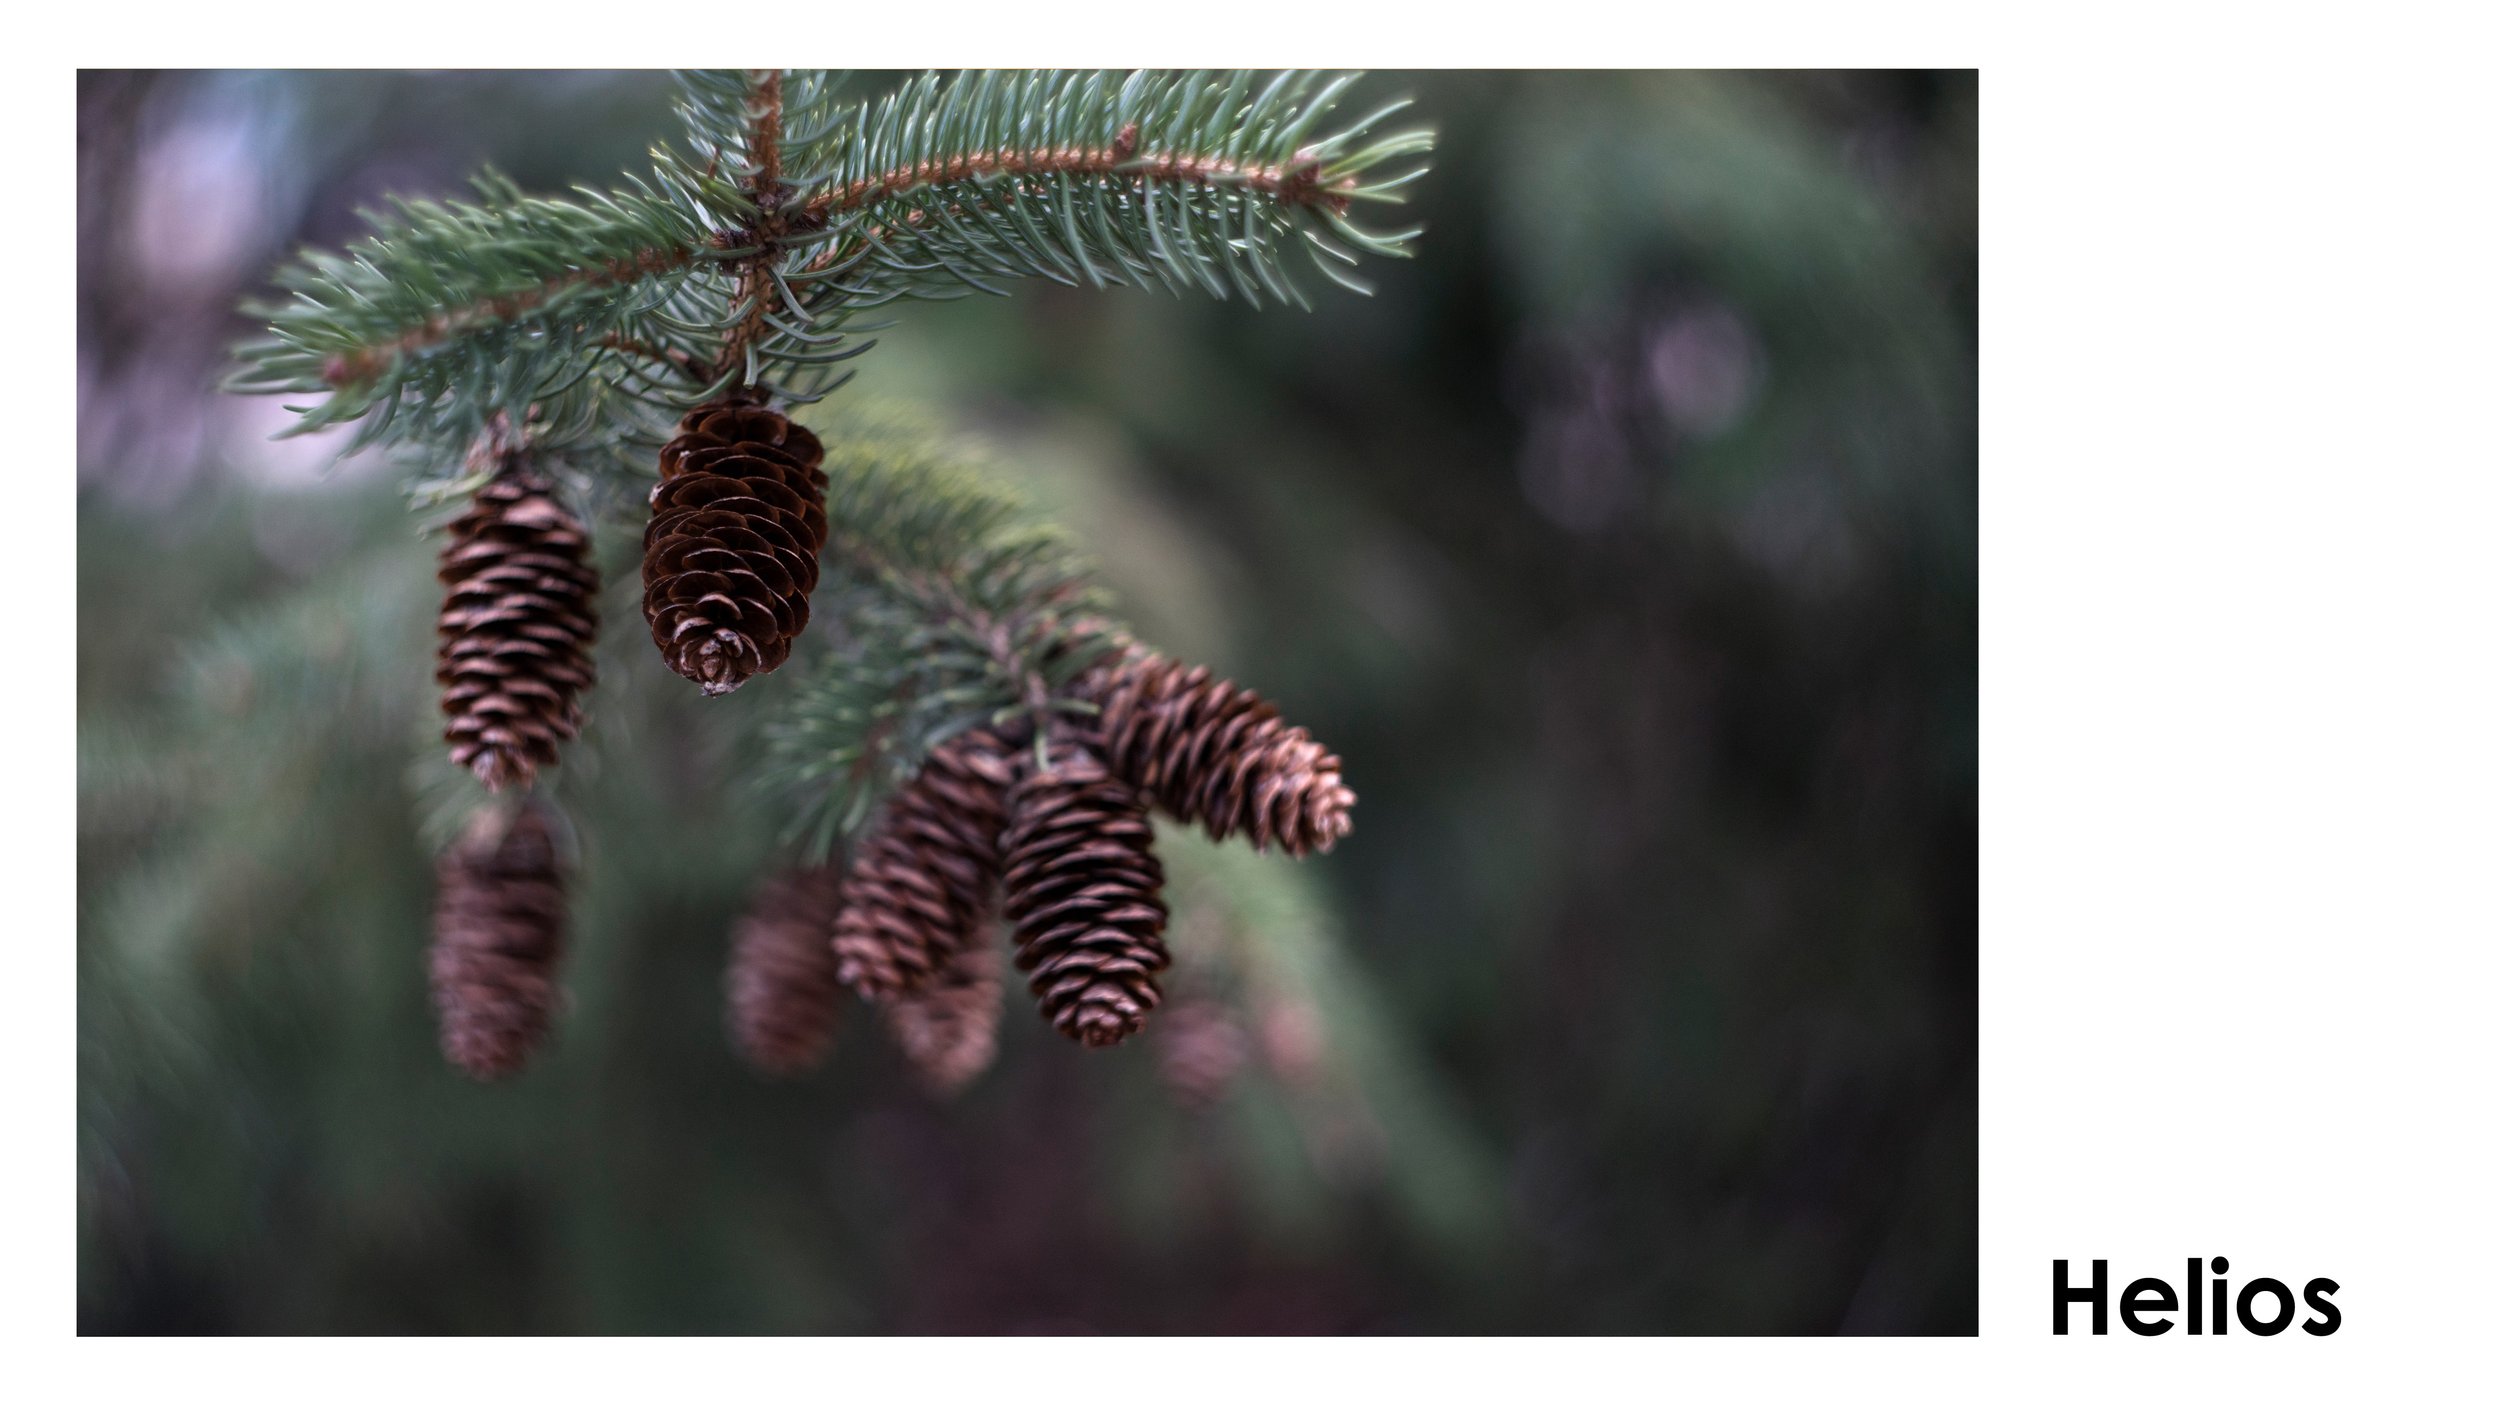
Helios 44M 58mm f2 - around $50. This has been said to be the most produced lens ever and they can be found for CHEAP! This lens is definitely not sharp at f2 but it has such unique character.
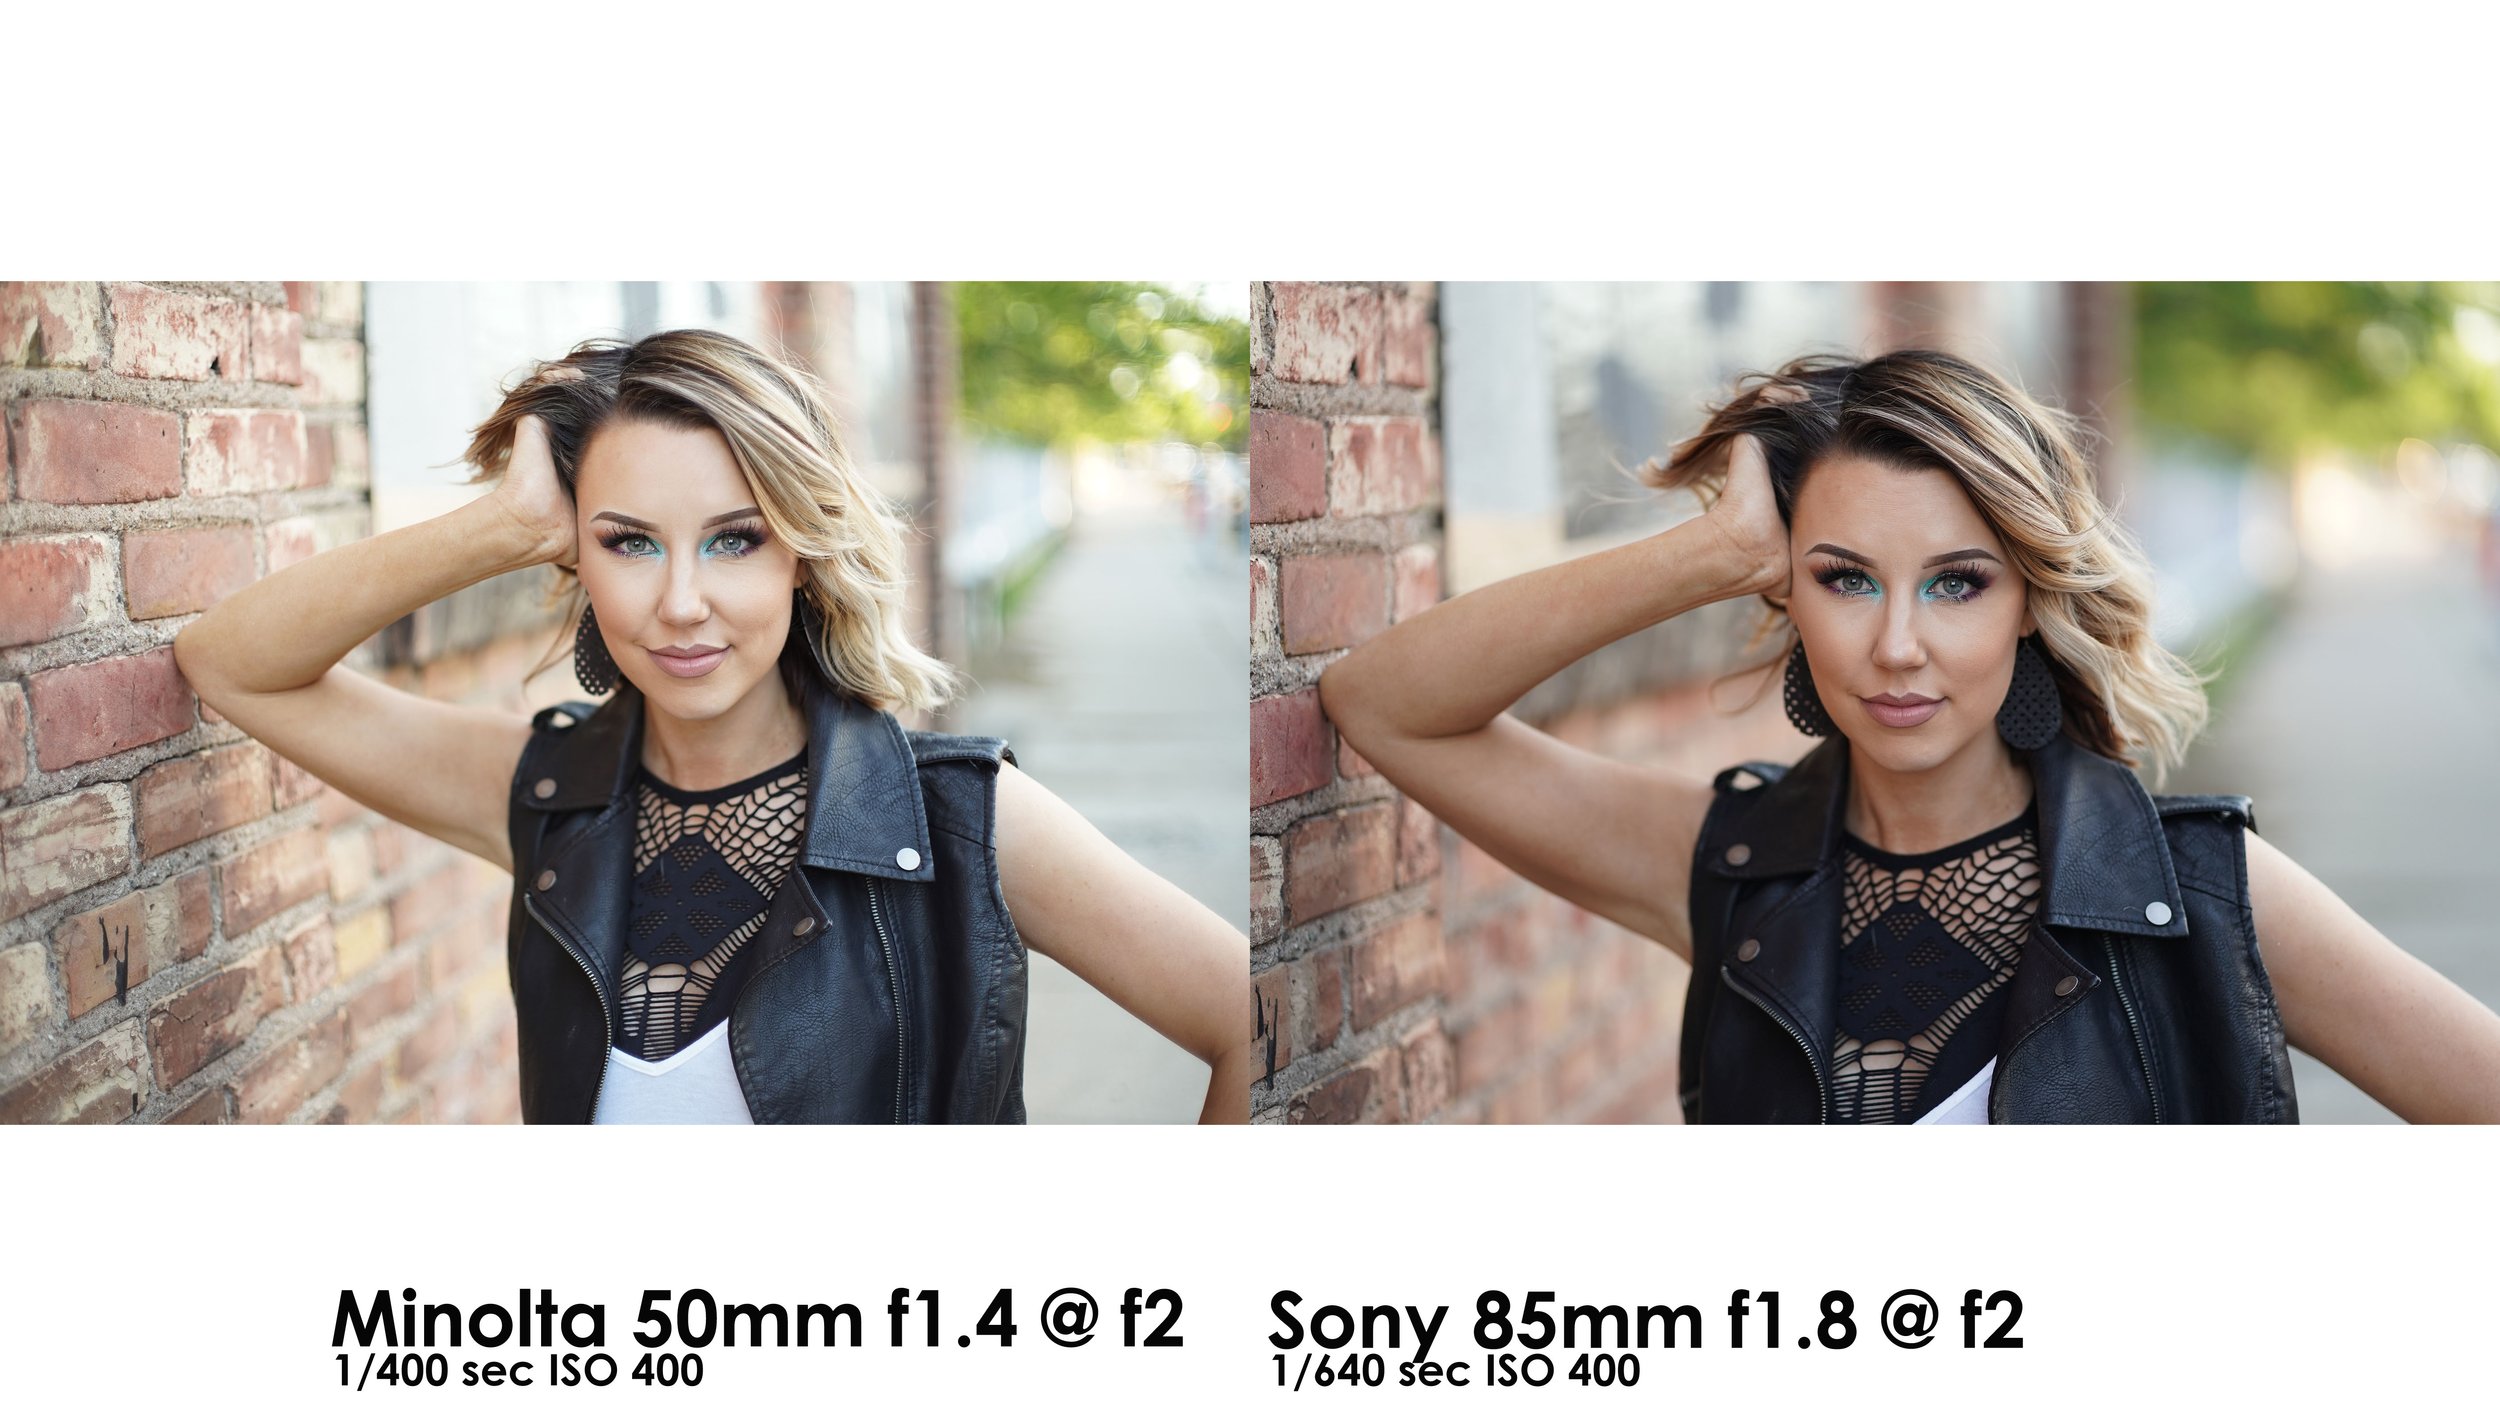
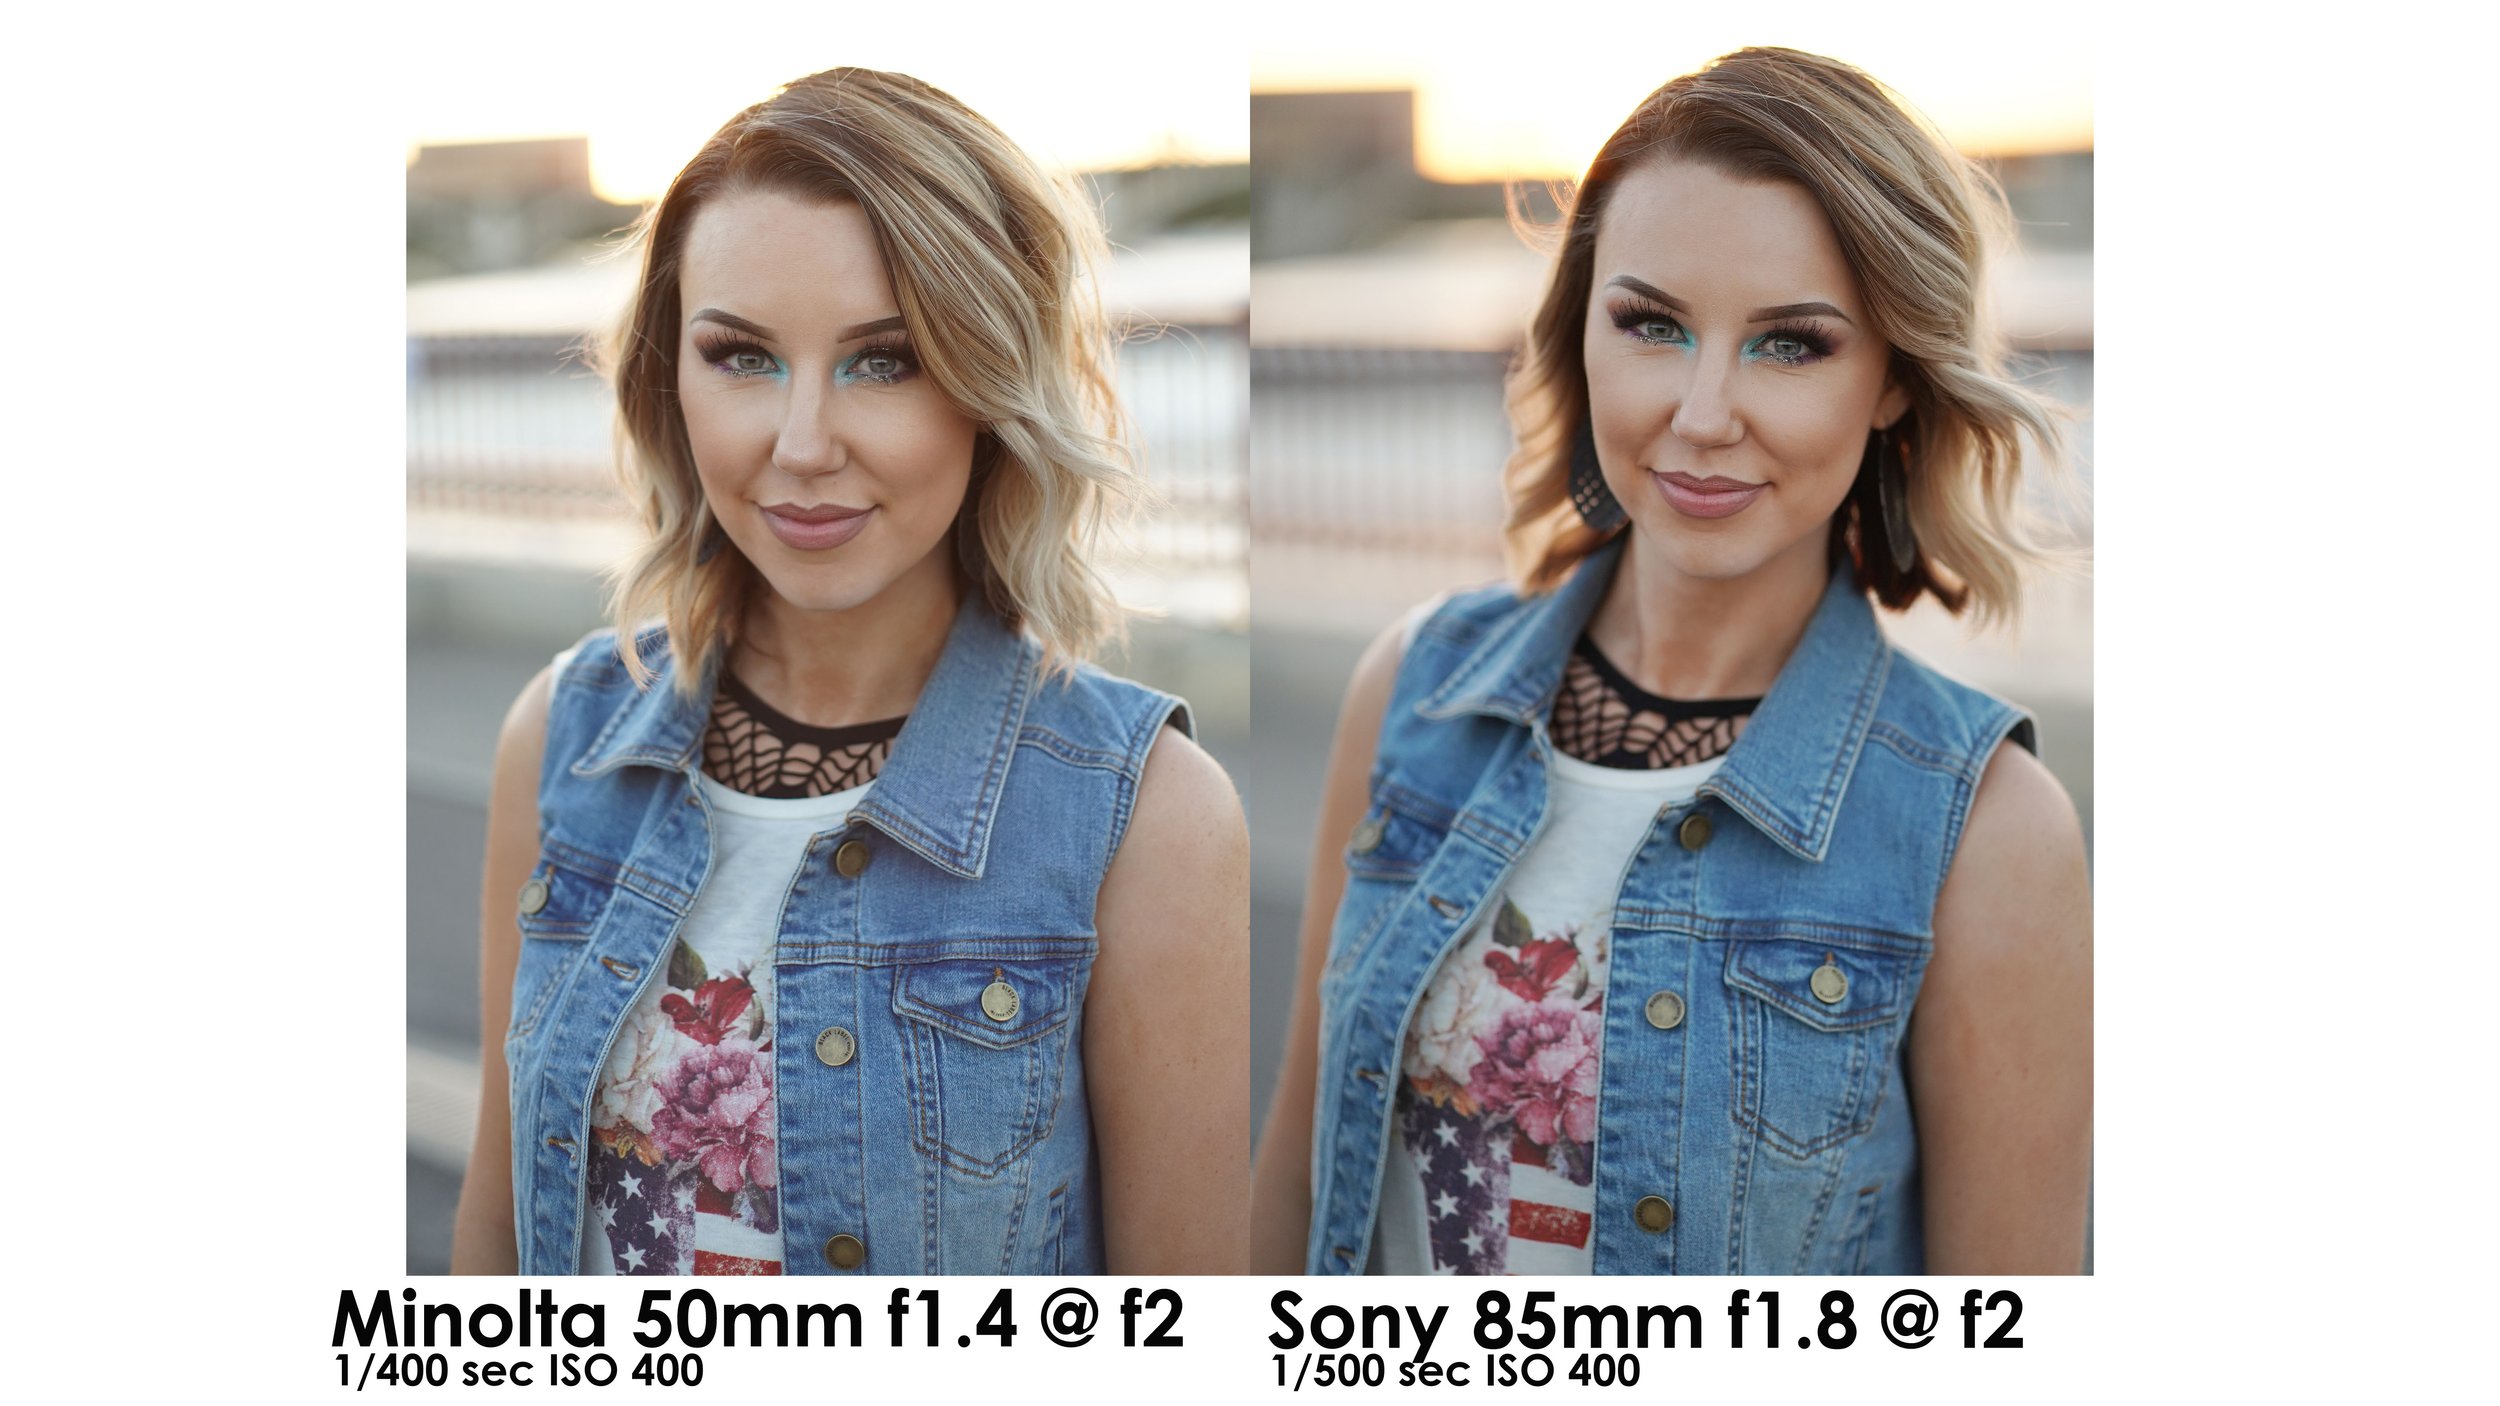
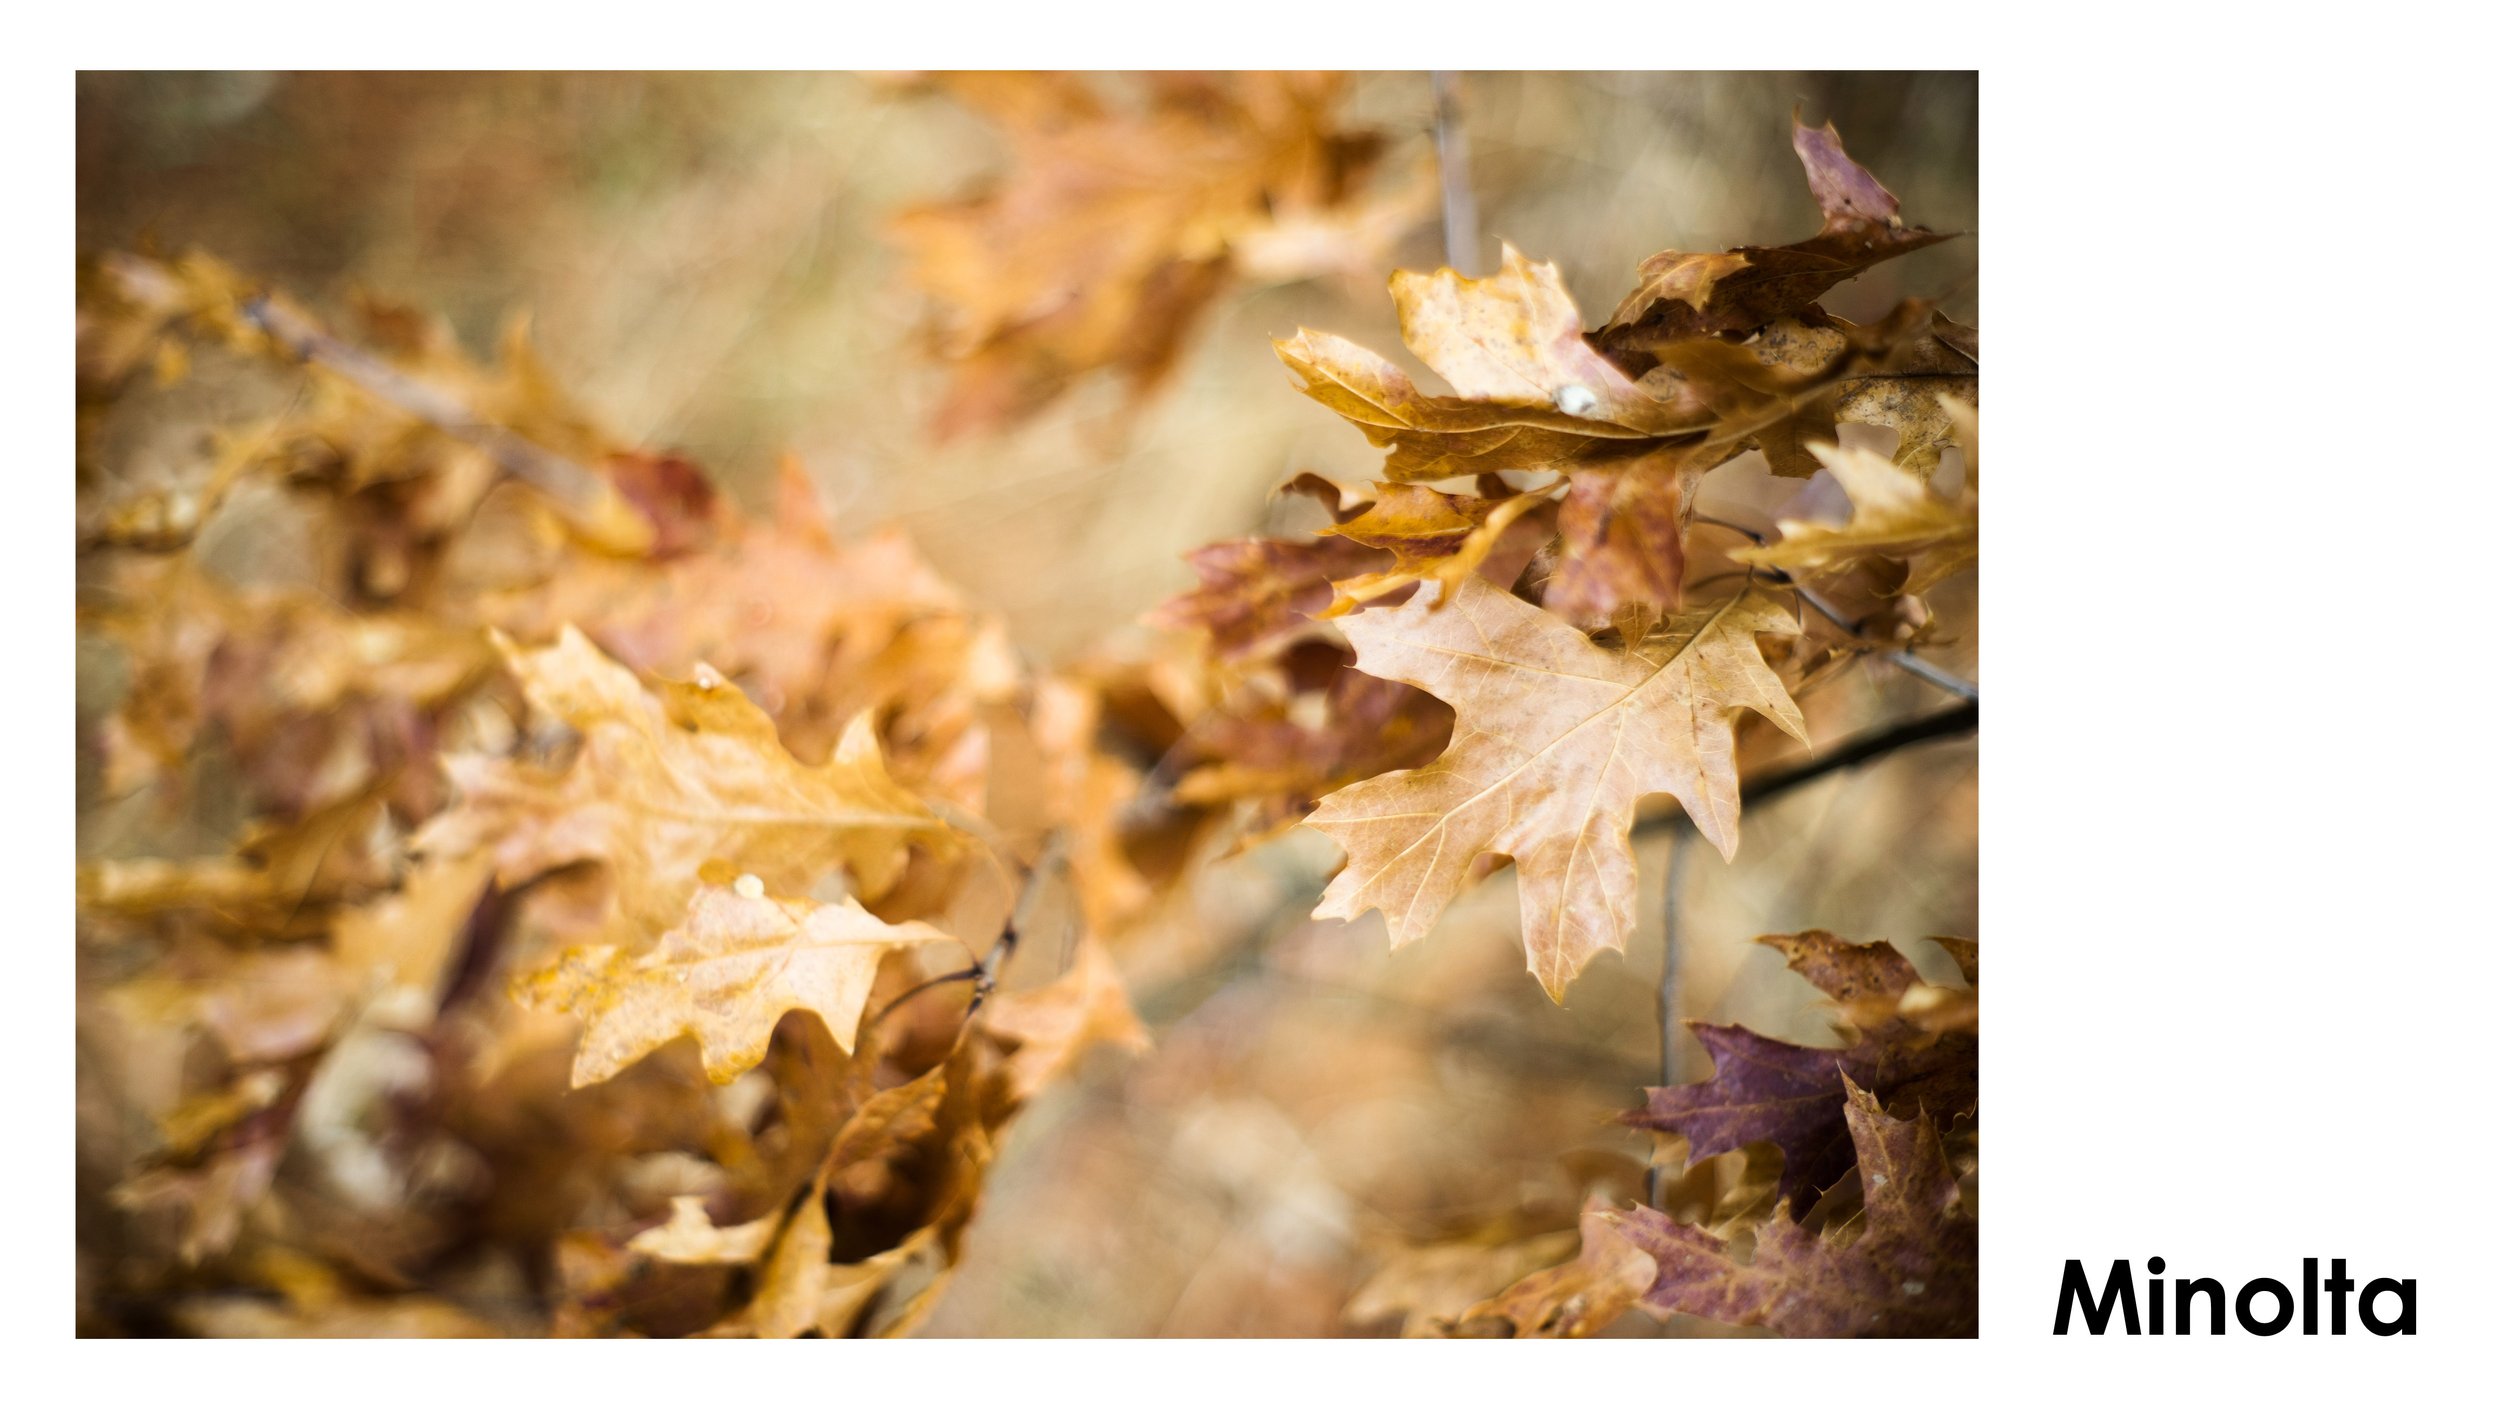
Minolta 50mm f1.4 or f1.7 MD Rokkor-X - around $50 - $100. Best value IMO.
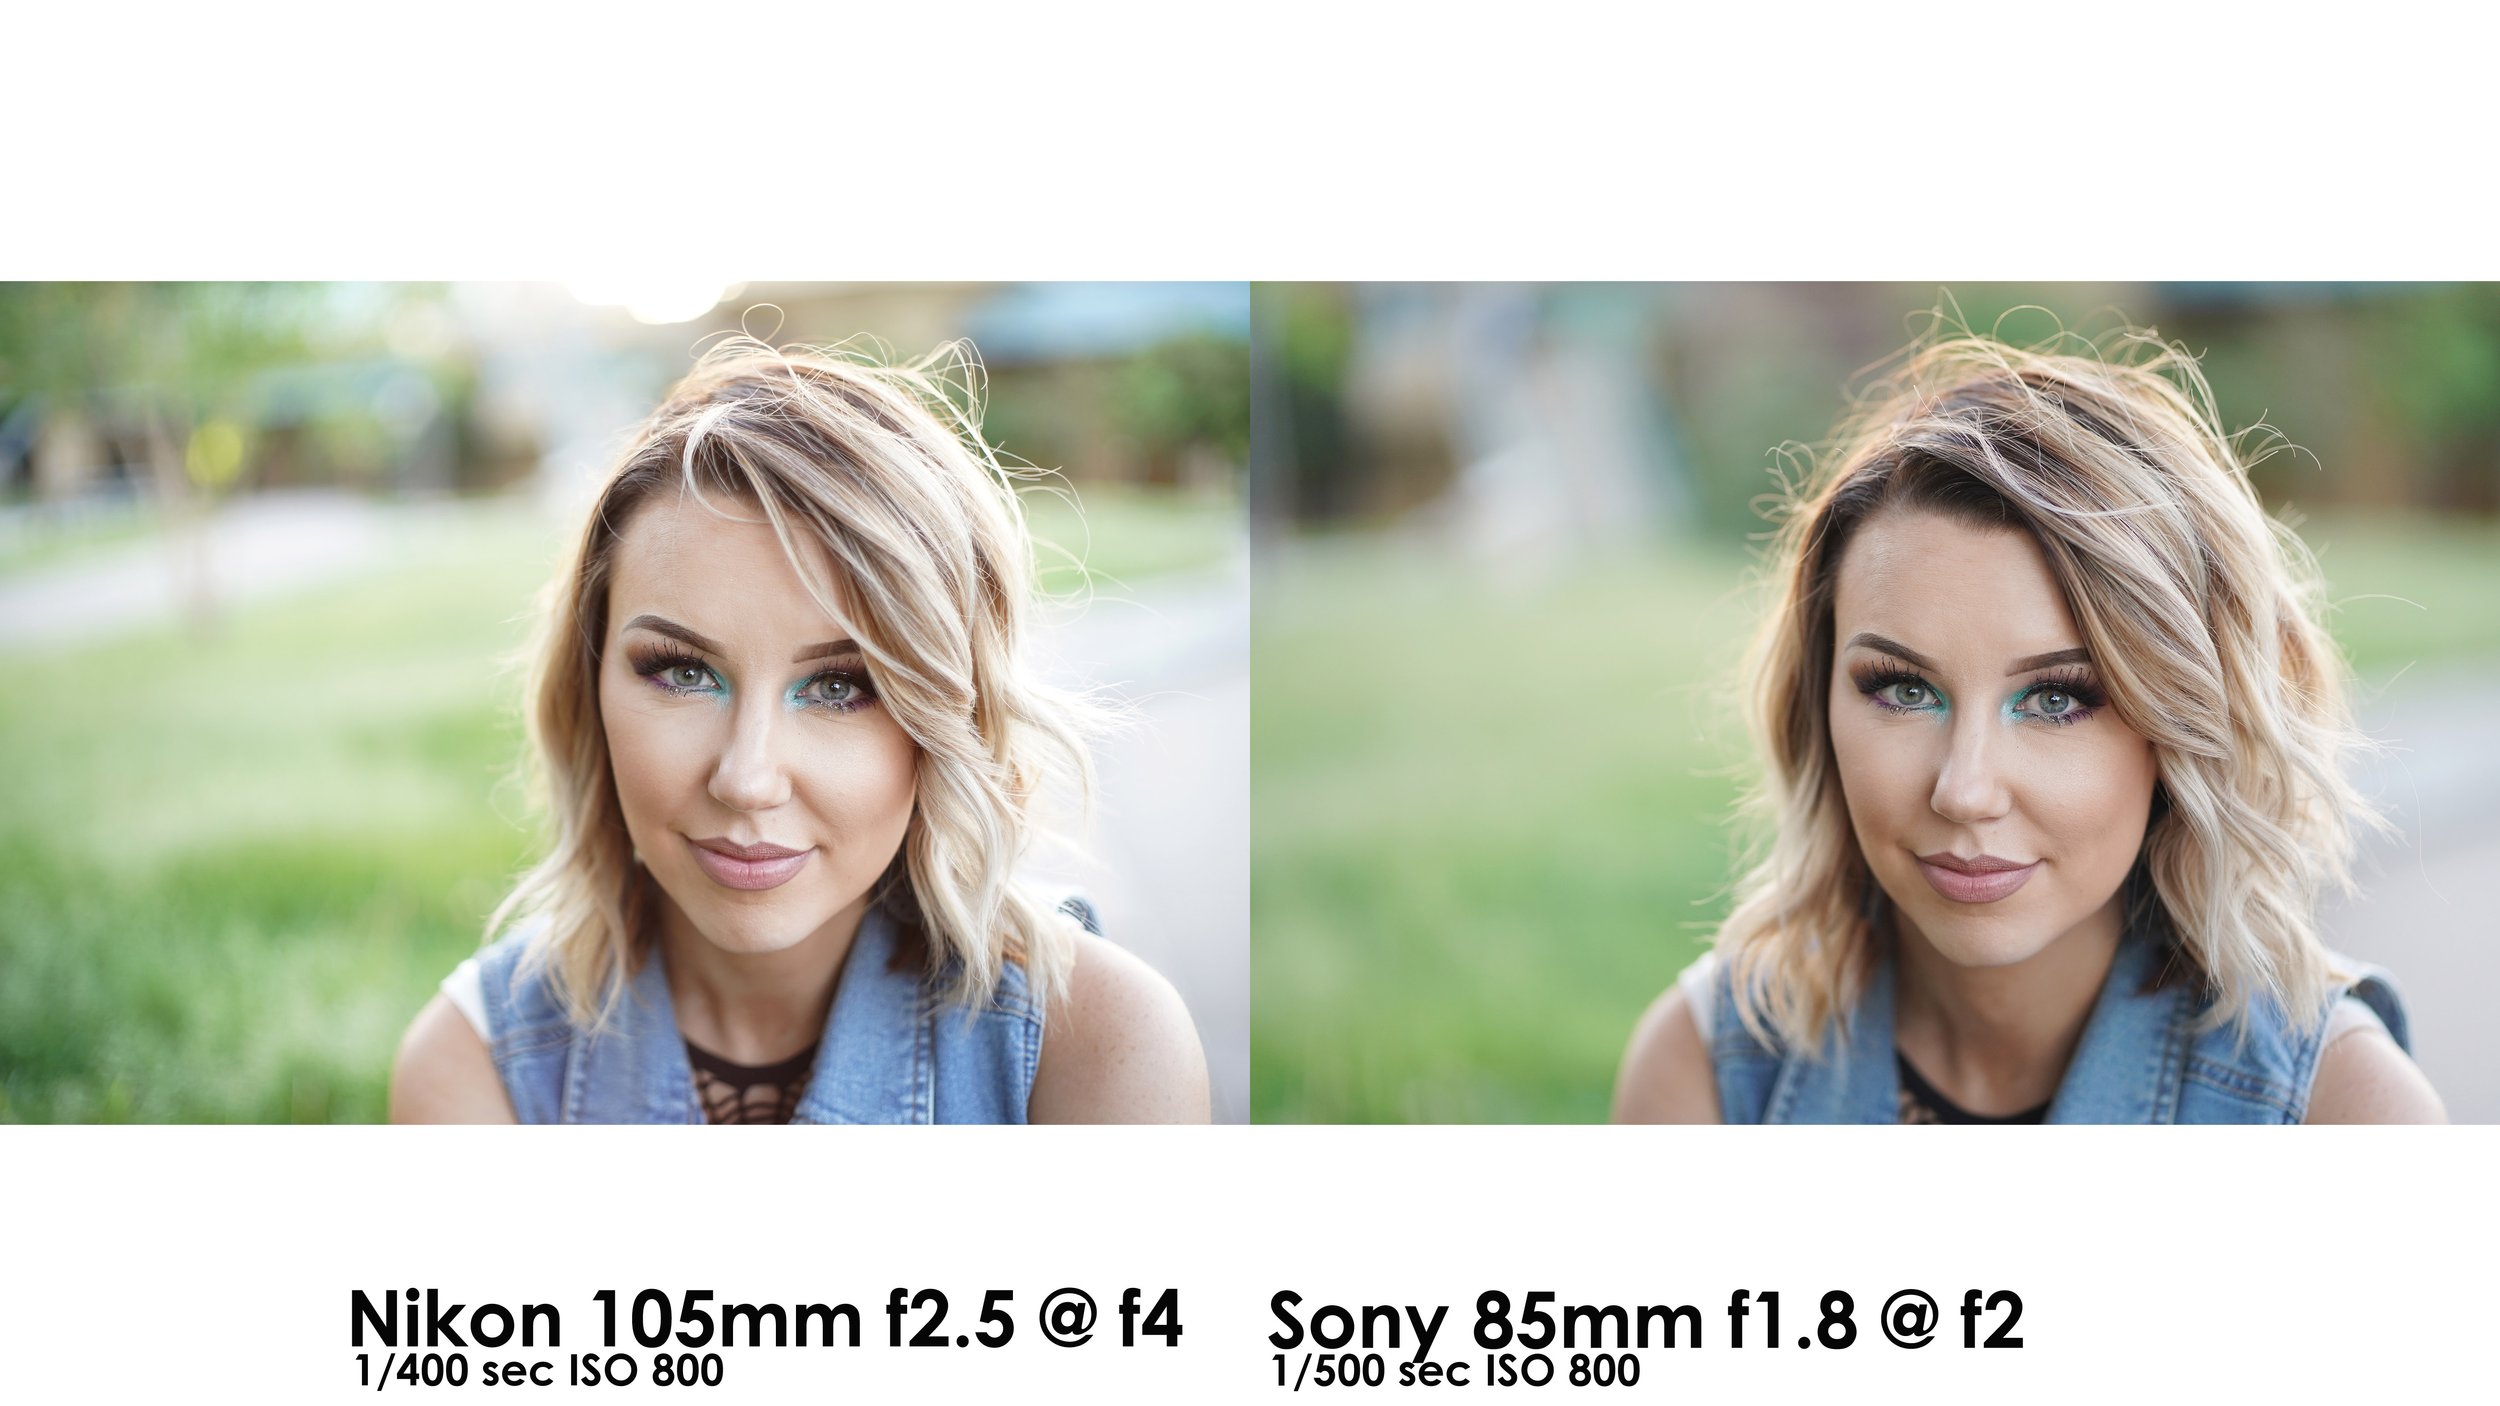
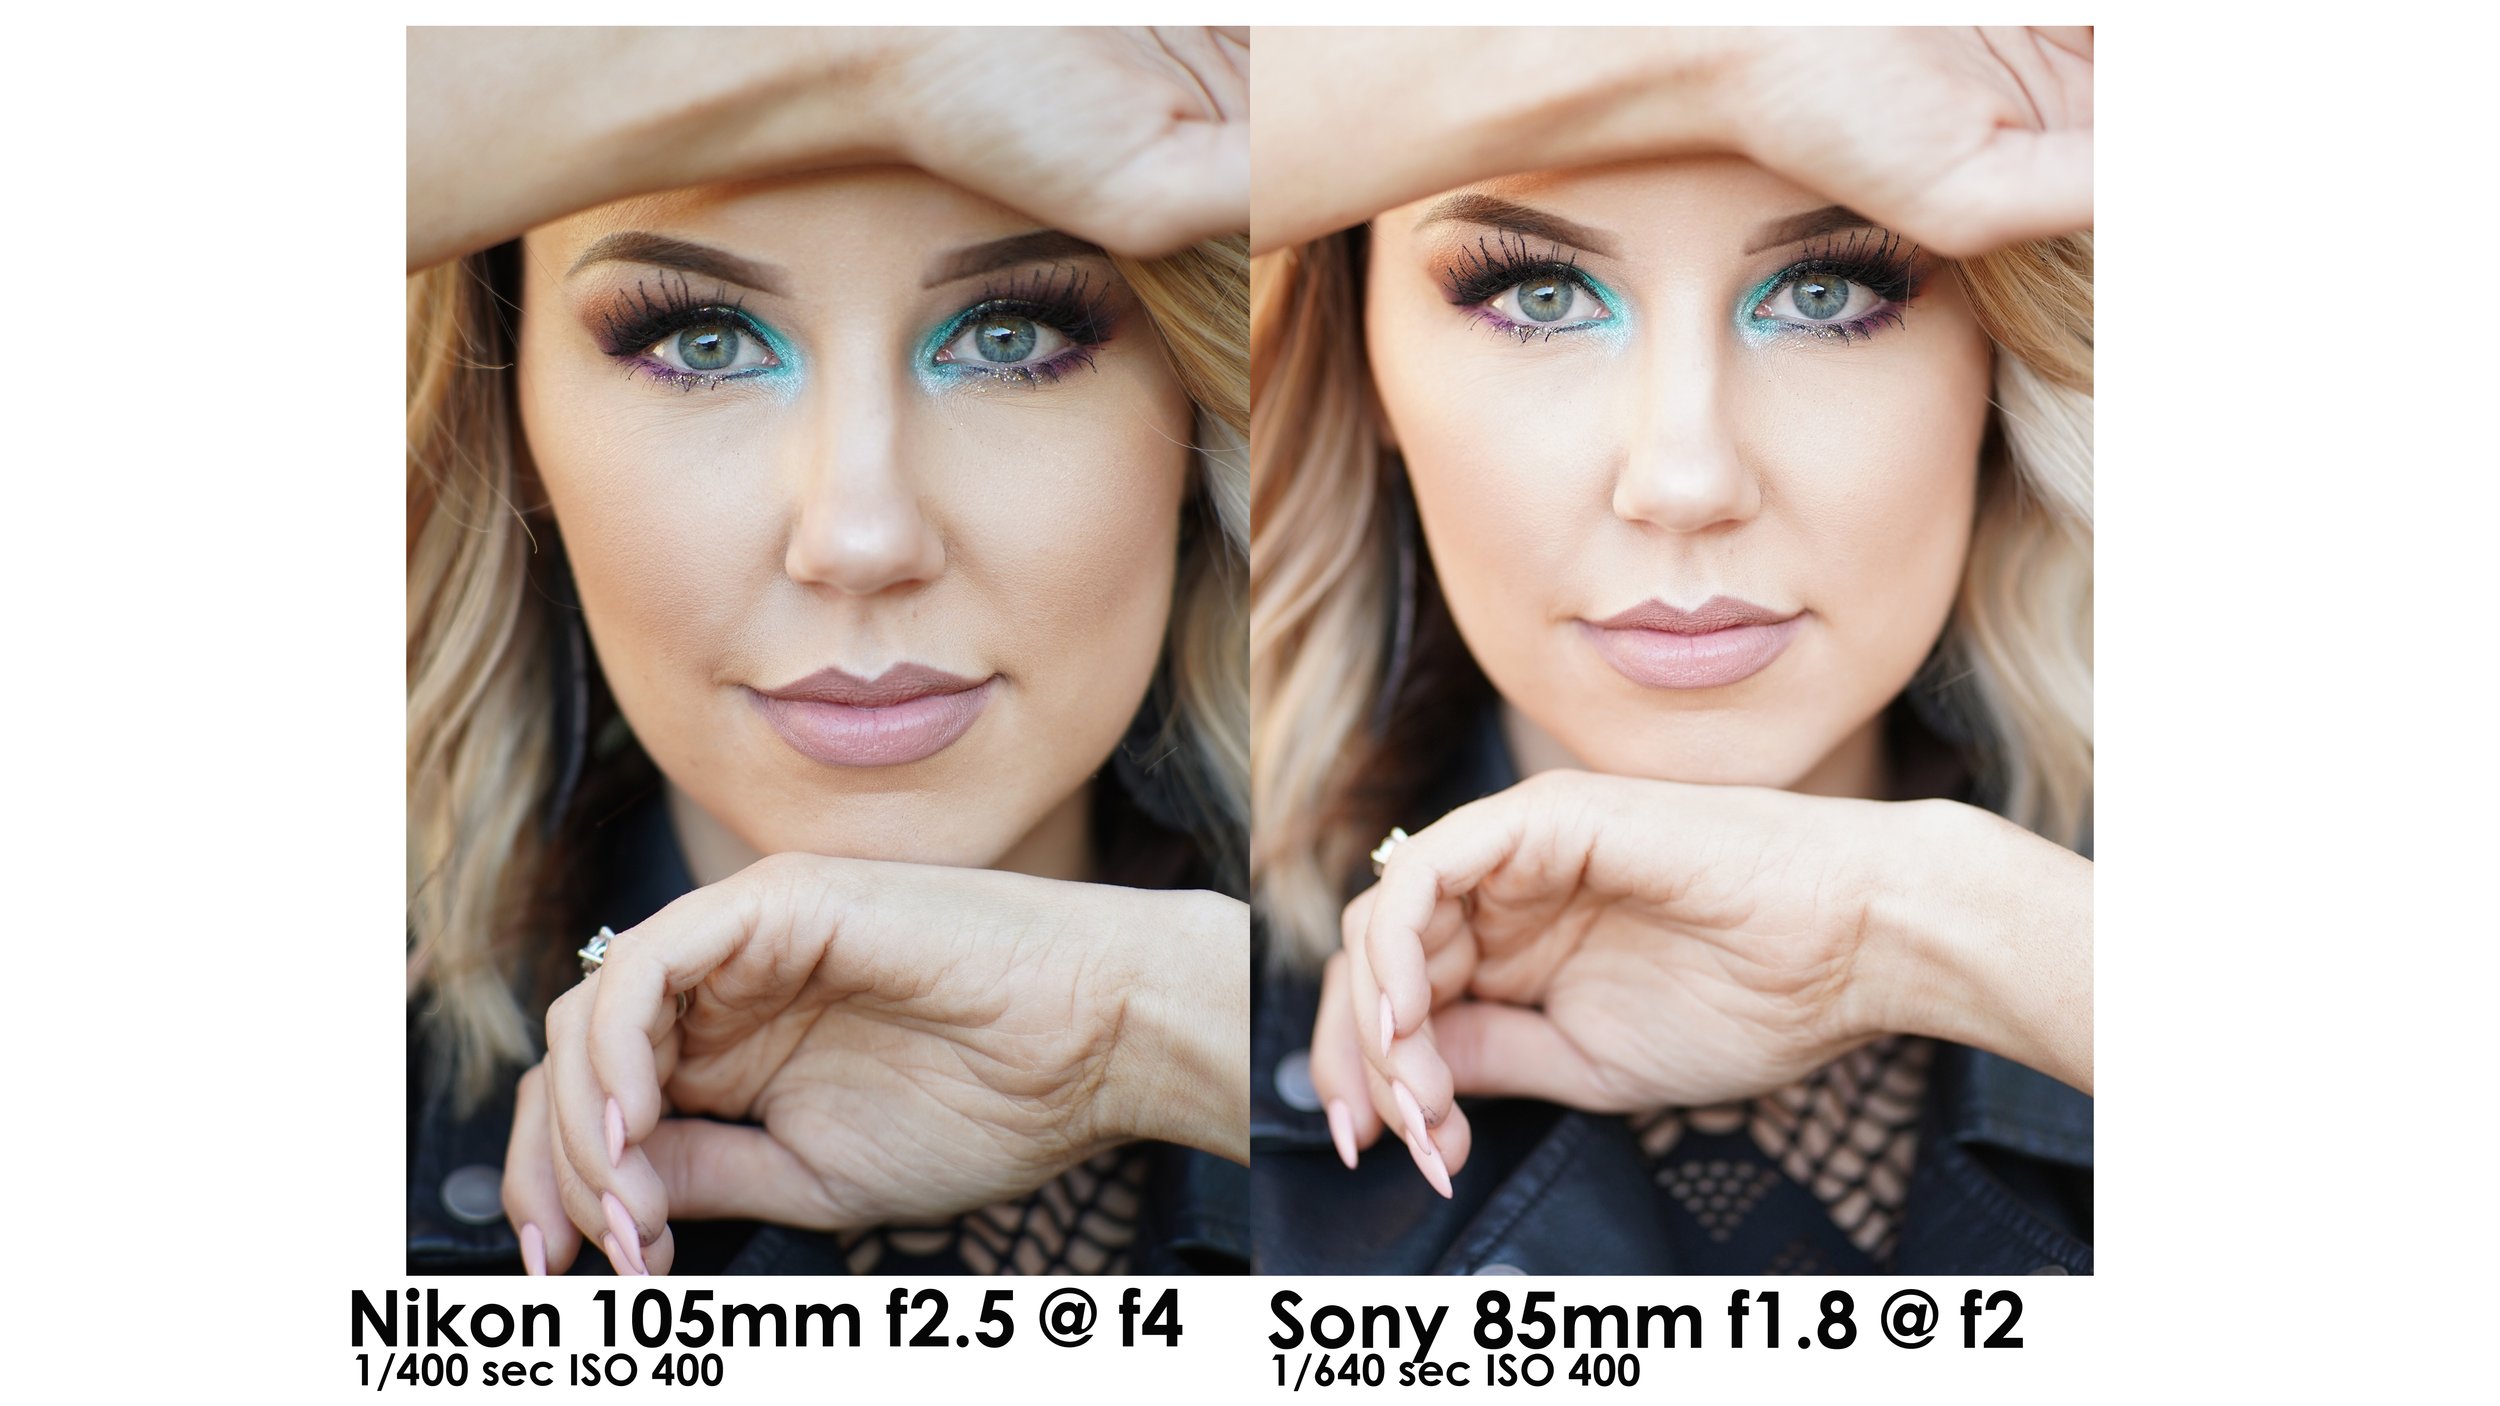
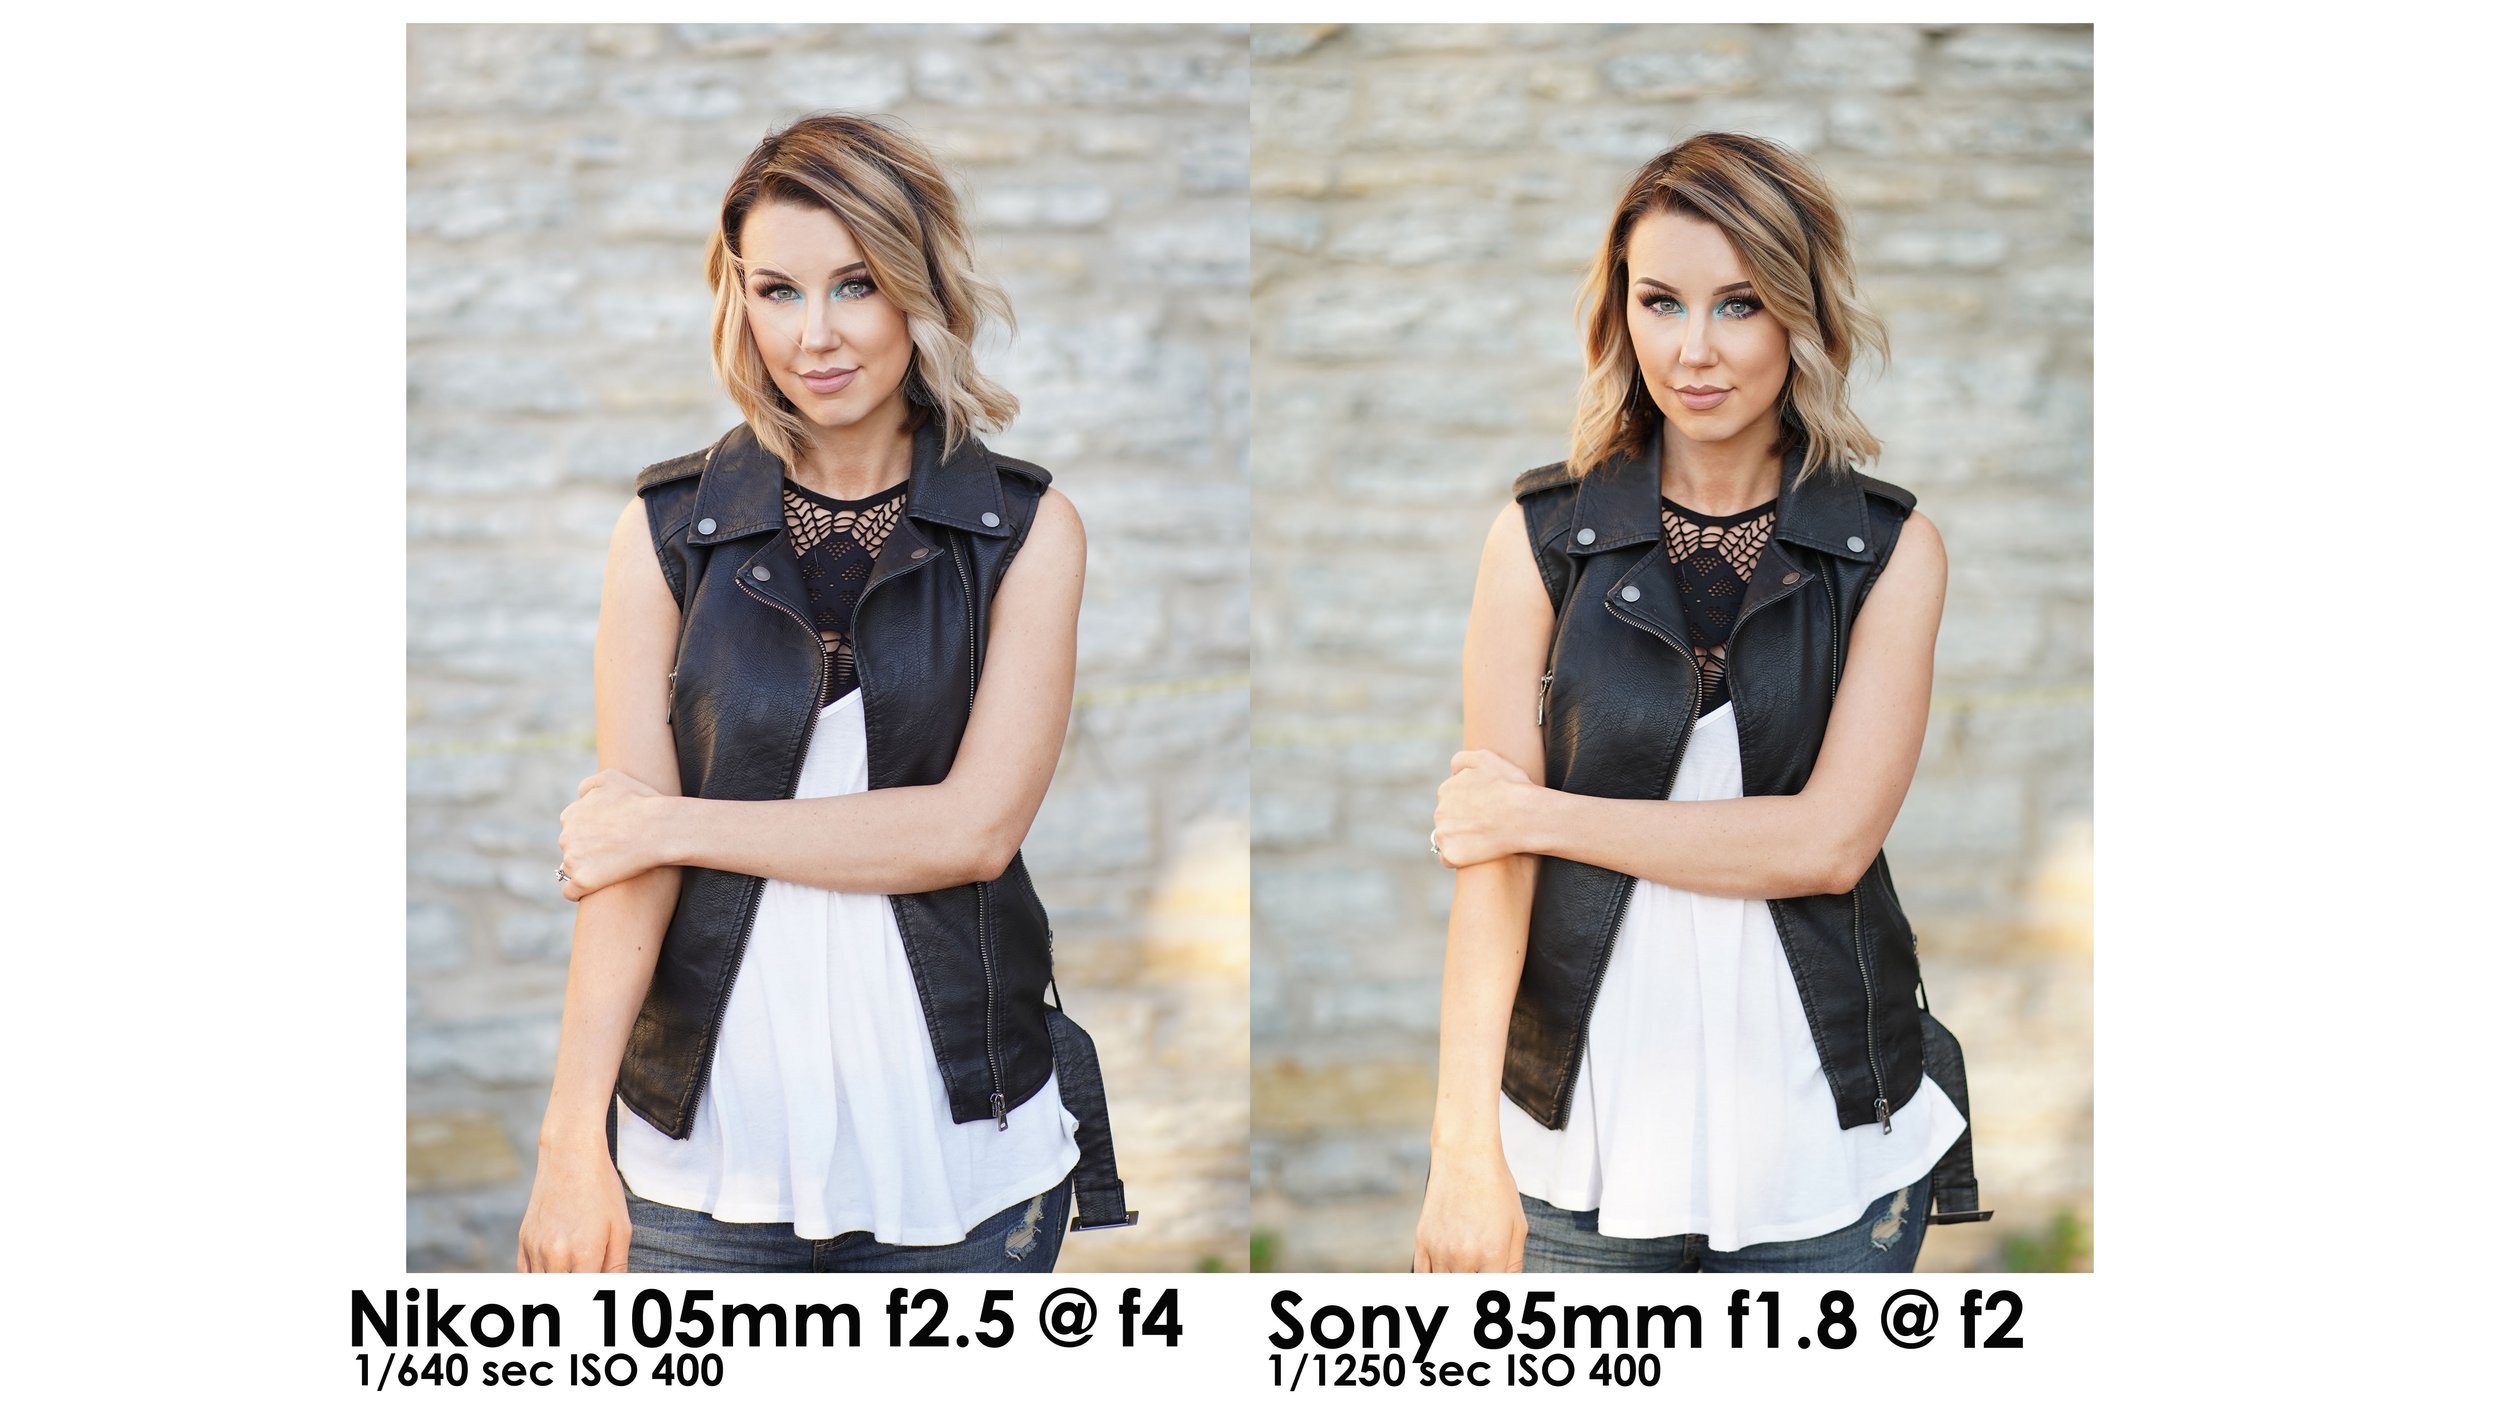
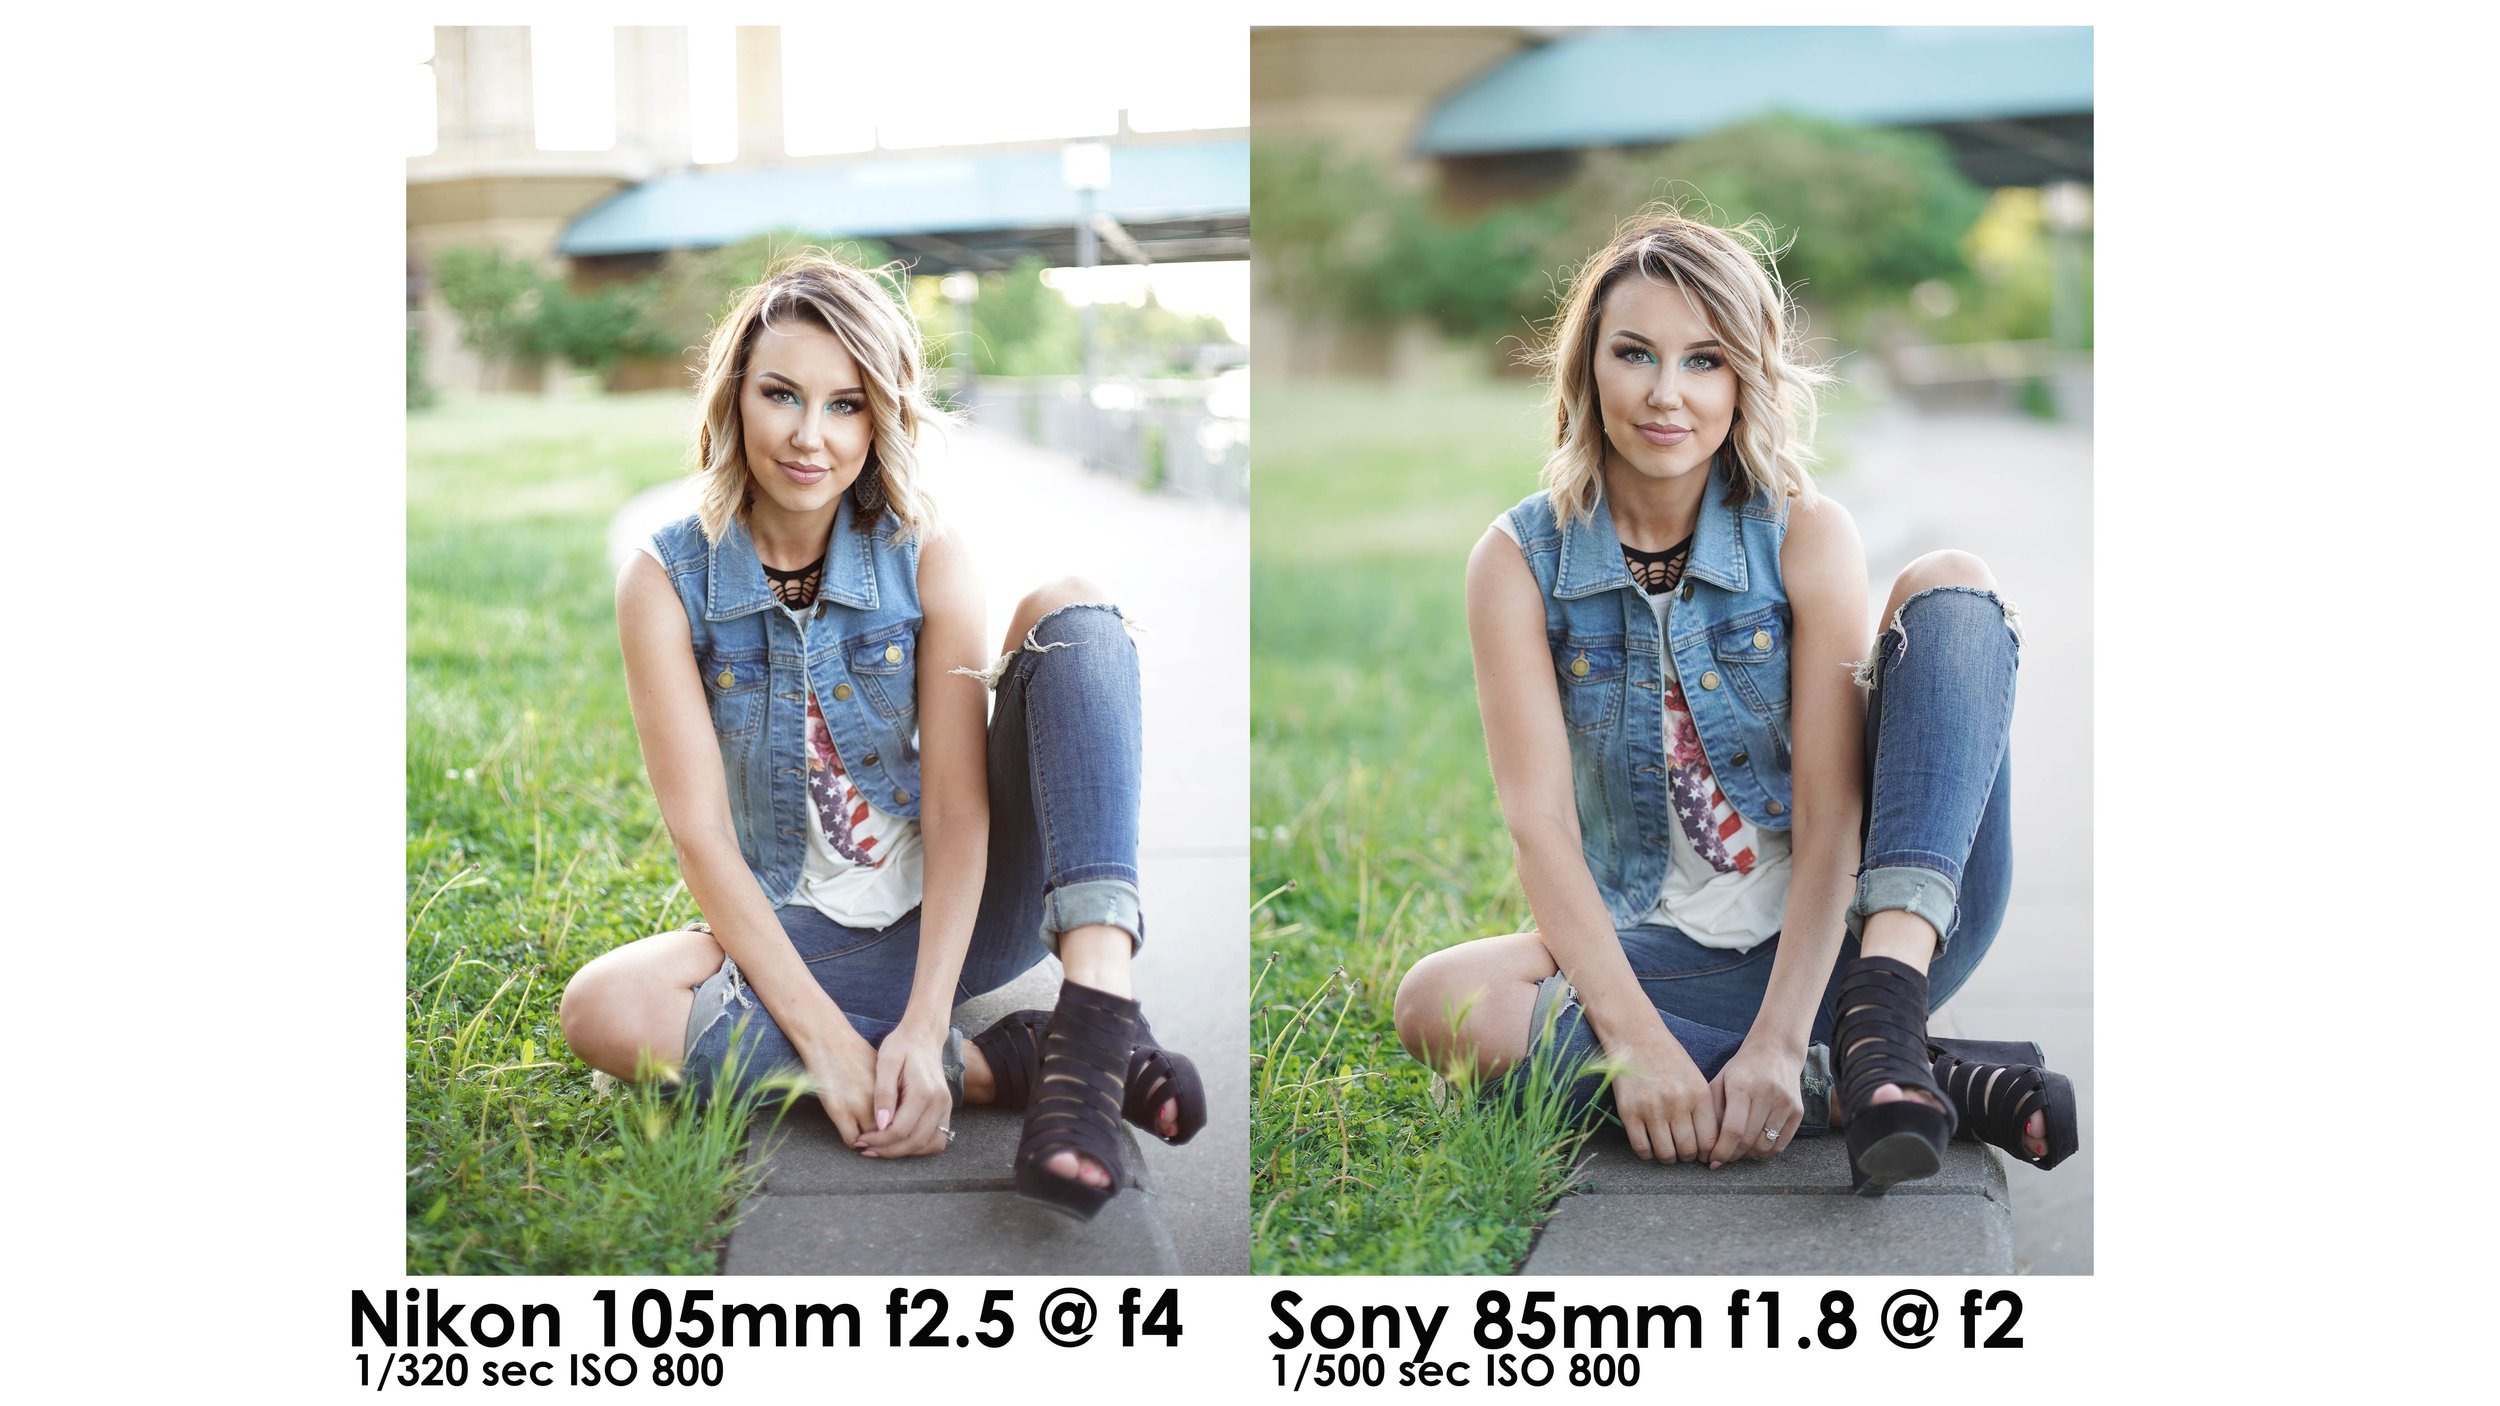
Nikon 105mm f2.5 - around $150.
All images from the video (pictured below) of Chelsey are straight from the camera, unedited JPG images. Yes, I know I could have matched the colors and edited them but that’s not the point.
These are just a few lenses I own and use on my film cameras so they were used as examples. If you have any 35mm film lenses all you need to do is purchase a lens adapter from lens mount to mirrorless mount. For example, I have three different lens mounts, one adaptor for each lens since they all have their own proprietary mounts. An example for Nikon lenses to Sony FE mount would be FX to NEX. If you have all Canon EF film lenses, then you’re good to go, you’ll just need the one adapter and all your Canon lenses will work. In my personal opinion Sony and Fuli and the most fun, easy and intuitive to adapt vintage glass to but it can be done with all mirrorless cameras. I’d say Sony and Fuji did it best first, since Canon and Nikon didn’t have mirrorless cameras until years later but they certainly have caught up since then. One thing to keep in mind is the crop factor if you are using a mirrorless camera that has a sensor smaller than full frame like Fuji or Olympus. Since full frame digital sensors are the same size as a piece of 35mm film, those are referred to as full frame and you’ll see the same focal length when pairing those old lenses to full Frame digital. If using an APS-C camera, referred to as crop sensor there will be a crop factor so choose your lenses accordingly. If using a 50mm vintage lens on an APS-C sensor you’ll want to multiply the focal length by 1.5x. So a 50mm lens would perform like a 75mm lens when attached to a crop sensor digital body. For Micro 4/3 bodies from Panasonic and Olympus you’ll multiply by 2x so a 50mm will perform like a 100mm on those brands of cameras. The lens adapters can easily be found online and in camera shops for anywhere from $25 - $100 each.
One thing to note if you’re on a limited budget is that you should consider looking into used mirrorless bodies that are a few generations old. Some examples would be a Fuji X-T2 or Sony A7ii. The image quality on these cameras are outstanding and two of the main things that are upgraded when new camera bodies are announced are improved auto focus and improved processing power, two things that do not matter when adapting manual focus lenses! So you could get started with one of those cameras and a vintage 28mm and 50mm for around $1,000 or less for example. Both of those cameras would serve you very will when shooting video with these lenses too.
A few reasons why Sony is a great option to adapt vintage glass to:
In Body Image Stabilization (IBIS). The camera has the ability to stabilize the sensor from the movement your hands may produce, also very helpful when photographing with slow shutter speeds. For example you might find that you are able to get a clear, crisp, in focus image at 1/30 of a second with a stabilized body whereas if you use a non-stabilized body you may find some slight blur when using the same shutter speed. In addition, you can set in camera what focal length you’re adapting and the camera will adjust the amount of stabilization it uses to get the best results. For example, I once tested a giant/heavy Nikon 300mm f2.8 lens to my Sony. First I didn’t set the focal length and shot at a 1/100 of a second and I got some slight motion blur. Then I set the stabilization to 300mm in the cameras menu and shot the same subject at the same shutter speed and the image turned out much better!
Focus Peeking. Focus peeking gives you a visual aid through your electronic viewfinder and/or the back LSD screen. It relies on contrast within the scene and I personally don’t use this on portraits but will on other photos where I’m stopping down to f4 or greater, maybe for still life or landscape photos.
Focus Magnification. Focus magnificent is the best tool of them all IMO and I use this for portraits or when using a lens wide open, like f1.4, f1.8 or f2 for example. This allows me to punch way in, like a visual crop in camera for a moment. This allows me to check critical focus and give me confidence I’m nailing the shot.
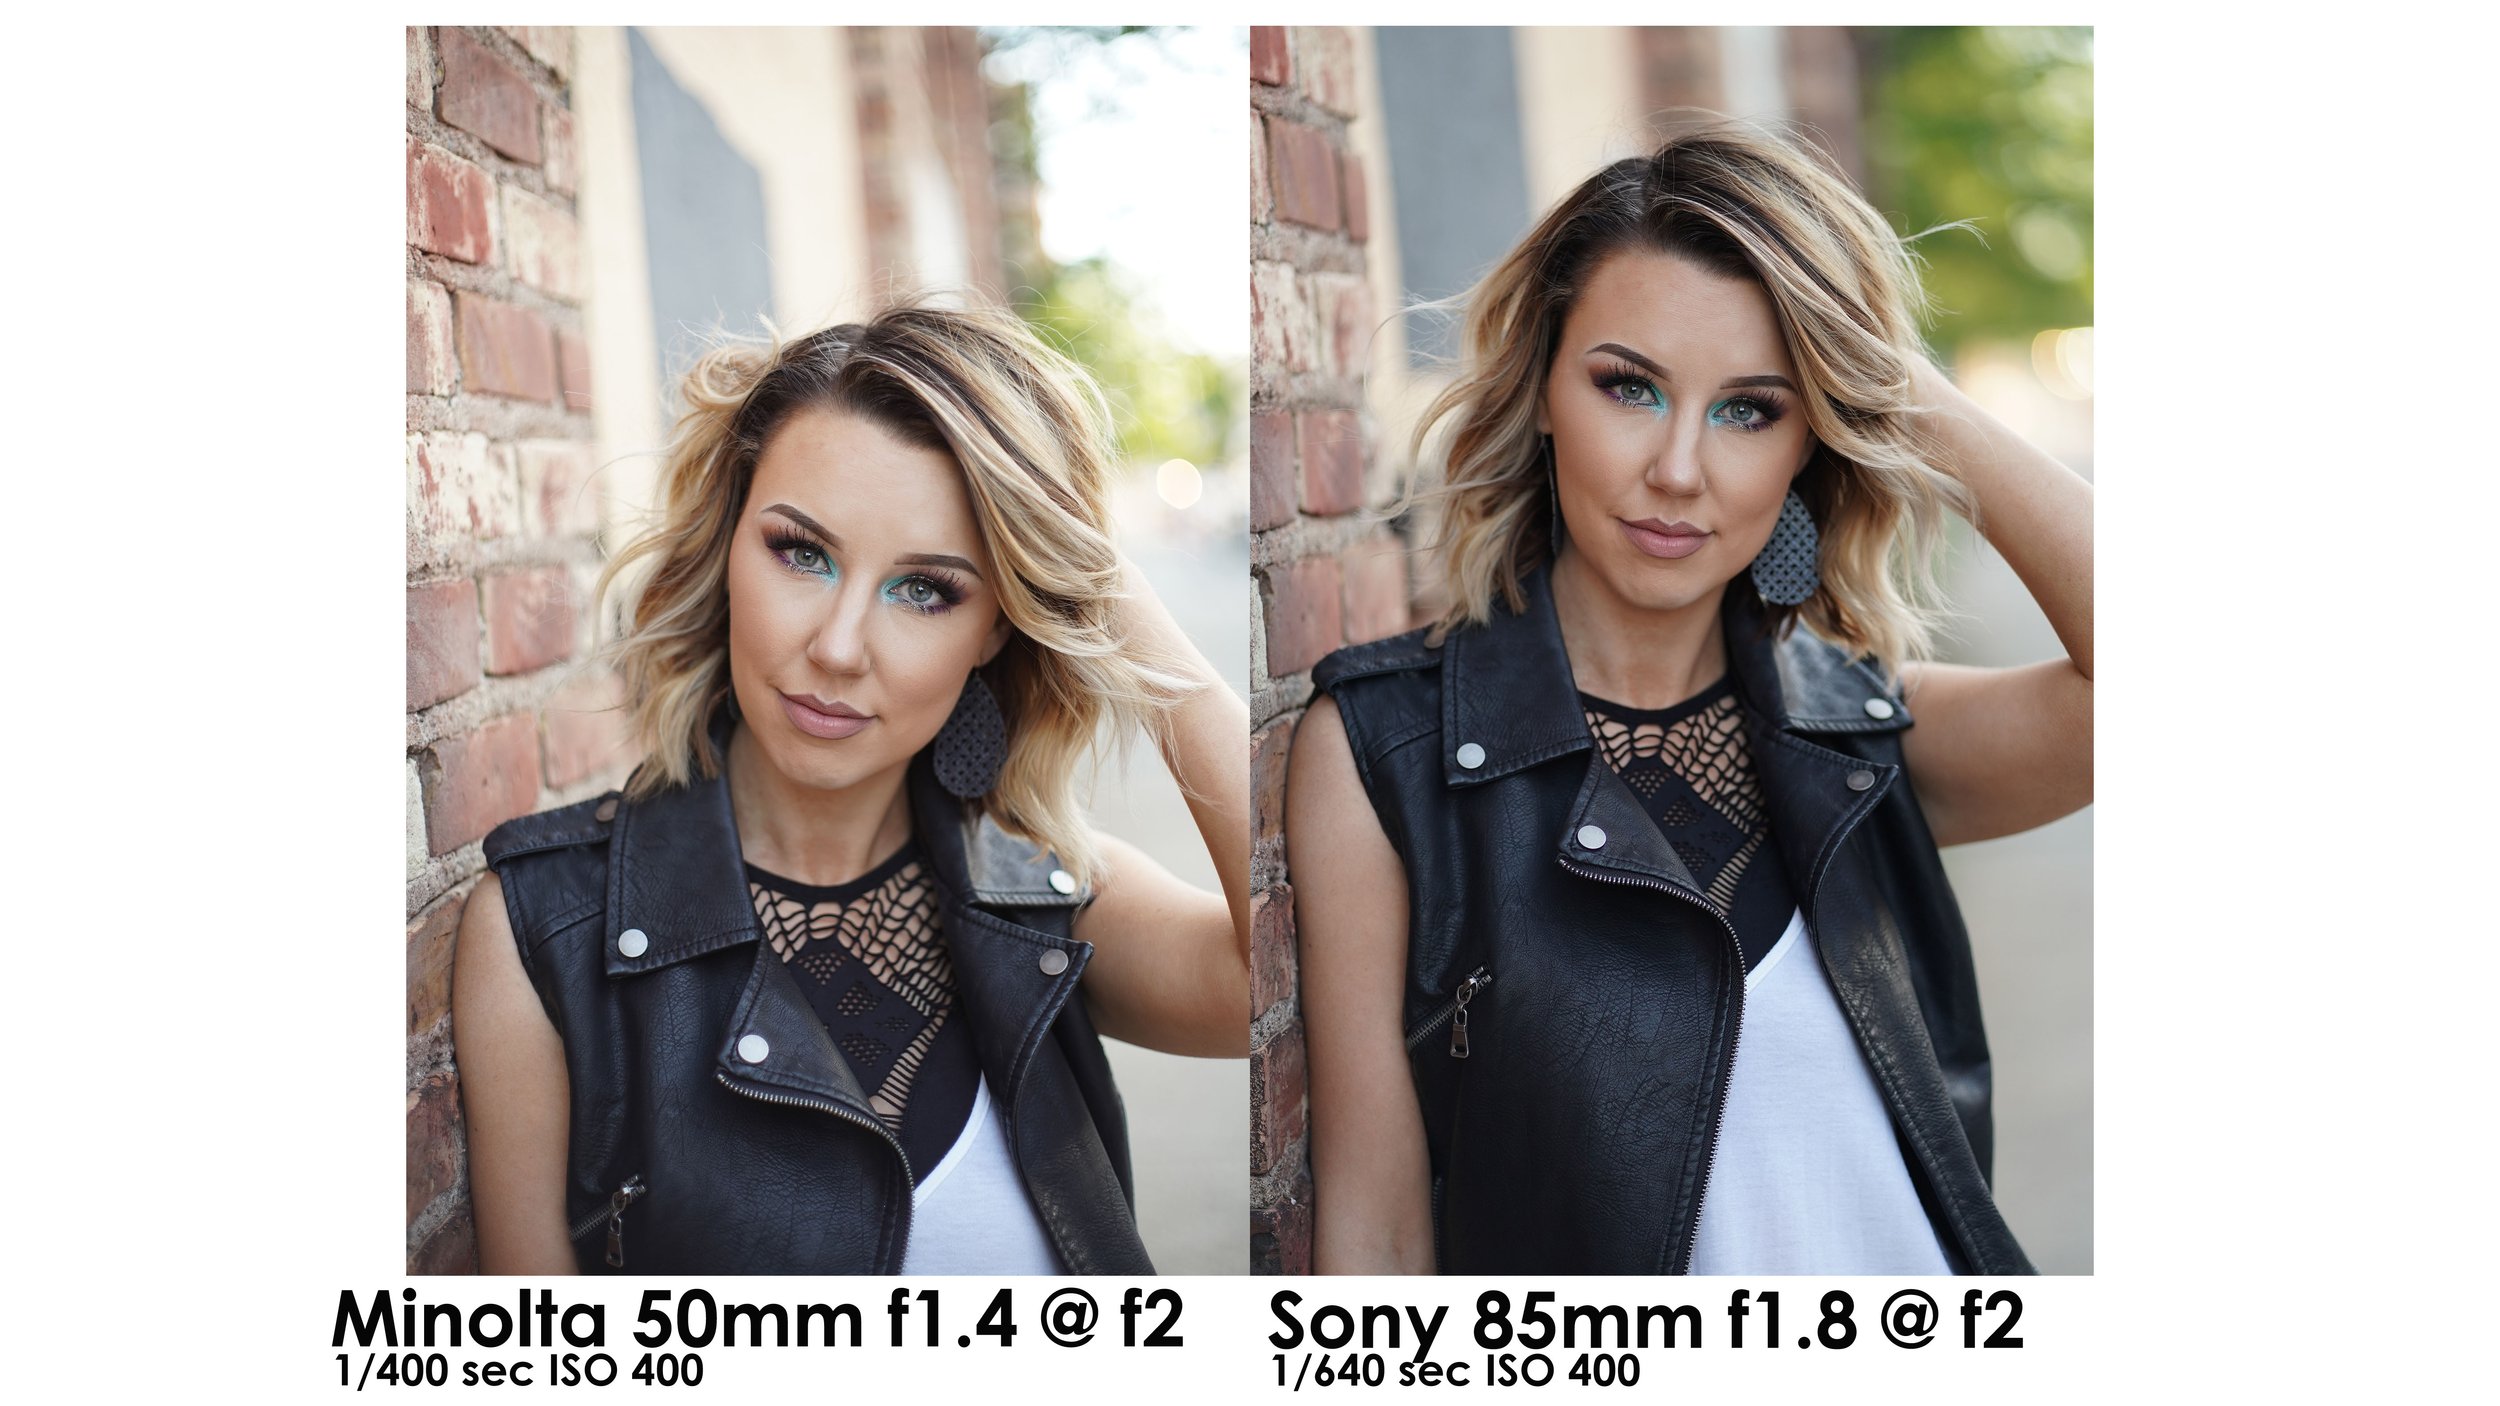
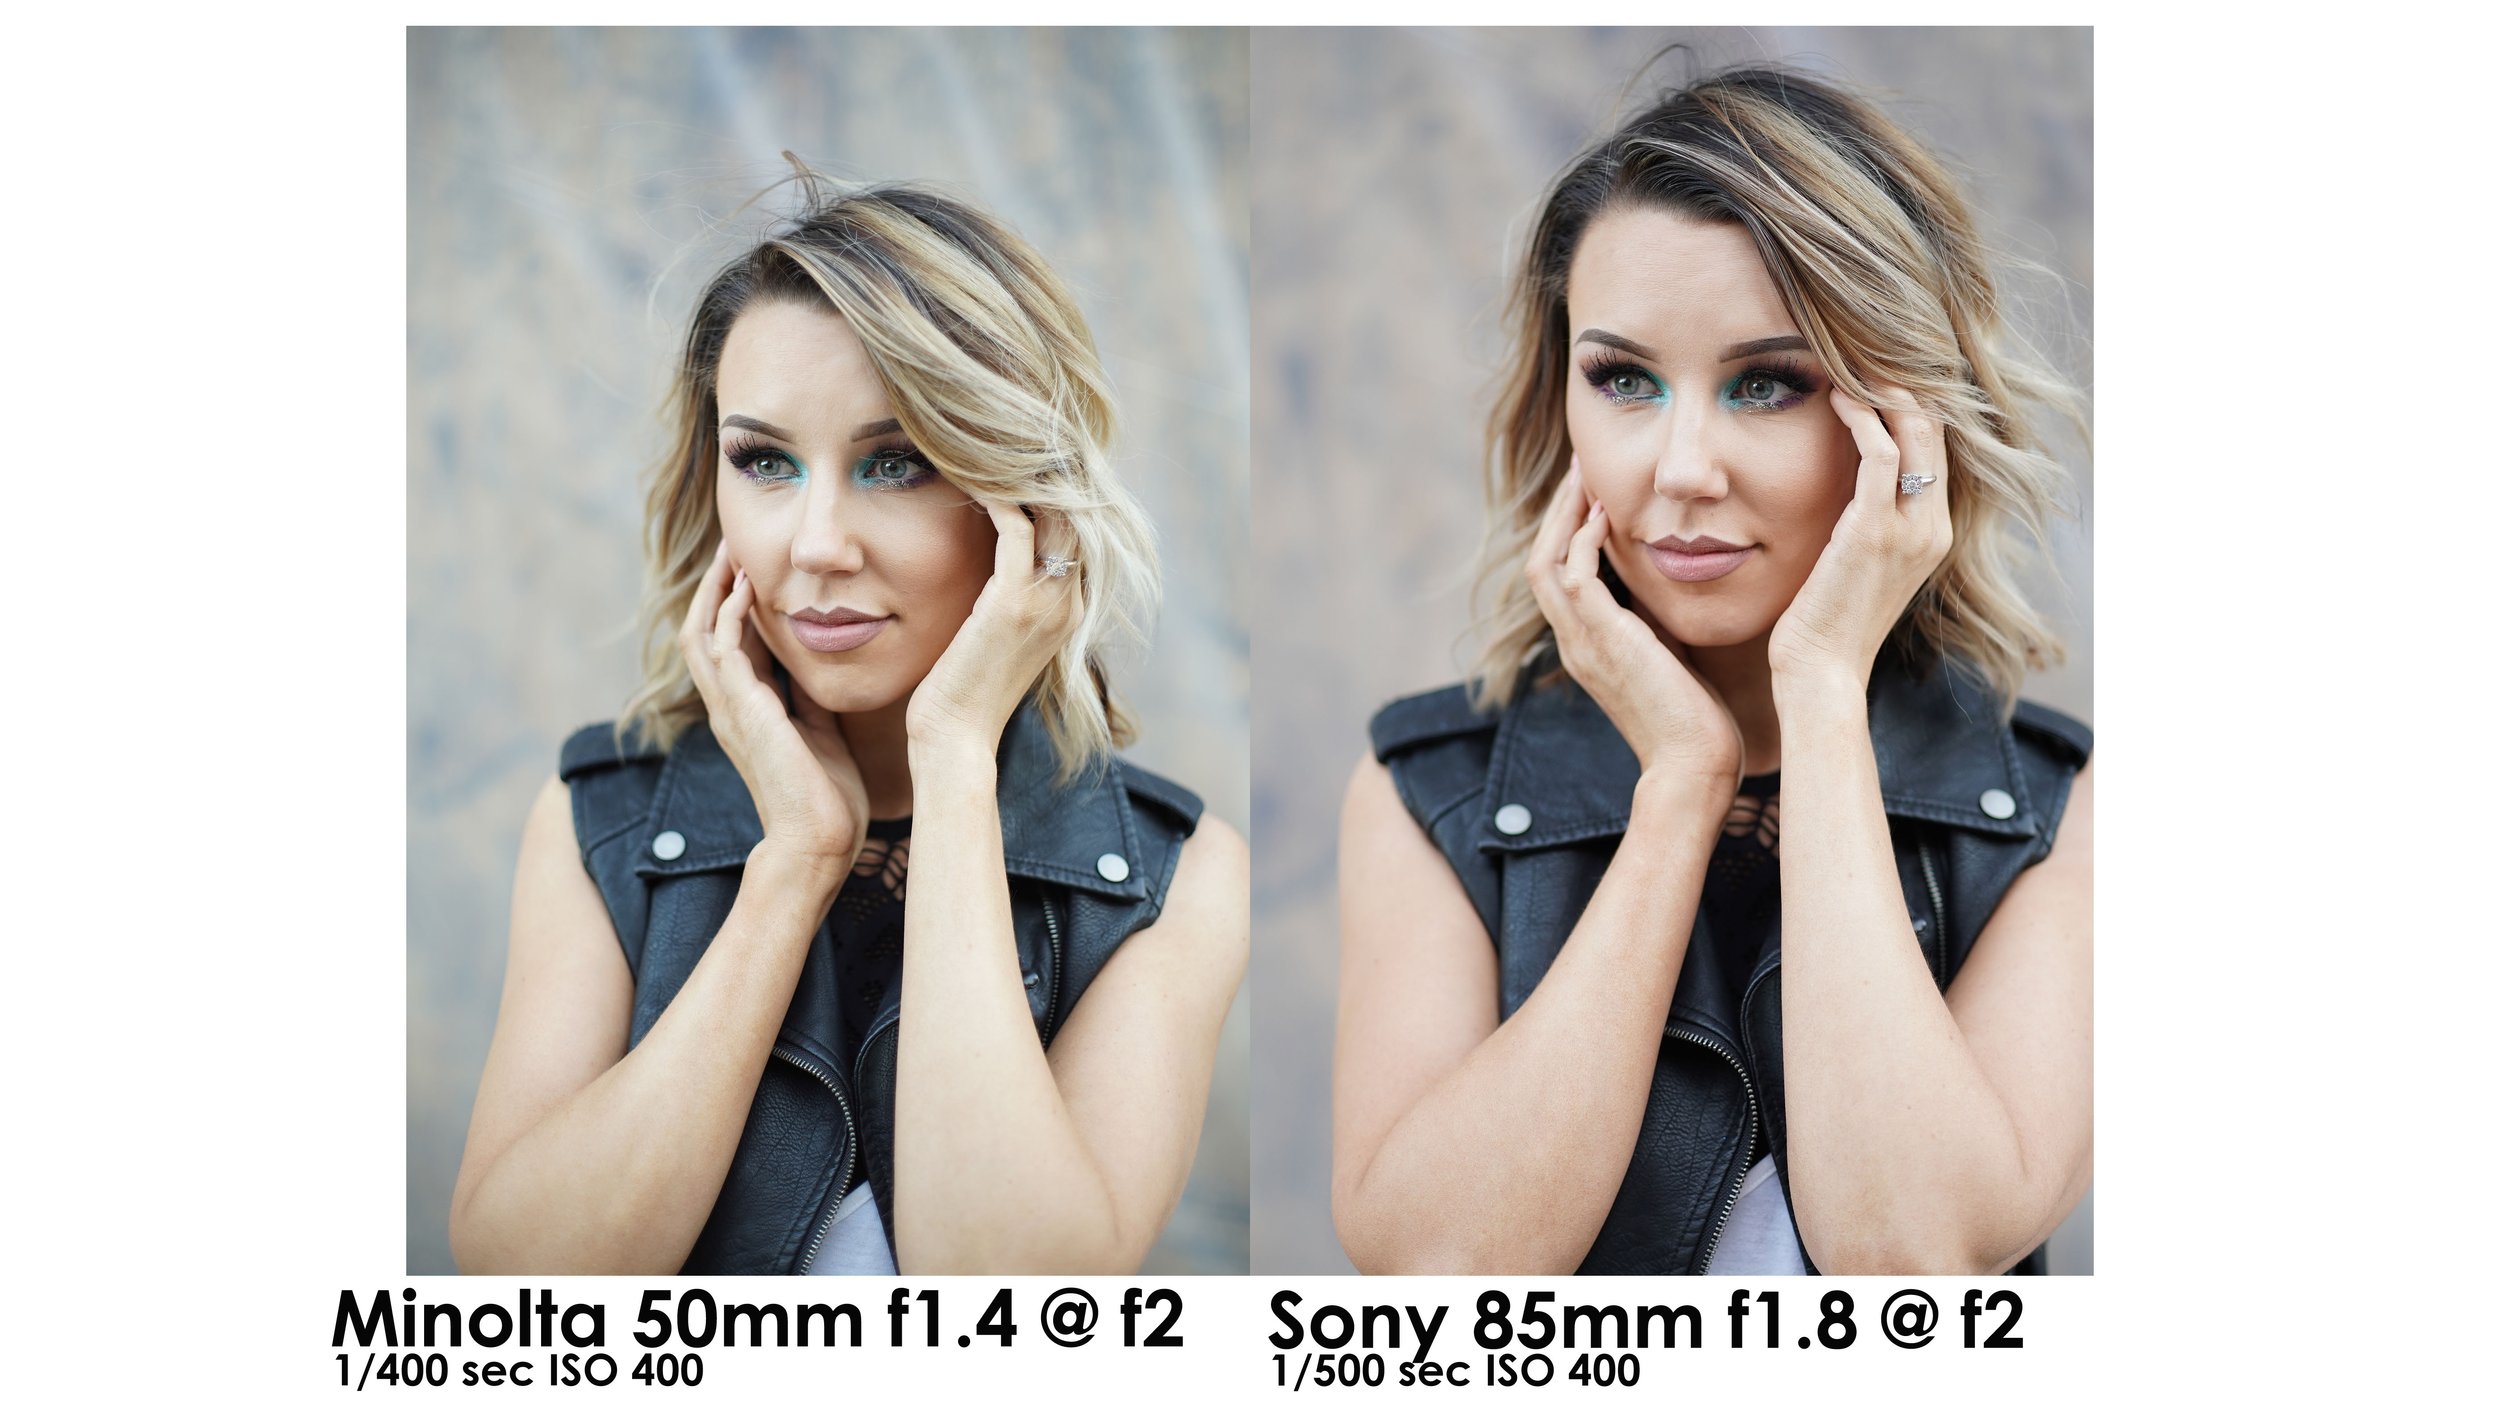
I’ve personally adapted lenses from Canon, Nikon, Pentax, Olympus, Minolta and Leica and I’m always blown away by the results. The following are a few more examples of the Helios and Minolta lenses:


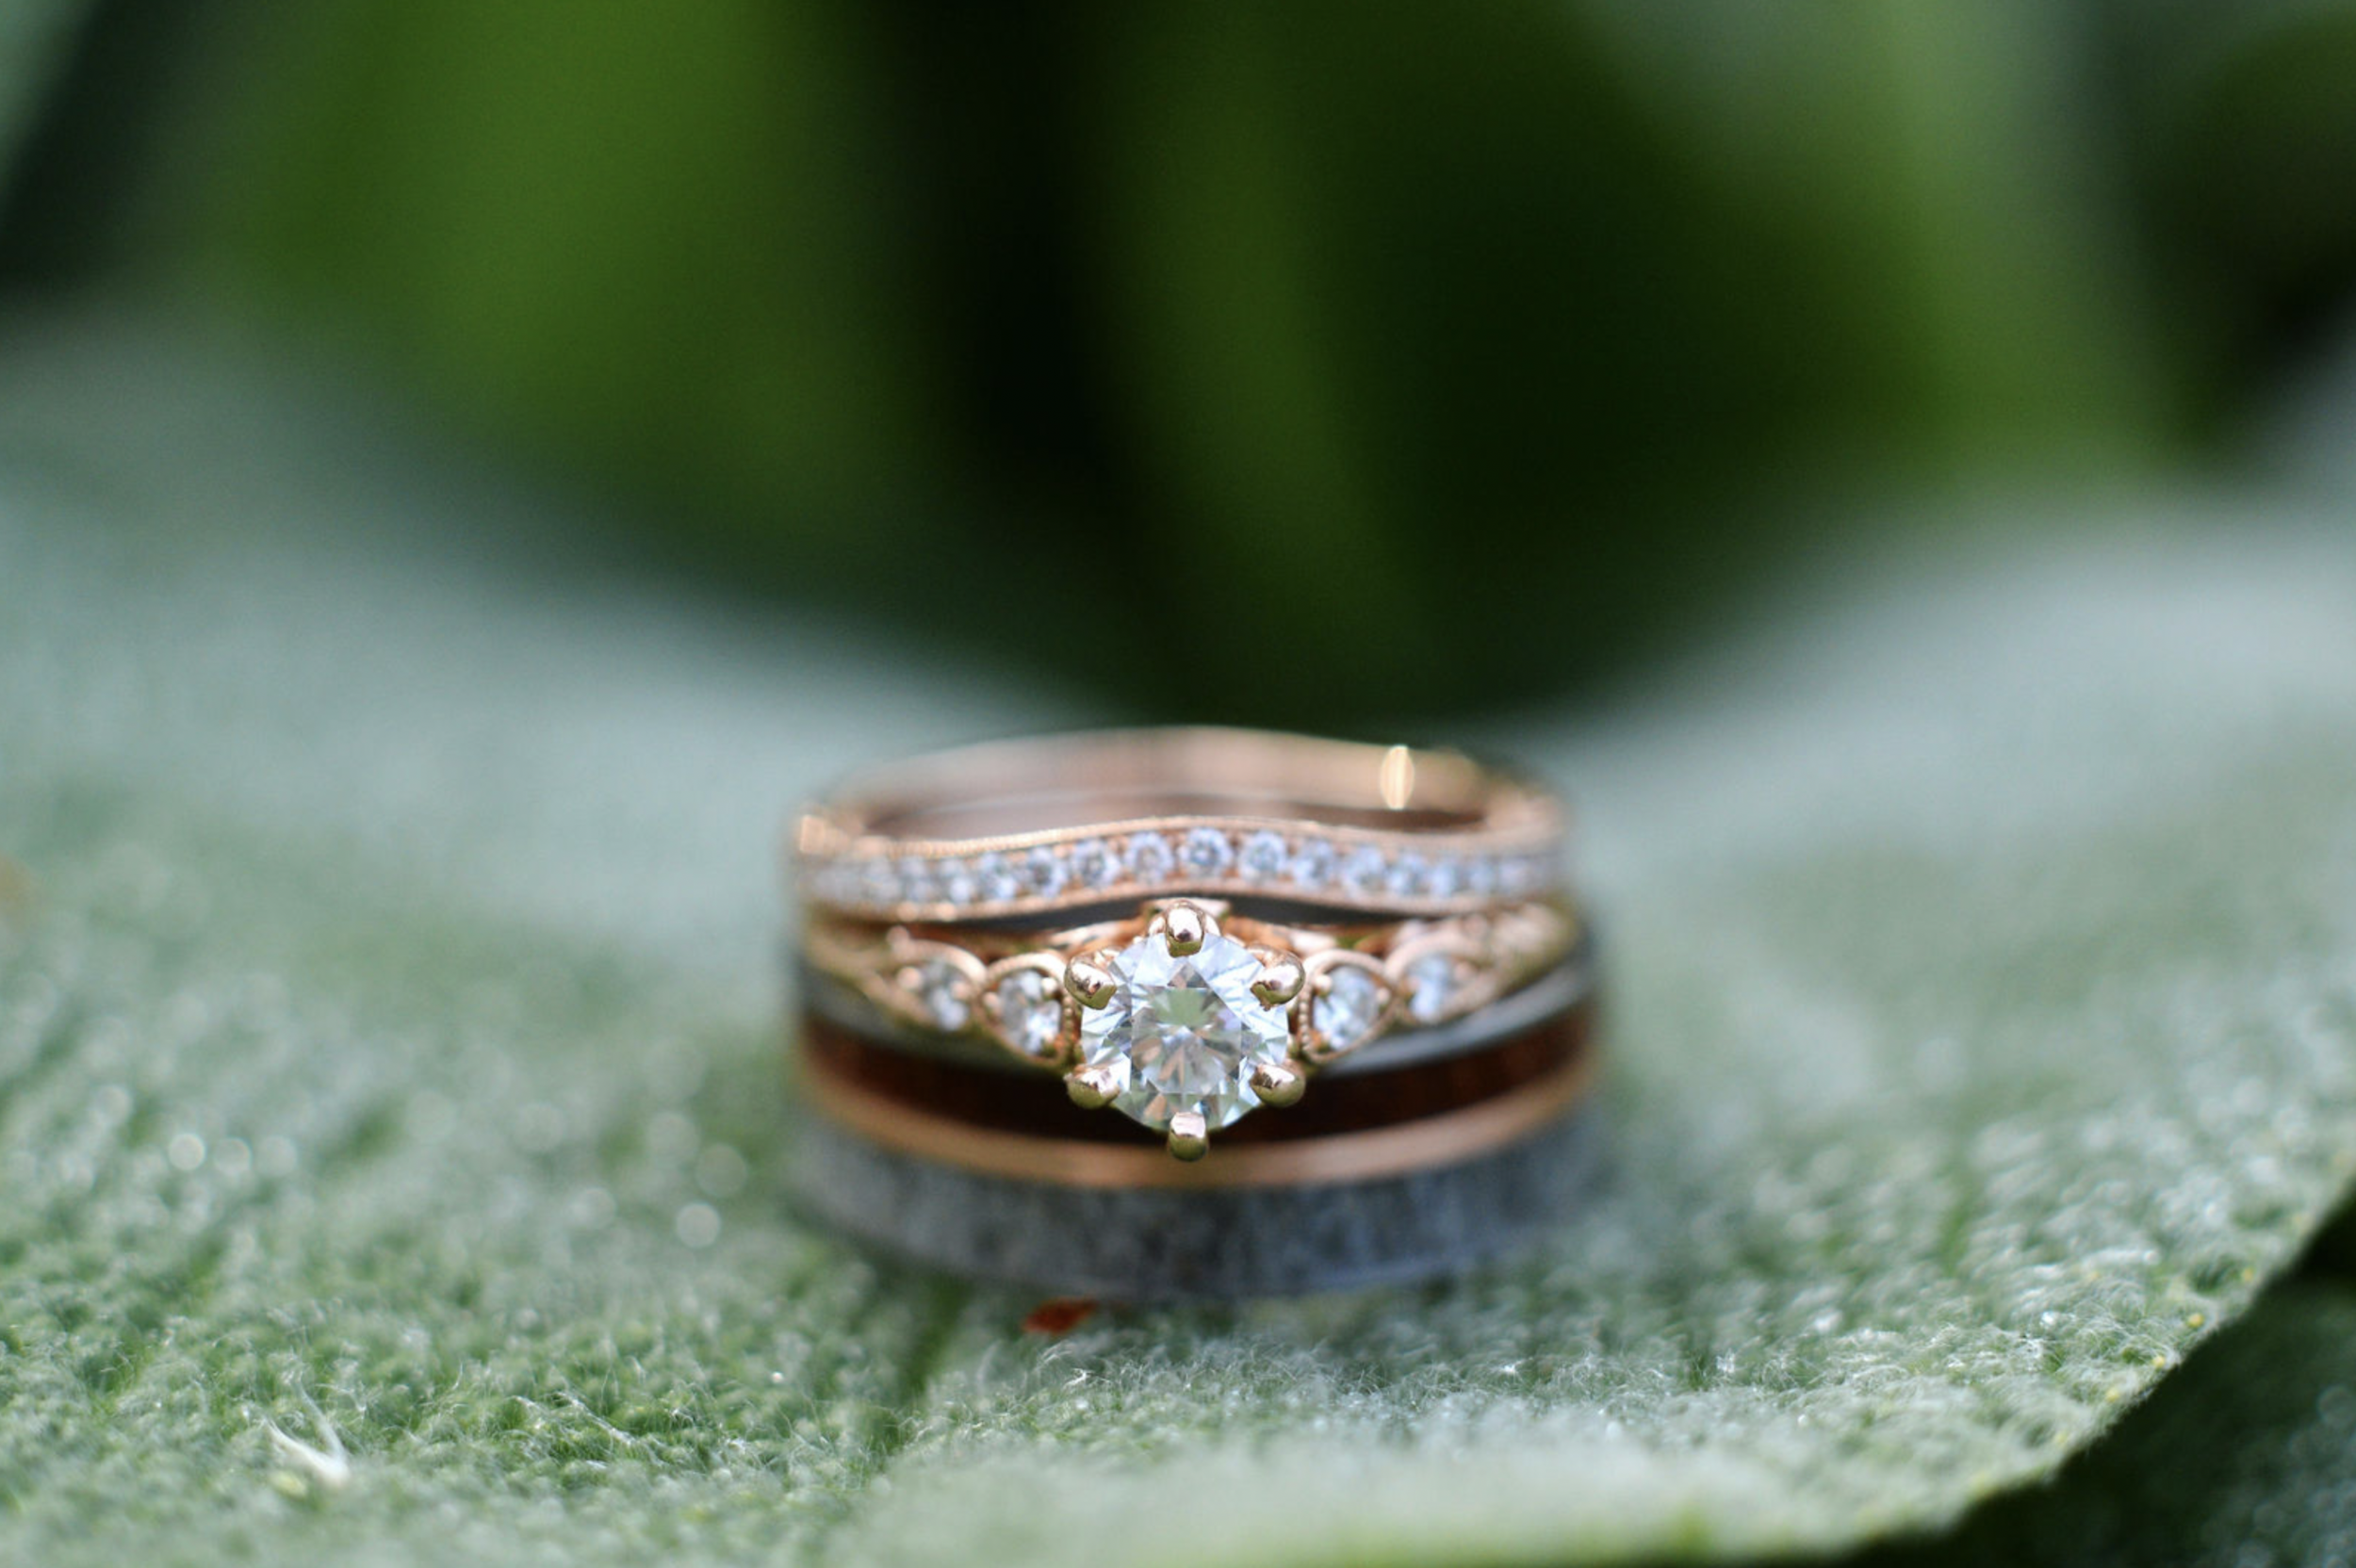
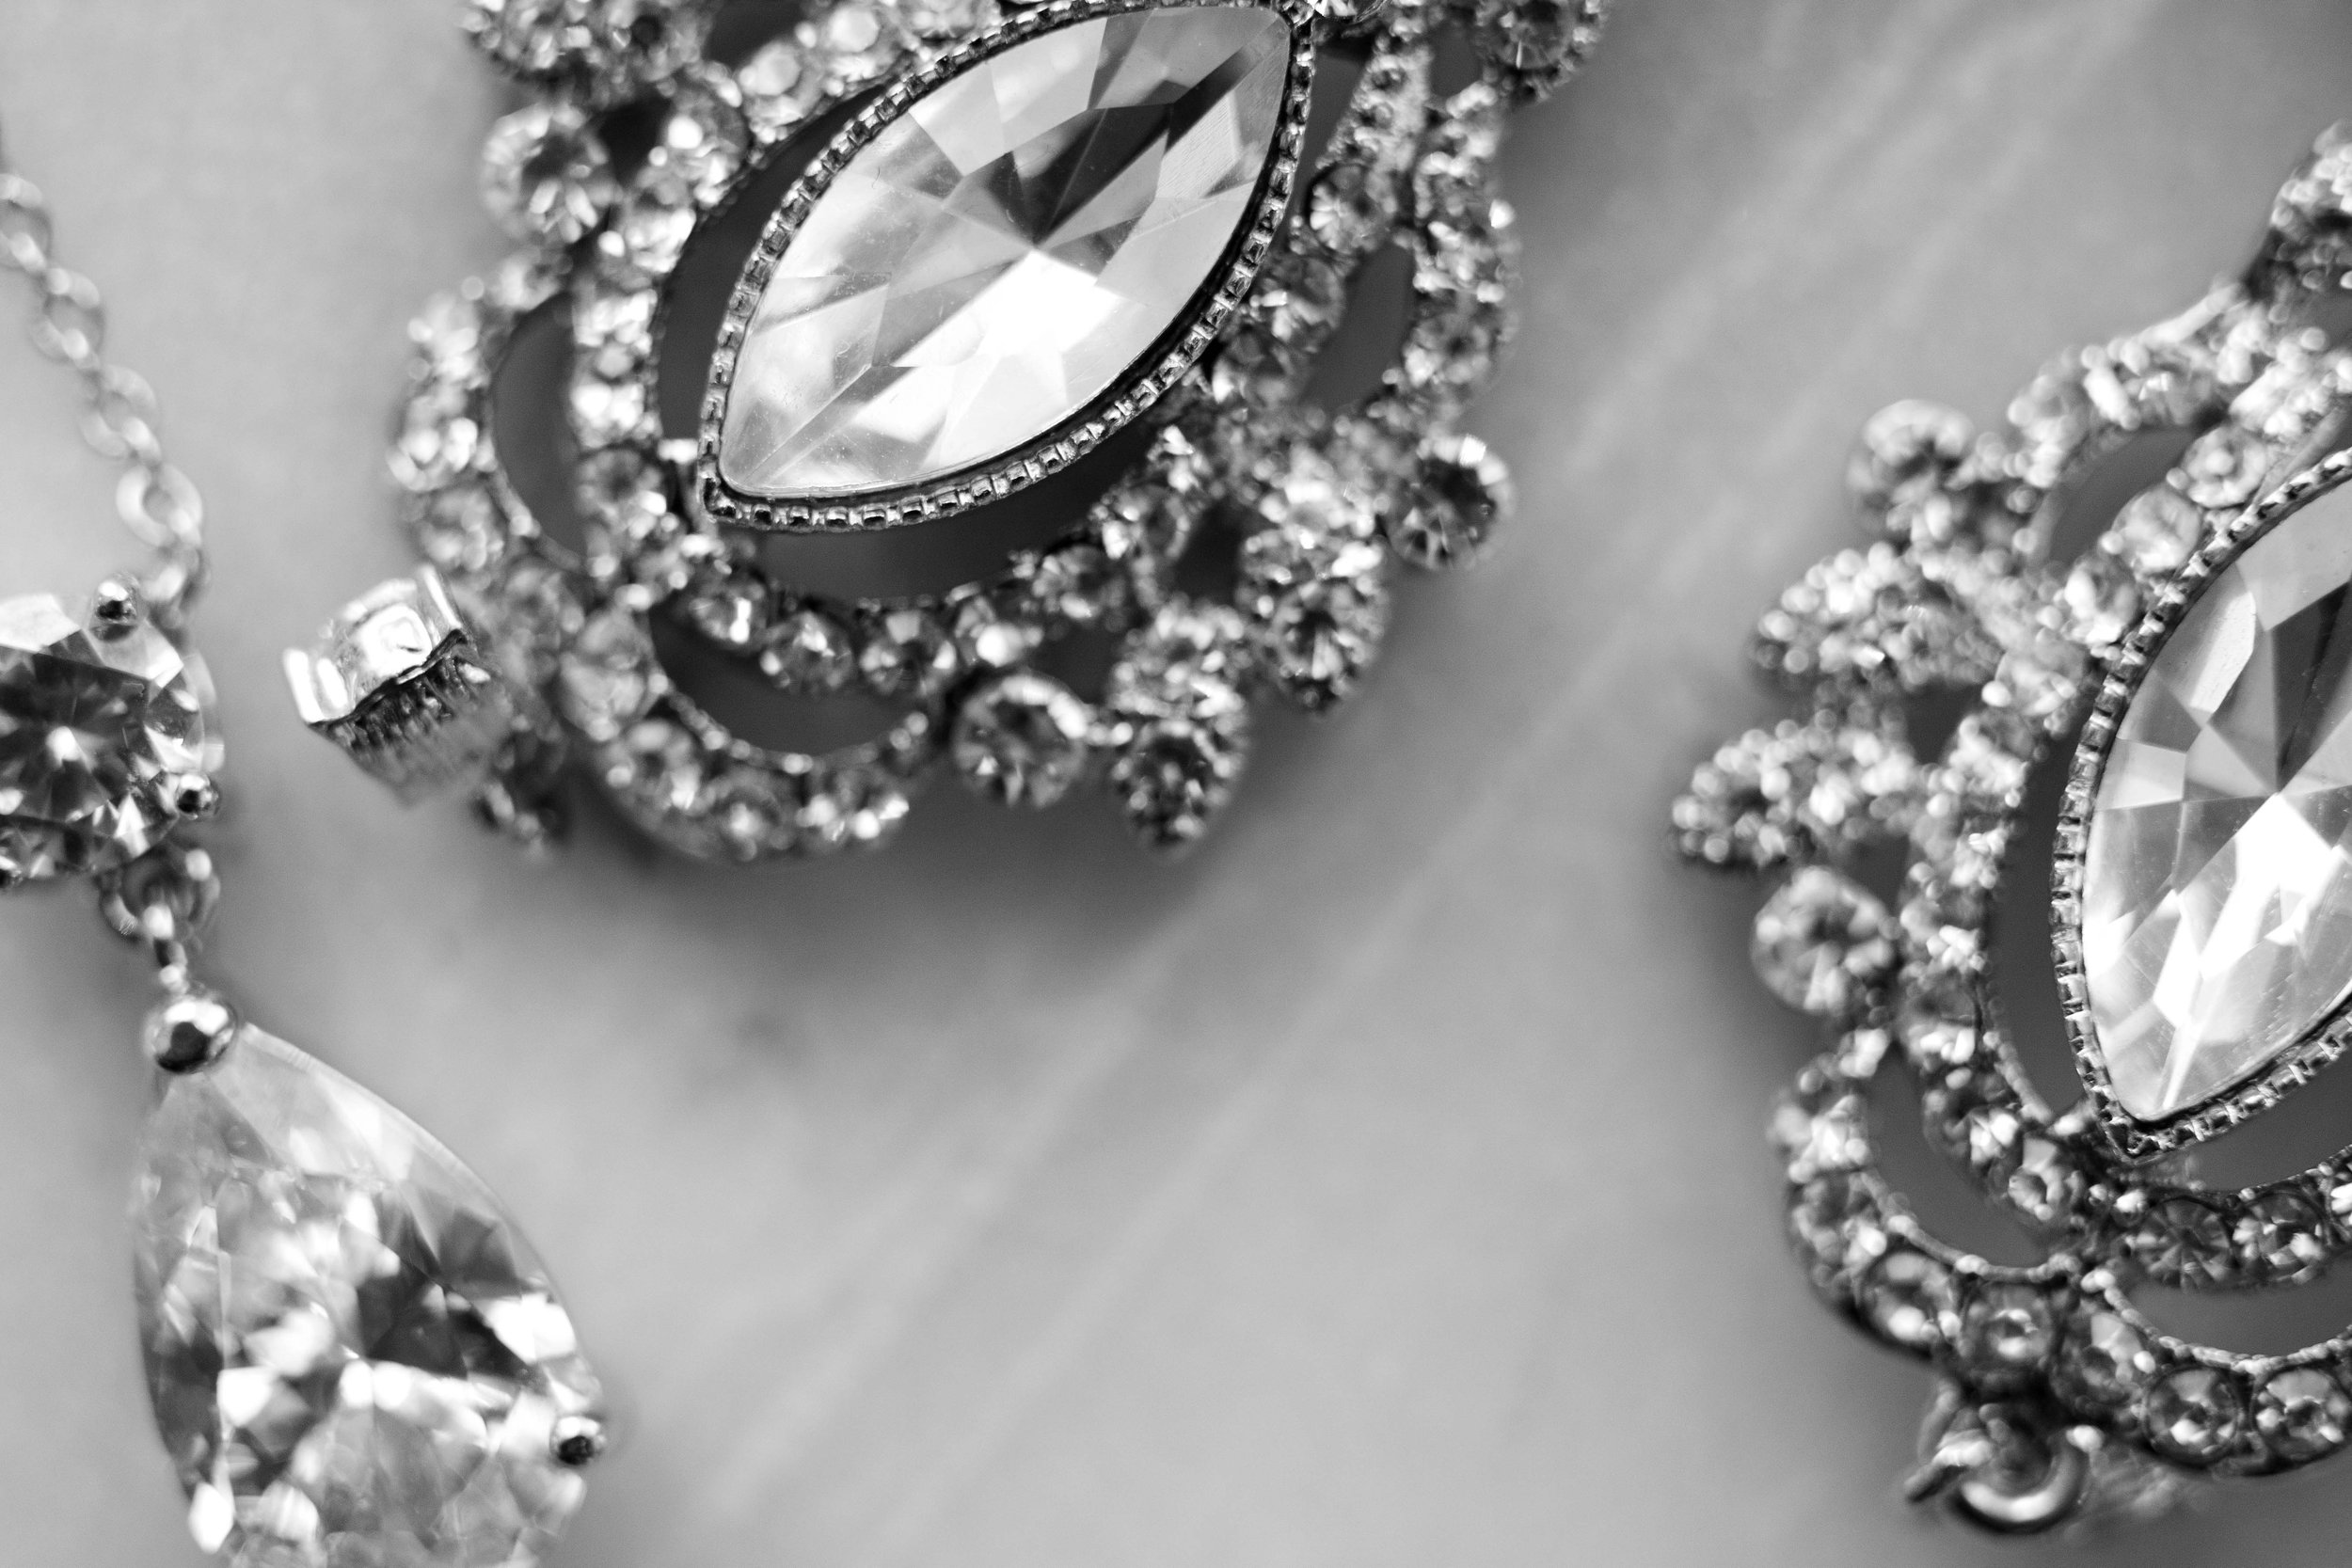
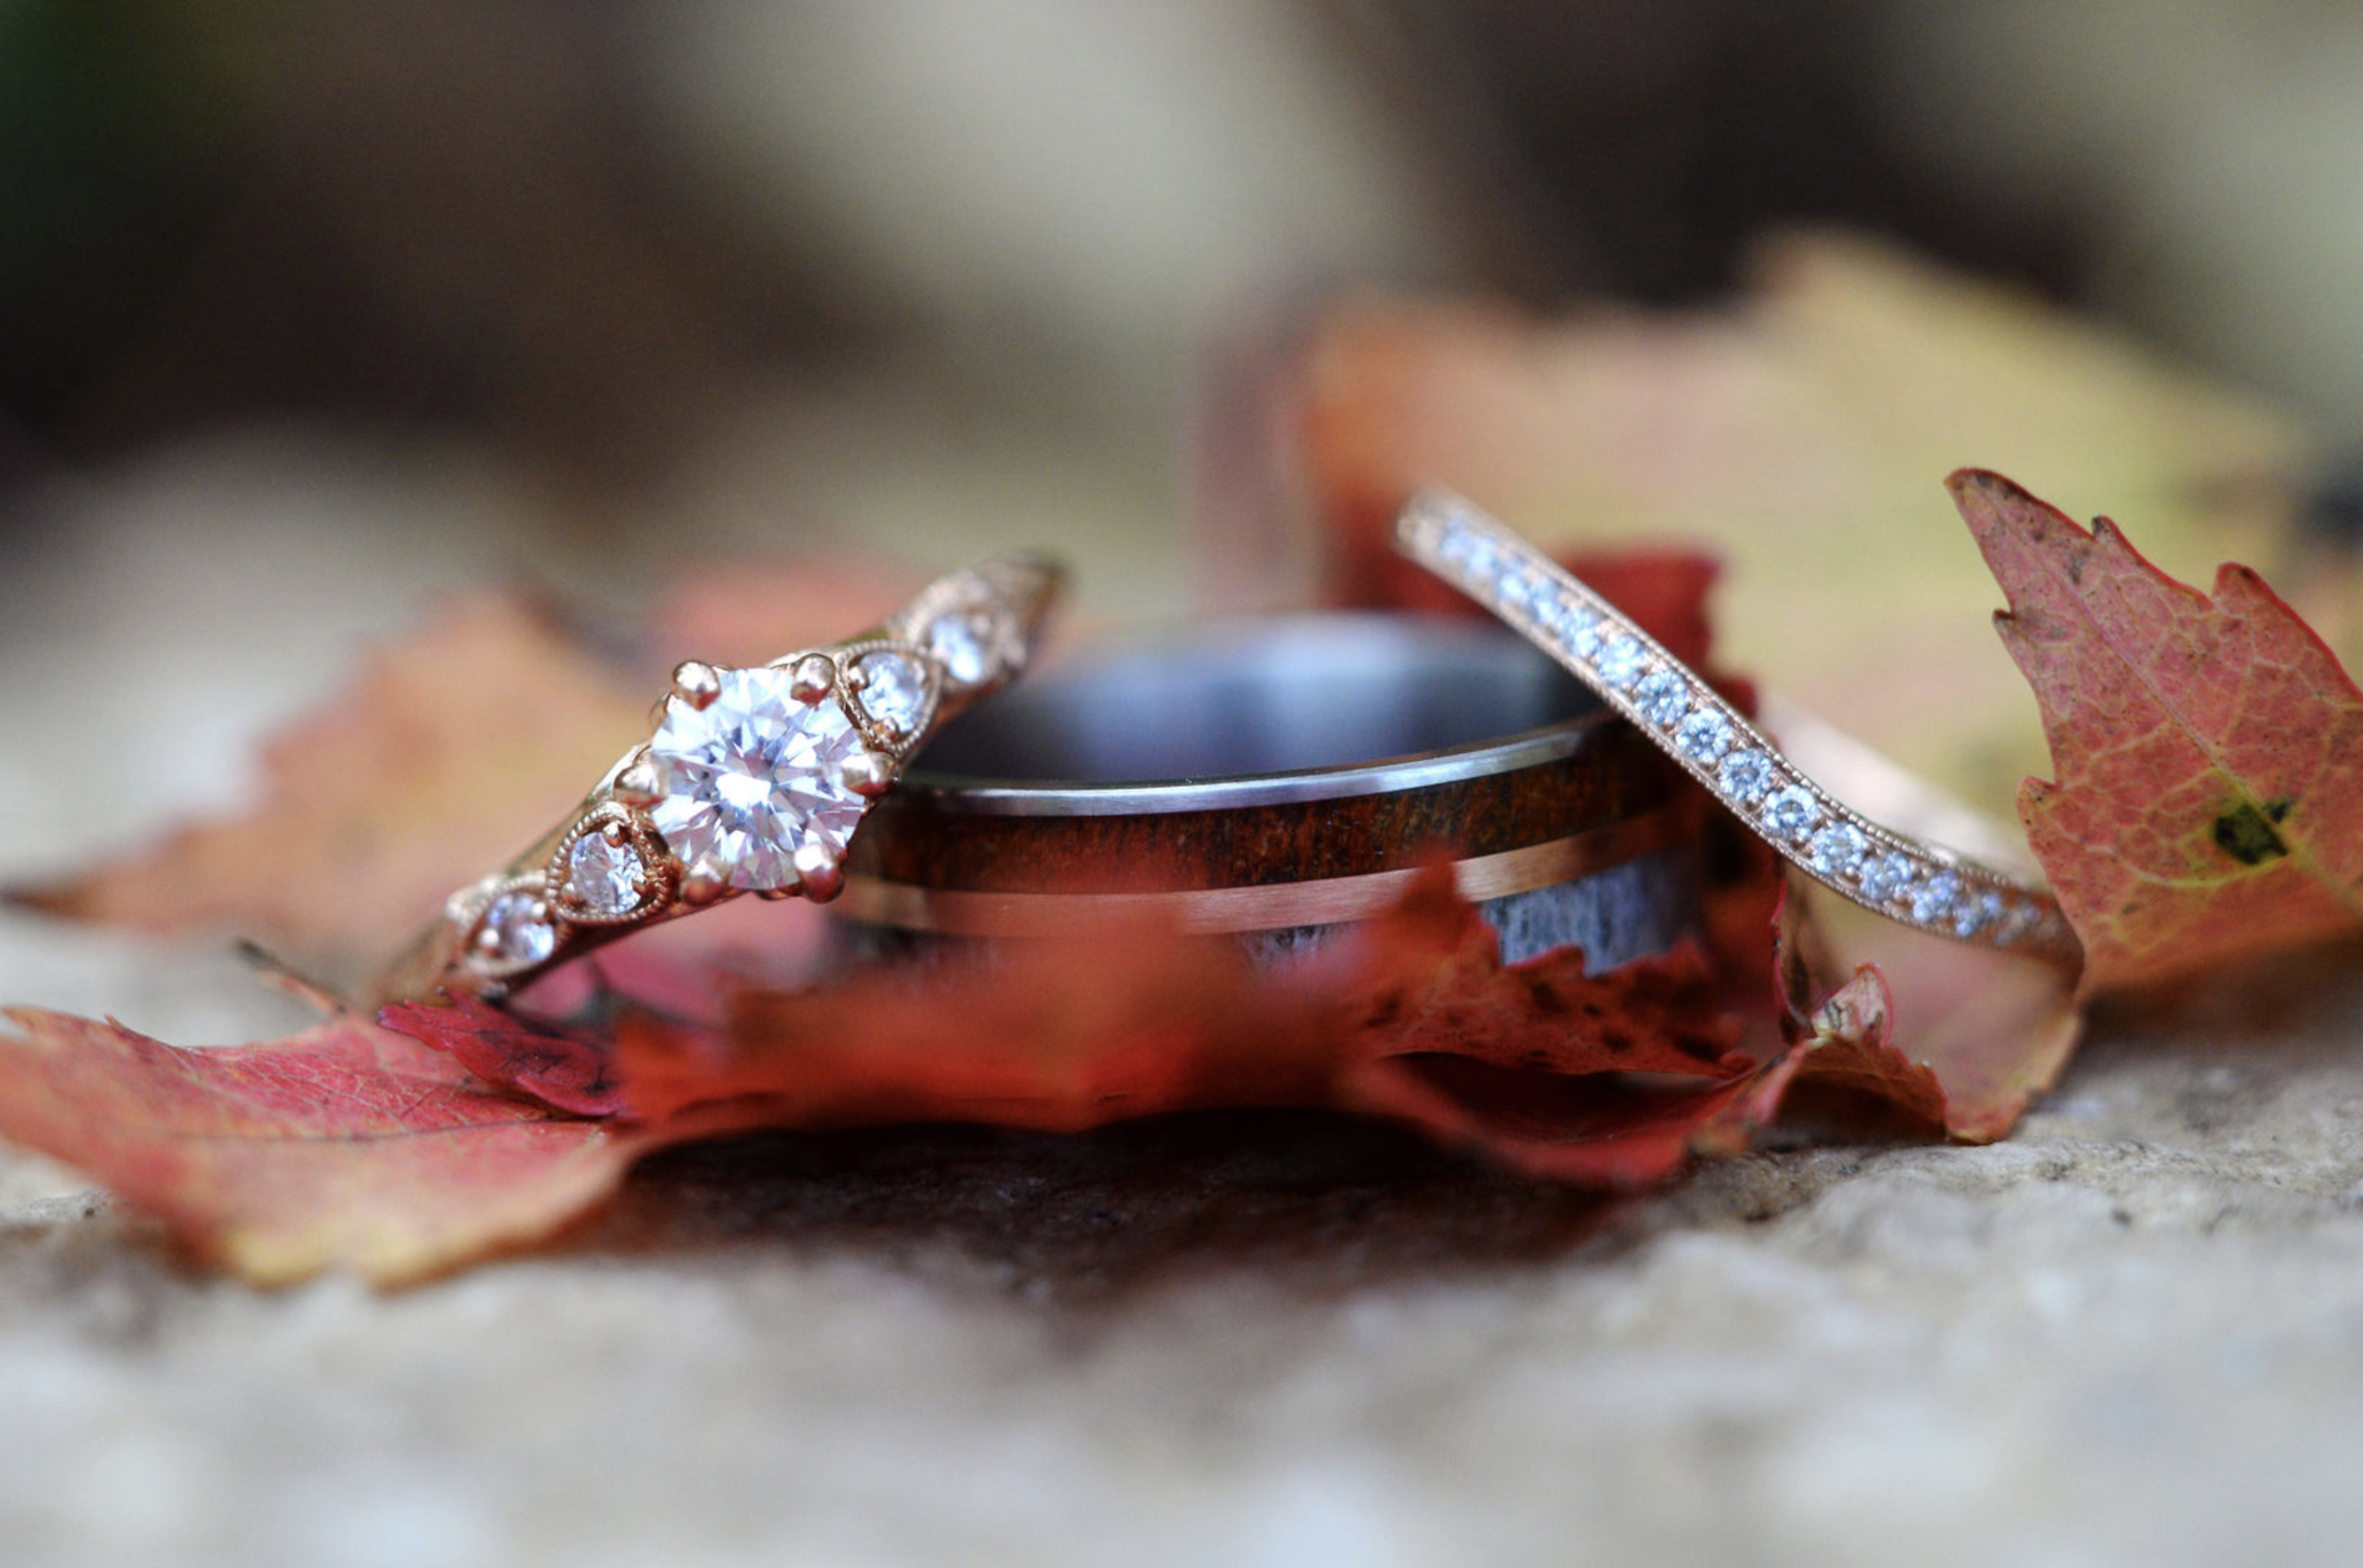
I’ve exclusively used a cheap macro lens from Nikon at weddings and in other professional applications. Check out the Nikon Micro 55mm f3.5, there is also a f2.8 version for only a little more money. In my opinion this f3.5 macro lens is the best value available for macro enthusiasts. I picked one up in 2015 for $30 and they can still be easily found for under $80. The following are a few examples of the macro adapted to Sony Full Frame:
Even if you already have a great kit of auto focus lenses, I’d still recommend trying out some vintage manual focus lenses. There are a lot of lenses out there with such unique character and remember, they are great for video too.
I big thanks to Chelsey for modeling and Andrew for capturing video clips!
Chelsey’s Instagram: @chelseysmithcosmetics
Andrew’s Instagram: @finite_modes